
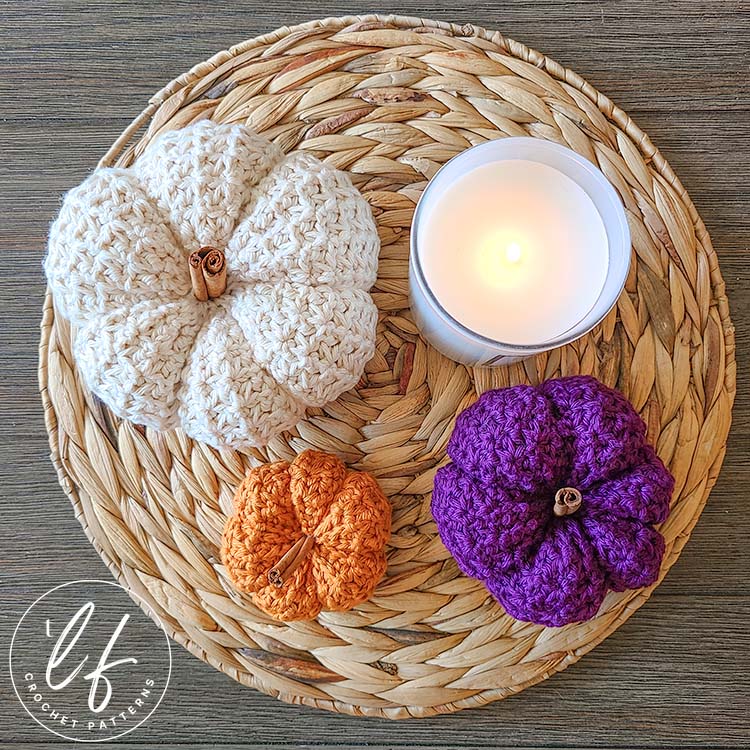
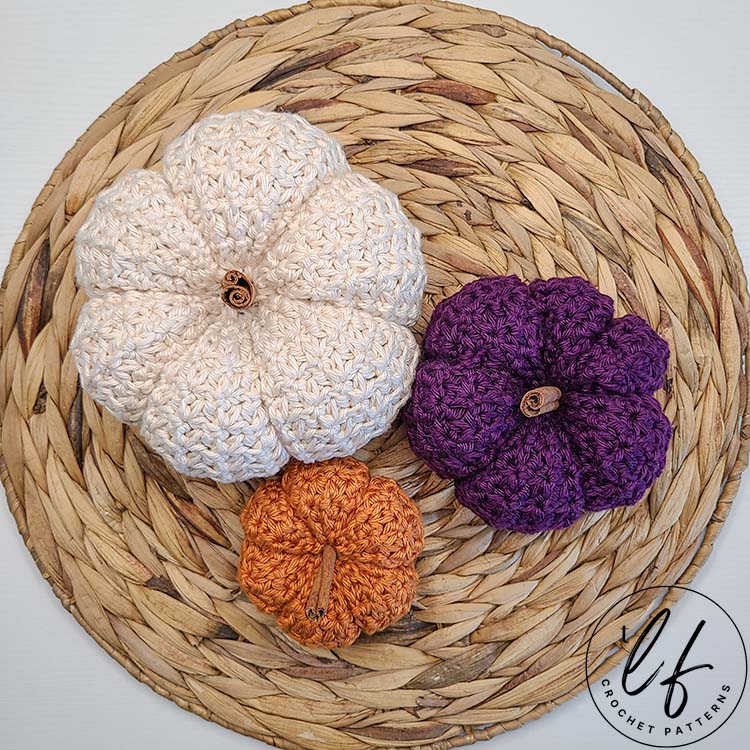
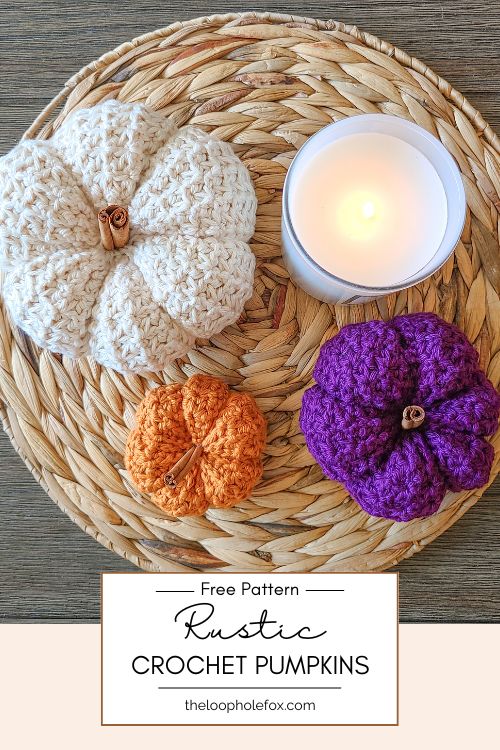
Polly Pumpkins Pattern – 3 Sizes of Crochet Pumpkins!
There’s no other perfect tell of autumn being on the way than pumpkins showing up everywhere and, as crocheters, we love to make them! As a designer, I absolutely love to design them. I’m excited to kick off this fall season with my Polly Pumpkins, a crochet pumpkin pattern that guides you through 3 sizes of pumpkin to create your own little pumpkin patch.
Love this crochet pumpkin pattern? Share the love and Pin it to Pinterest!
The Polly Pumpkins use the Trinity Stitch to create a beautiful woven texture that feels organic and, of course, is gorgeous.
This is a tight stitch that creates little clusters which sort of look like groves like an actual pumpkin would.
Designed to cinch tightly without the need to sew a hole closed, this crochet pumpkin pattern has modified the start and end of the Trinity Stitch. The ends will taper and force the rectangle for the crochet pumpkin to curl so that it has even more of the pumpkin shape before we even start with the ribbing.
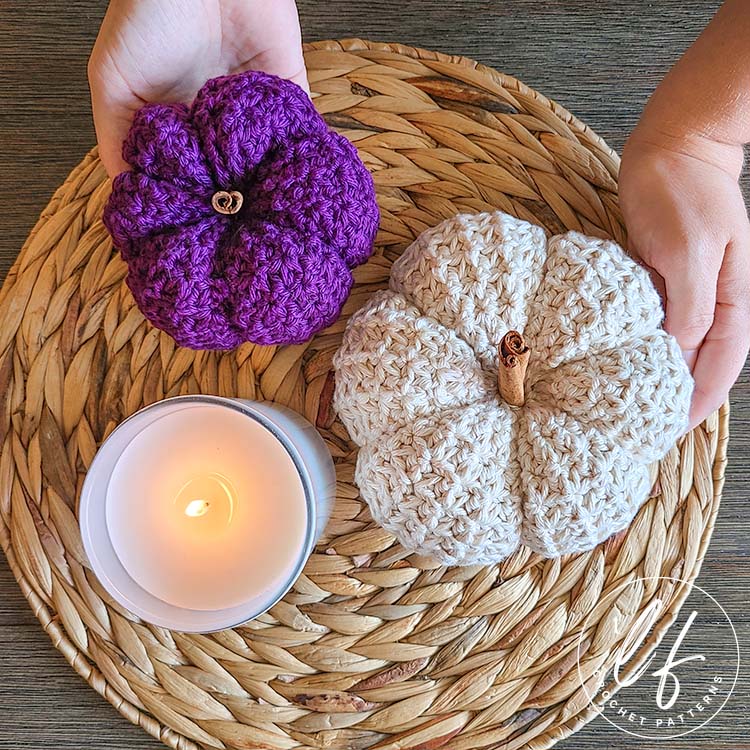
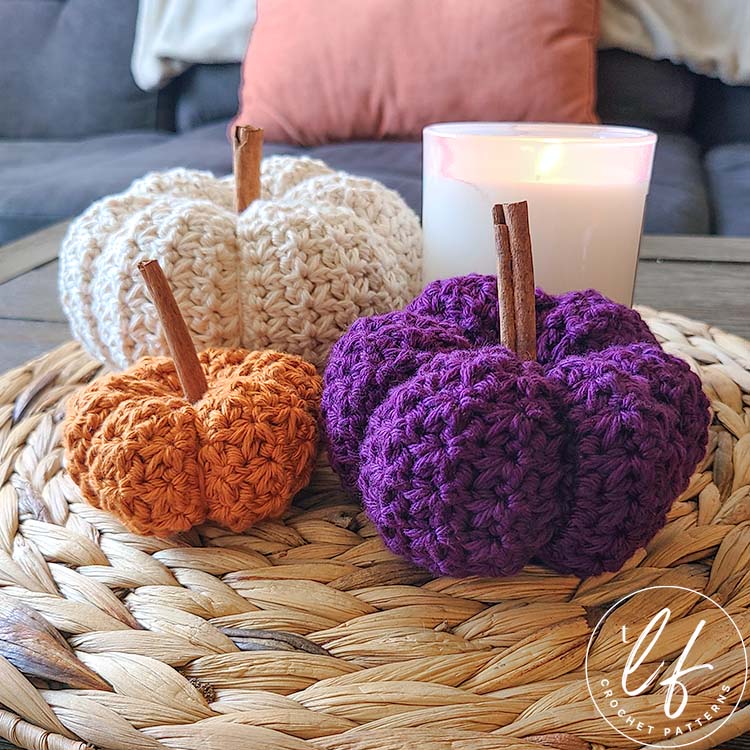
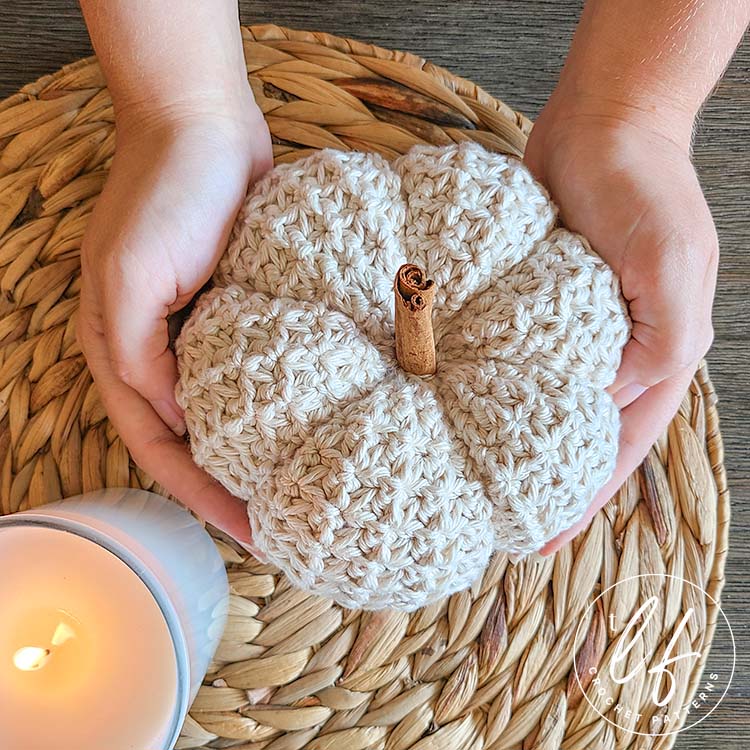
This crochet pumpkin pattern includes 3 sizes: Tiny, Small and Large.
You can make as many or as few of each size to create your little pumpkin patch of Polly Pumpkins.
What yarn should I use for my Crochet Pumpkins?
Crochet pumpkins are fast and fun projects that can use any yarn and any color, so they’re a great stash buster to help use up scraps of yarn that we’ve accumulated throughout the year.
Yep! You read that right. Any yarn of any weight and fiber.
From smooth and sleek cotton to fluffy soft hygge, this crochet pumpkin pattern will look fantastic in any color or fiber.
You can use several different yarns to create a little pumpkin patch of varied pumpkins.
Because these pumpkins are decor that are meant to sit there and be pretty, they typically won’t be handled a lot or require yarn that can stand up to heavy usage.
While I used cotton yarn for my pumpkins, you absolutely don’t have to.
Keep in mind that the yarn usage listed does reflect medium (4) cotton yarn, so if you change weight or fiber, your yarn usage will be different.
If you prefer a printable, inexpensive PDF version of this pattern which includes tutorial photos, you can grab one in my Etsy shop by clicking the button below.
DISCLAIMER: This post includes affiliate links. This means, should you decide to purchase a product via one of these links, I will receive a small commission at no extra cost to you. I only recommend products I use and love (Or products I know others love, have heavily researched, know have good ratings and plan to purchase myself). These small commissions help to support this blog and continue keeping most of my patterns free. You can read more on my Privacy Policy, if you prefer.
What do you need to crochet a pumpkin?
Making crochet pumpkins is fairly easy and straight forward but you do need more than just yarn, a hook and the ability to crochet.
This crochet pumpkin pattern (as well as most crochet pumpkin patterns) will require additional materials to finish the pumpkin.
You will need something to stuff the pumpkin with. I used polyfil but you can use almost anything you want. If you keep your tails of yarn cut from other projects, you can use those. You can use old (but clean!) socks you don’t want anymore. You could use stuffing beads. It’s really up to you.
I used polyfil because I still have a big bag of it that I purchased years ago and I like my pumpkins to be squishy. 🙂
You’ll also need something to use as the stem. This is optional but it really does make the crochet pumpkin look finished.
You can use a cinnamon stick (bonus: it smells great!), a twig found in your yard, create a stem from other crafting materials or crochet one. The choice is yours!
When designing this crochet pumpkin pattern, I used a cinnamon stick. In my Woodland Pumpkins, I used a twig.
I really like the natural organic look of these and I don’t want to have to purchase a brown yarn to use so little of it, so I typically do not crochet a stem.
Of course, you’ll also need a tapestry needle to seam, cinch and create the ribbing.
All of these items are listed in the crochet pumpkin pattern below.
Where to get this Crochet Pumpkin Pattern
The Polly Pumpkin Pattern is a free crochet pattern in this blog post. Scroll down to view the free version.
However, if you’d like a more robust pattern with photo tutorials, the steps for the photo tutorial written out in full sentences and a printer friendly version of the PDF, I recommend you purchase the PDF pattern.
With the PDF pattern, you will receive photo tutorials for the special stitches and techniques as well as a detailed photo tutorial for each row which will set you up to work this crochet pumpkin pattern with confidence. The photos include details with arrows and dots to help identify all the stitches and their placement.
The PDF pattern has detailed photo tutorials for the special stitch (Single Crochet 3 Together), Rows 1 and 2 which set you up to work this fall crochet home decor with confidence and, of course, a photo tutorial for each step of finishing the pumpkin.
SKILL LEVEL
Intermediate. Crocheters looking to follow this pattern should know how to:
- Read a crochet pattern – There is NOT a video tutorial for this crochet pumpkin pattern.
- Work the basic stitches – Chain, slip stitch and single crochet.
- Know how to Single Crochet 3 Together (sc3tog) or be willing to learn.
- Understand how to work into chains when they count as stitches.
- Understand how to seam a project. You can use any seaming method you prefer.
- Feel comfortable using a tapestry needle with a long tail of yarn to weave in and out of stitches as well as create ribbing.
This is NOT a beginner pattern. Absolute beginners will find this pattern outside of their skill level but adventurous beginners could be able to work through it, especially with the PDF pattern that includes a ton of photos to help you through.
If you are unfamiliar with any of these techniques or aren’t familiar with reading patterns, I highly recommend the PDF as it will walk you through everything step by step.
DISCLAIMER: This post includes affiliate links. This means, should you decide to purchase a product via one of these links, I will receive a small commission at no extra cost to you. I only recommend products I use and love (Or products I know others love, have heavily researched, know have good ratings and plan to purchase myself). These small commissions help to support this blog and continue keeping most of my patterns free. You can read more on my Privacy Policy, if you prefer.
MATERIALS
Medium (4) weight yarn of your choice in any color you prefer. Sample uses cotton yarn and the yarn usage reflects this. You can use any fiber you like.
You will need approximately:
Tiny: 26 grams / 40 yards
Small: 50 grams / 75 yards
Large: 90 grams / 135 yards
Yarn Used
Shine Worsted from We Crochet in colorways Cream, Sweet Potato (orange) and Serenade (purple).
TOOLS & NOTIONS
5 mm (H-8) Hook – Check out my favorite crochet hooks!
Tapestry needle
Scissors
Stitch markers, if you prefer them
Polyfil Stuffing
Embellishment for “stem”. I used a cinnamon stick but you can use a twig or anything you prefer.
GAUGE
Gauge isn’t important for these pumpkins. The Trinity Stitch, which is used throughout most of this pattern, is a tight stitch by nature. Make sure that it stays tight enough that the stuffing won’t show through but not so tight that you can’t work into the stitches and everything will work fine.
Note: I am a tight crocheter, so my tension is usually tighter than others. Learn more about gauge and what this means here.
FINISHED SIZE
Tiny: 1.25 inches tall, 10 inch circumference
Small: 2 inches tall, 14 inch circumference
Large: 3.25 inches tall, 19 inch circumference
ABBREVIATIONS (US TERMS)
- Ch – Chain
- Sl St – Slip Stitch
- Sc – Single Crochet
- Sc3tog – Single Crochet 3 Together *
- St(s) – Stitch(es)
- […] – Repeats are listed inside brackets.
- (…) – Stitch counts are listed at the end of row in ( ) and bold italics.
NOTES
- Chain 1 at the beginning of the row to turn never counts as a stitch. Always place your first stitch in the first stitch.
- Watch your tension in the slip stitches at the start and end of the row so that they don’t become difficult to work into.
- Chain 1’s in the row instructions (after the sc3tog) COUNT as a stitch. The stitch count will include these and you will work into them as a “normal” stitch.
- You can use any weight of yarn and yarn of any fiber you prefer. Your usage will be different than listed if you use a different weight and/or fiber.
- This pattern requires an odd amount of stitches (requires an even amount of chains).
- The sides of this project will taper in and the rectangle will curl as you work rows. This is intended – you’re not doing anything wrong.
Trinity Stitch – Tutorial
This pattern uses the Trinity Stitch which has a ton of texture. This stitch uses sc3tog (single crochet 3 together) and chain 1’s to create pretty clusters. I highly recommend you check out my Trinity Stitch Crochet Tutorial before following this pattern if you have never used the Trinity Stitch before. It will help you understand the placement of the sc3tog’s, how the stitch count stays the same even though we are using a decrease, etc.
Construction
We first create a long rectangle. The rectangle is then seamed into a tube and cinched closed on one side. We then stuff the pumpkin with polyfil and cinch the top closed. Once closed, we manipulate the sides of the work with long tails of yarn that are pulled tight to create the ribs on the sides of the pumpkin. Finally, we finish the pumpkin with an embellishment for the stem, if preferred.
Special Stitch – Sc3tog (Single Crochet 3 Together)
Sc3Tog is a single crochet decrease which is typically used to make 3 stitches into 1 stitch. In this pattern, it is used as a cluster though it’s worked the same.
To work a SC3TOG, you will: Insert hook into first indicated stitch, yarn over and pull up a loop. 2 loops on hook. Insert hook into the next stitch, yarn over and pull up a loop. 3 loops on hook. Insert hook into the next stitch, yarn over and pull up a loop. 4 loops on hook.
Now, yarn over and pull through all 4 loops. 1 loop remains on hook.
Your SC3TOG is complete! The SC3TOG is a part of the Trinity Stitch. In this stitch pattern, the SC3TOG is used as a cluster and not a decrease. This is achieved by pulling loops through the previous stitch worked and then pulling up a loop in each of the next 2 stitches. Once completed, we create a chain 1 to secure the cluster and bring the stitch count back up.
It is important to note that in Row 2 and all of the repeats of Row 2, we count the chain 1’s that secure the stitch and bring the stitch count back up as a stitch. This means that we will work into the chain 1 when it comes time to sc3tog in the next row. We will pull a loop up in each of these when working our sc3tog for the Trinity Stitch.
Special Note – Starting in Previous Stitch
In this pattern, you will see instructions to begin sc3tog’s or place single crochets “starting in the previous stitch”. This means you will use the same stitch where your previous stitch ended to begin.
When your previous stitch was a single crochet:
To begin your sc3tog as written in this pattern, you will insert your hook into the “previous stitch” which is the SAME stitch your single crochet was placed in and pull a loop through. Then, insert your hook into the next stitch (top of the sc3tog from the previous row or into the next chain), yarn over and pull a loop through. Then, insert your hook into the next stitch (chain 1 from previous row or into the next chain), yarn over and pull a loop through. Finish your sc3tog.
When your previous stitch was a sc3tog:
To begin your sc3tog as written in this pattern, you will insert your hook into the “previous stitch” which is the SAME stitch the last leg of your sc3tog was placed in and pull a loop through. Then, insert your hook into the next stitch (top of the sc3tog from the previous row or into the next chain), yarn over and pull a loop through. Then, insert your hook into the next stitch (chain 1 from previous row or into the next chain), yarn over and pull a loop through. Finish your sc3tog.
Polly Pumpkins – Free Crochet Pumpkin Pattern
If you have not read all of the notes for this crochet pumpkin pattern, please go read them now before starting.
These instructions will take you through creating the rectangle for all 3 crochet pumpkin sizes. At the end of each size, do not cut yarn. Continue on to Finishing Instructions.
Tiny:
Ch 16
Row 1 – 1 Sl st in 2nd ch from hook, 1 sl st next ch. 1 sc next ch. Sc3tog starting in previous ch. [Ch 1, sc3tog starting in previous ch]. Repeat inside brackets across the row until 2 chs remain. 1 sc same ch as last leg of sc3tog, 1 sl st each of the remaining 2 chs. (15)
Row 2 – Ch 1, turn. 1 sl st in first st, 1 sl st next st, 1 sc next st. Sc3tog starting in previous stitch. [Ch 1, sc3tog starting in previous st]. Repeat inside brackets across the row until 2 sts remain. 1 sc same st as last leg of sc3tog, 1 sl st each of the remaining 2 sts. (15)
Rows 3 through 34 (or until the rectangle is approximately 8 inches long or 2x as long as width + 1 inch) – Repeat Row 2.
Small:
Ch 24
Row 1 – 1 Sl st in 2nd ch from hook, 1 sl st next ch. 1 sc next ch. Sc3tog starting in previous ch. [Ch 1, sc3tog starting in previous ch]. Repeat inside brackets across the row until 2 chs remain. 1 sc same ch as last leg of sc3tog, 1 sl st each of the remaining 2 chs. (23)
Row 2 – Ch 1, turn. 1 sl st in first st, 1 sl st next st, 1 sc next st. Sc3tog starting in previous stitch. [Ch 1, sc3tog starting in previous st]. Repeat inside brackets across the row until 2 sts remain. 1 sc same st as last leg of sc3tog, 1 sl st each of the remaining 2 sts. (23)
Rows 3 through 44 (or until the rectangle is approximately 11 inches long or 2x as long as width + 1 inch) – Repeat Row 2.
Large:
Ch 34
Row 1 – 1 Sl st in 2nd ch from hook, 1 sl st next ch. 1 sc next ch. Sc3tog starting in previous ch. [Ch 1, sc3tog starting in previous ch]. Repeat inside brackets across the row until 2 chs remain. 1 sc same ch as last leg of sc3tog, 1 sl st each of the remaining 2 chs. (33)
Row 2 – Ch 1, turn. 1 sl st in first st, 1 sl st next st, 1 sc next st. Sc3tog starting in previous stitch. [Ch 1, sc3tog starting in previous st]. Repeat inside brackets across the row until 2 sts remain. 1 sc same st as last leg of sc3tog, 1 sl st each of the remaining 2 sts. (33)
Rows 3 through 54 (or until the rectangle is approximately 15 inches long or 2x as long as width + 1 inch) – Repeat Row 2.

You will now have a long rectangle that has no right or wrong side. The sides of the rectangle will taper in and curl as shown in the notes of this pattern.
If/when you measure your rectangle’s length, measure where it is the longest, not along the short sides. The rectangle is widest in the center.
You can now cut your yarn but leave a long tail of 1-1.5 feet (at least 12 inches for Tiny and at least 18 inches for Large). You need enough yarn to seam, cinch and create the ribbing. This length should be more than enough and you will have some left over. It’s better to have more and not need it than not have enough.
SEAM
Now we will seam the pumpkin to make the rectangle into a tube shape. To do this, we will place the two short ends of the rectangle together. These will be the bottom of the chains from Row 1 and the top of the stitches from the final row worked.
You can seam these ends together however you prefer. I used a tapestry needle and the whip stitch.
To whip stitch, you will: Insert your tapestry needle from bottom to top into the top of the first stitch from your last row and then into the bottom of the chains of the first stitch.
Then, pull the yarn through. You will bring the yarn up and over the stitches and then insert the tapestry needle into the next set of stitches from bottom to top once more.
Continue seaming all the way across the row. You will seam together 15 stitches (Tiny), 23 stitches (Small) or 33 stitches (Large).
Once you have seamed the two ends together, tie a knot in your yarn so that when we cinch the top, your seam doesn’t pull with it. Turn your tube inside out so that the seam is hidden inside of the work.
CINCHING & STUFFING
To close the tube, we will cinch one end completely closed, stuff the tube and then cinch the other end closed but leaving a small hole for our stem embellishment to go into.
To cinch the first end, take your tapestry needle and weave in and out of the sides of the stitches along the opening. This doesn’t have to be perfect. Try to go through each stitch but, if you miss one, it won’t ruin anything.

Once you’ve woven in and out of all of the stitches along the opening, pull the tail of the yarn tight. You might have to push the stitches down along the strand of yarn to cinch tightly closed. That’s okay.
Once you’ve pulled this tail tight, the tube will have cinched into a closed bottom. If you want to make sure this is extra secure, you can go through these stitches again as best as you can (it doesn’t have to be perfect) but that is totally optional.
Now that the bottom is cinched tight, insert your needle through the bottom to thread the yarn up and through the opening that will be the top. Your long tail of yarn should come up and through the opening that has not been cinched closed yet.
When stuffing the crochet pumpkin, try to keep this tail yarn tucked against the side. This keeps it out of the way of the stuffing and makes it easier to insert your stem later.
Now it is time to stuff the tube. Place stuffing inside of the tube until it is filled. You want your tube to be stuffed well but not over stuffed so that it begins to stretch the stitches.
TIP: One thing I like to do is make a place in the stuffing for where the end of the stem embellishment will go in. This helps to sink the stem into the stuffing to keep it secure and not fight with the stuffing later. I just use my finger or the item I am going to use as a stem (I used a cinnamon stick) to dig a little bit into the stuffing to create a pocket for the stem to sink into.
Once your stuffing is in place, cinch the top closed the same way we cinched the bottom.
REMEMBER: Our embellishment needs to go into the hole left at the top of this cinch, so we don’t want to pull it completely closed and tight like we did at the bottom. You can insert the item you are using for a stem before you pull the cinch tail tight so that you know the stem fits.
Just like on the bottom, you can go back through these stitches again to make sure the cinch is secure but it’s not required.
Now we will position the tail of yarn so we can create the ribs. We want this tail of yarn to go through the stitches close to the stem but not inside the actual hole where the stem goes.
If we go through the hole, it will make it difficult to put the stem in and will pull on the hole making it wider.
We will thread the needle down and into the hole and back out through a stitch not far from the hole/stem but through a stitch, not the hole. In the image below, a white bracket shows how far out I’ve pulled the needle through (not far, maybe a couple millimeters) and a black arrow points to the tail.

CREATING THE RIBS
Now that we have made the work into a sort of ball shape, we will create the ribbing.
Note: I left my cinnamon stick in the hole while creating the ribbing. It seems fiddly but it’s not difficult to do. I recommend keeping whatever stem you’re using in the hole while creating the ribs to make sure that your yarn doesn’t create a sort of web inside the stuffing that makes it difficult to put the stem back in.
We will place the first rib along the seam that made the rectangle into a tube so that it’s completely hidden.
To create the ribbing, we are going to wrap the tail of yarn around the side (or height) of the pumpkin from top to bottom.
Then insert your needle into the center bottom and push it back up through the top, where the stem is.
When pushing the needle back through the top, we want to make sure that the needle comes through the stitches, not through the hole that the stem goes into so that the ribbing doesn’t pull that hole open.
Once pulled through, pull the tail of the yarn tight so that it creates a rib in the side of the work. You can pull this tail as tight as you prefer. I like pumpkins with deep ribs, so I pulled my tail as tight as I could.
With the first rib complete, we will add another. Before starting another rib, we will thread the yarn under a couple of stitches to either side (pick a side, which way you go doesn’t matter) so that the next rib will be away from the first one.

And, once you’ve repositioned the yarn under a couple of stitches, you can make your next rib the same way we made the first one.
We will continue adding ribbing evenly spaced around the ball to shape it into a pumpkin.
You can add as many or as few ribs as you want for your pumpkin. 5 or 6 ribs is usually a good number. My tiny pumpkin has 6 ribs.
Once you’ve placed as many ribs as you’d like, thread the needle and tail of yarn down through the pumpkin so that it comes out of the bottom. Now you can tie off the yarn, weave in your ends and cut it.
You’re done!
Want to get the PDF version of this crochet pumpkin pattern? Get your copy on Etsy by clicking the button below!
That’s all there is to it! I hope you enjoyed this crochet pumpkin pattern and I hope you you love your crochet pumpkin! Go and make a whole variety of them in all different colors, fibers and sizes. You’ll have your very own crochet pumpkin patch.
Love the Polly Pumpkins pattern? Share the love and Pin it to Pinterest!
One of my greatest joys is seeing your finished crochet projects from my patterns or tutorials, so when you post to Instagram, don’t forget to tag me so I can show you some love! I’m @theloopholefoxcrochet. You can also share pictures on my recent posts on Facebook or within my Facebook group!
And don’t forget to pin this to your Pinterest boards, so you can remember it for later!
Don’t forget to join my Facebook Group so we can chat all about your creations! We are a group for crocheters of all experiences, all interests and love to hang out together. Come join the fun!

Shannon | Designer & Editor
Shannon helps crocheters find their next project and build their skills with in depth tutorials and crochet patterns on her blog, theloopholefox.com.
With more than a decade of crochet experience, Shannon knows that understanding why we do something matters just as much as how we do it. She teaches new techniques and crochet stitches in depth so you can crochet with confidence.
Find More Home Decor Crochet Patterns:
Woodland Pumpkins
Millie Hanging Baskets
Aura Wall Hanging
Marguerite Wall Hanging
