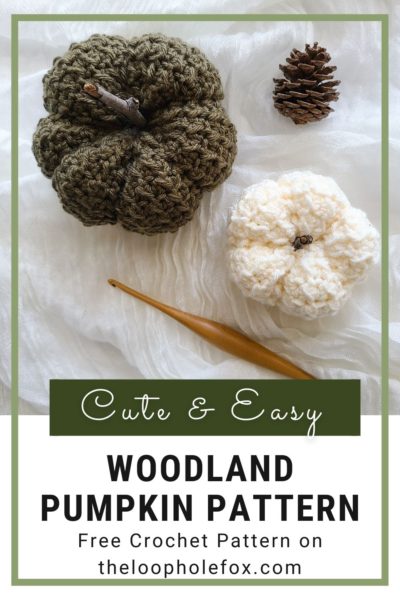
Woodland Pumpkins
You guys! I honestly can’t tell you how excited I am to finally be posting this easy crochet pumpkin pattern. I mean, seriously, look at how cute and classic they are! This easy crochet pumpkin is worked up in the even moss stitch as a flat rectangle and then seamed and cinched. You’ll have an adorable variety of pumpkins in a cinch! See what I did there?
When I decided to design my very own crochet pumpkin pattern, I put a lot of thought into the look and feel I wanted this cute piece of fall decor to have. Once I narrowed down the idea that I wanted the pumpkin to look organic, I went on a search to find the perfect stitch and landed on the even moss stitch. When it comes to an easy crochet pumpkin, I also wanted the stitch pattern to be easy but packing in personality, so the even moss stitch was perfect.
DISCLAIMER: This post includes affiliate links. This means, should you decide to purchase a product via one of these links, I will receive a small commission at no extra cost to you. I only recommend products I use and love (Or products I know others love, have heavily researched, know have good ratings and plan to purchase myself). These small commissions help to support this blog and continue keeping most of my patterns free. You can read more on my Privacy Policy, if you prefer.
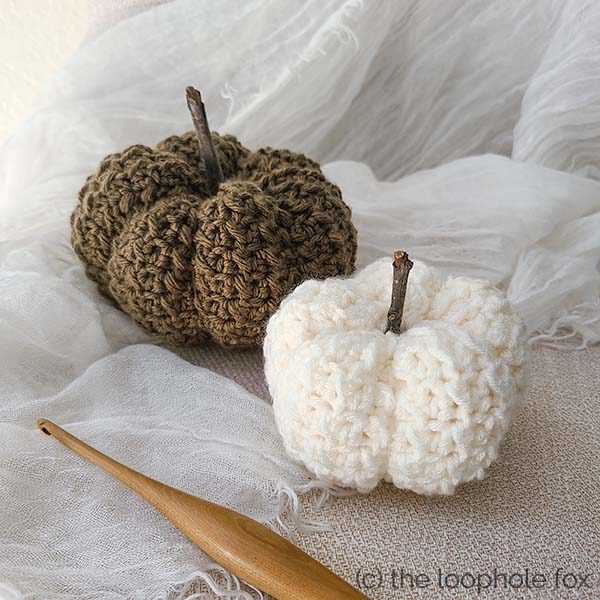
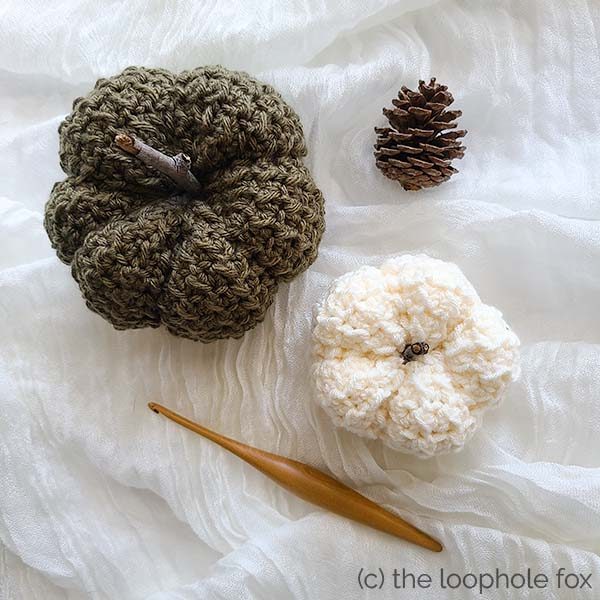
And, in keeping with the organic and rustic crochet pumpkin feel, I decided to use a stick for my stem. I love how sticks become weathered and broken where they’ve fallen from the tree, so I felt this was perfect. You can, of course, use whatever you like for the stem. Cinnamon sticks are very popular and have the added fun of a fall scent.
If you prefer a printable, inexpensive PDF version of this pattern which includes tutorial photos, you can grab one on either my Ravelry or my Etsy shop by clicking the buttons below.
One thing I want to make note of: Pumpkins come in all shapes and sizes and whatever color, size, shape your pumpkin ends up is perfect. You are crocheting to make yourself happy, after all.
You can easily customize these pumpkins to be a variety of sizes and colors. I’ve made these pumpkins in tons of colors… blue, purple, green, white. Any color you can think of would be cute as a button.
While the written pattern has a specific yarn weight, hook size and number of stitches, please feel free to use any yarn weight (and corresponding hook size), color, and chain as little or as many as you prefer to make a whole family of pumpkins.
This easy crochet pumpkin pattern WILL work for any yarn weight and stitch count, just make sure that you have an even amount of chains when you start so that the stitch works up as it should.
SKILL LEVEL
Easy (Beginner’s should know how to half double crochet and slip stitch). This pattern uses the Even Moss Stitch which is a relatively straight forward stitch. However, if you’d like to see how the stitch is worked in either photos or a video, check out my tutorial.
MATERIALS
Medium (4) weight yarn of your choice in any color you prefer.
You will need approximately:
2 oz/57g/105 yards
Yarn Used
Dark Green Pumpkin – Lion Brand Basic Stitch in Olive
White Pumpkin – Yarn Bee Soft and Sleek in Ivory
TOOLS
5 mm (H-8) Hook – Check out my favorite crochet hooks!
Tapestry needle
Scissors
Polyfil Stuffing
Optionally, you’ll need something to create the stem of the pumpkin with. I used a stick! You could use anything you like to create the stem – cinnamon stick, a stick from the yard, crochet your own… Your options are endless!
GAUGE
17 stitches x 19 rows = Approximately 4 inches x 4 inches following the pattern as written.
Gauge isn’t massively important for these pumpkins. The stitch used in these pumpkins is a tight stitch by nature. Ensure your tension isn’t so loose that you have holes between your stitches and you’re good to go.
FINISHED SIZE
16 inches around by 3.5 inches high.
Changing the size of the pumpkins is fairly straightforward. If you want a pumpkin that is taller than 3.5 inches, add chains to your beginning chain to widen the project. If you want a pumpkin that is shorter than 3.5 inches, remove chains from your project.
For example: The white pumpkin as pictured above was made with only 20 chains (19 stitches) instead of the stated 28 chains (27 stitches). The finished white pumpkin is approximately 2.5 inches tall.
Important: Always make sure to chain an EVEN amount of chains so that you will have an ODD amount of stitches.
You will want to continue working rows as stated in the pattern until your work is about twice as tall as it is wide. In general, you can guesstimate that it will take 2x as many rows as you have stitches in each row.
For example, my white pumpkin that had 19 stitches in each row took 40 rows to be about twice as tall as it is wide.
ABBREVIATIONS
In US terms;
- Ch – Chain
- Sl St – Slip Stitch
- Hdc – Half Double Crochet
- St(s) – Stitch(es)
- (…) – Stitch counts are listed at the end of row in ( ) and bold italics.
NOTES
- These pumpkins are a great stash buster and look great in any color you might like.
- Chain 1 at the beginning of the row never counts as a stitch. Always place your first stitch in the first stitch.
- Watch your tension on your first and last slip stitches of the row so that they don’t become difficult to work into.
- Make sure you are working into only the top of the half double crochets, not all three loops so that the texture of the stitch pattern shows.
- Pumpkins are lovely in any size – This pattern instructs you on how to make one size of pumpkin, however, there are instructions on how to change the size on your own.
- You can use any weight of yarn and yarn of any fiber you prefer. Your usage will be different than listed if you use a different weight.
- This pattern requires an odd amount of stitches. Should you change the size, always make sure you start with an even amount of chains for an odd amount of stitches.
How to Make This Easy Crochet Pumpkin
Ch 28
Row 1 – Sl st in 2nd ch from hook. [1 hdc next ch, 1 sl st next ch]. Repeat inside brackets across the row to the end. Your last stitch should be a sl st in the last ch. (27)
Row 2 – Ch 1, turn. Sl st in the 1st st. [1 hdc next st, 1 sl st next st]. Repeat inside brackets across the row to the end. (27)
Special Note: You will always place a slip stitch in the top of a slip stitch and a half double crochet in the top of a half double crochet.
Rows 3 through 57 – Repeat Row 2.
Finish off your yarn but leave a long tail (a foot and a half, at least). We will be using this tail to seam, cinch and create the ribbing.
SEAM
You now have a long rectangle that has no right or wrong side.
Seam the pumpkin into a tube shape by placing the two short ends of the rectangle together and using your tapestry needle to seam them. You can use any seaming method you prefer. I used the whip stitch.
Once you have seamed the two ends together, tie a knot in your yarn so that when we cinch the top, your seam doesn’t pull with it.
Turn your tube inside out so that the seam is hidden inside of the work.
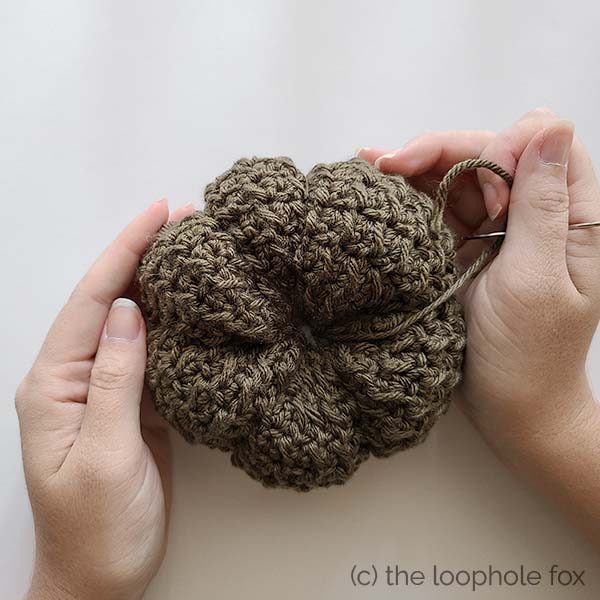
CINCHING & STUFFING
To close the tube, we will cinch one end closed, stuff the tube and then cinch the other end closed.
To cinch the first side, take your tapestry needle and weave in and out of the sides of the stitches along the opening.
Once you’ve woven in and out of all of the stitches along the opening, pull the tail of the yarn tight. You might have to push the stitches down along the strand of yarn to cinch tightly closed. That’s okay.
Once you’ve pulled this tail tight, you might find that there’s still a bit of an opening in the center. Sew this opening shut by sewing in one side of the opening and out the other. You will want to do this going both horizontally and vertically to ensure the opening is completely closed.
Now it is time to stuff the tube. Place stuffing inside of the tube until it is filled. You want your tube to be stuffed well but not over stuffed so that it begins to stretch the stitches.
Once your stuffing is in place, cinch the top closed the same way we cinched the other side.
There will likely be a small opening at the top as there was before. You can sew this closed the same way as we did the other side
Tie off your yarn but do not cut it. We are securing the worked tail to ensure it doesn’t pull when we create the ribbing.
CREATING THE RIBS
Now that we have made the work into a sort of ball shape, we will create the ribbing.
To create the ribbing, we are going to wrap the tail of yarn around the side (or height) of the pumpkin from top to bottom and insert your needle into the center bottom. You will want to place your strand of yarn in between the rows so that your textured stitches remain.
Push the needle through to the center top. You might have to squish the work down to do this and that’s okay.
Once pulled through, pull the tail of the yarn tight so that it creates a rib in the side of the work.
You can pull this tail as tight as you prefer. I like pumpkins with deep ribs, so I pulled my tail as tight as I could.
With the first rib complete, you will now want to add a few more. You can add as many or as few ribs as you like. My pumpkins have 5 ribs each.
You will want to place the ribbing as evenly as possible but keep in mind that pumpkins are beautiful regardless of their rib placement, so there’s no need for perfection. 🙂
Simply choose your next rib placement and repeat the process as listed above for as many ribs as you like.
Once you’ve completed your ribs, tie off your yarn so that your ribs don’t lose their definition. Weave in the end and trim the excess yarn. Choose the side that looks best to be the top, add in your stem to finish it off.
You’re done!
Don’t forget – The inexpensive PDF version of this pattern has a full photo tutorial for creating the pumpkin. If you’d like photos to help you through creating your pumpkin, I’d highly recommend checking out the PDF in either my Ravelry or Etsy shop!
That’s all there is to it! I hope you enjoyed this crochet pumpkin pattern and I hope you you love your crochet pumpkin! Go and make a whole variety of them! I have made… probably 15 at this point. Someone stop me from making more pumpkins!
One of my greatest joys is seeing your finished crochet projects from my patterns or tutorials, so when you post to Instagram, don’t forget to tag me so I can show you some love! I’m @theloopholefoxcrochet. You can also share pictures on my recent posts on Facebook or within my Facebook group!
And don’t forget to pin this to your Pinterest boards, so you can remember it for later!
Don’t forget to join my Facebook Group so we can chat all about your creations! We are a group for crocheters of all experiences, all interests and love to hang out together. Come join the fun!

Shannon | Designer & Editor
Shannon helps crocheters find their next project and build their skills with in depth tutorials and crochet patterns on her blog, theloopholefox.com.
With more than a decade of crochet experience, Shannon knows that understanding why we do something matters just as much as how we do it. She teaches new techniques and crochet stitches in depth so you can crochet with confidence.
Find More Free Crochet Patterns:
Easy Infinity Scarf Pattern
Easy Triangle Shawl Pattern
Easy Crochet Cactus Pattern