
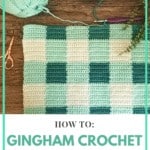
How to Gingham Crochet for Absolute Beginners
If you’ve looked at any of my social media even once, you know that I love gingham. Seriously, I love it. Today, I’m going to walk you through how to gingham crochet for the absolute beginner using single crochet with this crochet tutorial. If you’re looking to crochet a gingham pattern but aren’t sure where to start, this post is for you.
In this crochet tutorial, you’ll learn the basics of the single crochet gingham crochet pattern, how to change colors, how to carry yarn and tips for keeping your yarn untangled.
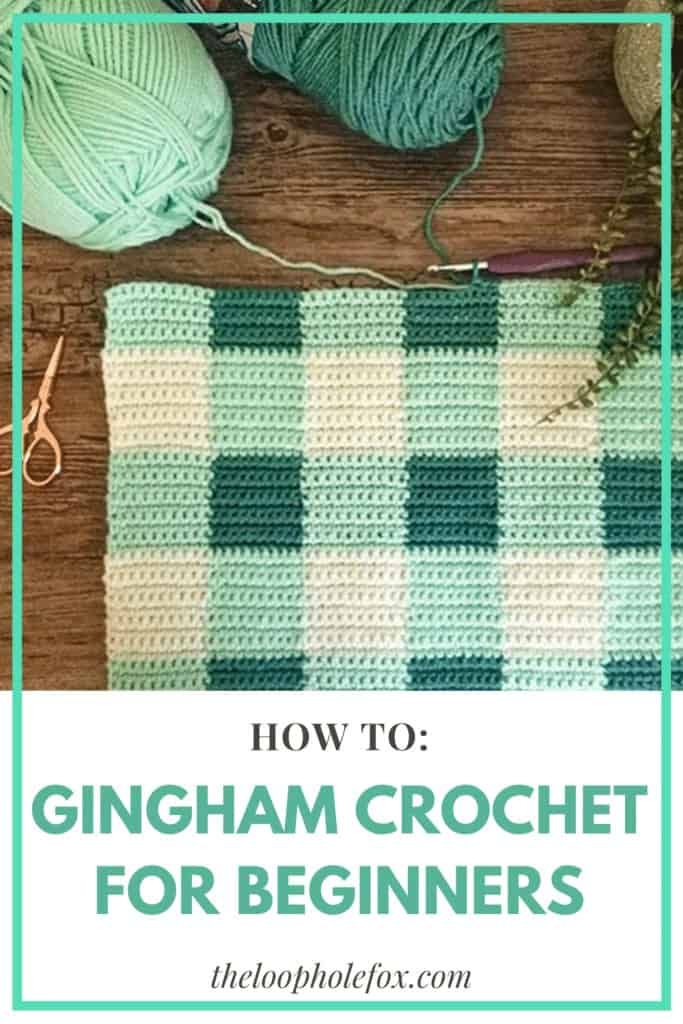
Gingham crochet packs simple things like baby blankets or tote bags with a ton of personality. It’s not only for 50’s style skirts and picnic blankets! If you’re wondering how to gingham crochet, look no further. This crochet tutorial has everything you need to get started.
If you’re new to gingham crochet, though, you might be wondering – How do I create this beautiful pattern? While it looks difficult, I’m here to tell you it’s actually pretty easy once you get the hang of it.
I’ll walk you through the basics of gingham crochet utilizing single crochet in this tutorial, so you can go forth and create all the gingham crochet projects you can think of. Don’t forget to tag me @theloopholefoxcrochet on Instagram if you create something using this tutorial so I can show you some love!
HOW TO GINGHAM CROCHET
When you’re learning how to crochet gingham, there’s a few different things you’ll want to know BEFORE you get started. These tips will help you create crisp and clean projects.
CHOOSE THE RIGHT COLORS
I know this sounds silly for a crochet tutorial, but hear me out!
When working up gingham crochet, it’s important to choose colors that are going to work well together.
My most favorite part of creating any gingham crochet project is choosing the colors. When deciding on your palette, you’re going to want find three different colors that work beautifully together. You’ll almost always have one color that is white, so that is checked off for you.
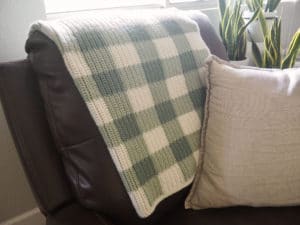
For the main colors, you’re going to want to find two colors that are in the same family but not the same saturation. Take a look at my Gender Neutral Gingham Baby Blanket as an example. I chose a dark green and a light green – but these colors weren’t just “dark” and “light” in any family of green. Both were specifically more in the “sage” color family. Not neon green and dark forest green.
For the purposes of this tutorial, I used Red Heart with Love – Minty (light green), Red Heart Super Saver – Soft White, Red Heart Super Saver – Jade (dark teal)
The same goes for any main colors you choose. For example, you probably wouldn’t choose a bright red next to a neon pink. These colors will clash. You could, however, do a darker pink next to a softer pink for a lovely baby blanket.
When you head to the craft store to pick up yarn for a gingham project, grab several and place them next to each other. I have been known to grab a cart just to have a place to set skeins next to each other. There are so many shades to choose from, so don’t limit yourself!
KEEP YOUR YARN FROM GETTING TWISTED
One of the only things I have ever disliked about gingham crochet is the two colors getting twisted up and having to painstakingly unravel the two skeins from each other. UGH! What a mess.
I believe including how to keep you yarn from getting twisted in this crochet tutorial is essential.
The plus side is you’ll only be working with two colors at once, so keeping your skeins from getting tangled is pretty easy.
When you’re crocheting, set your skeins in front of you. One to the left and one to the right. When you change colors, pay attention to which color is on the right skein and which is on the left. The color on the right skein, you’ll just set it down behind the work like you normally would. However, for color on the left skein, you’ll pull in front of the work. After you’ve finished your color change, just hold your non working yarn on top of your previous row of stitches and crochet over the strand.
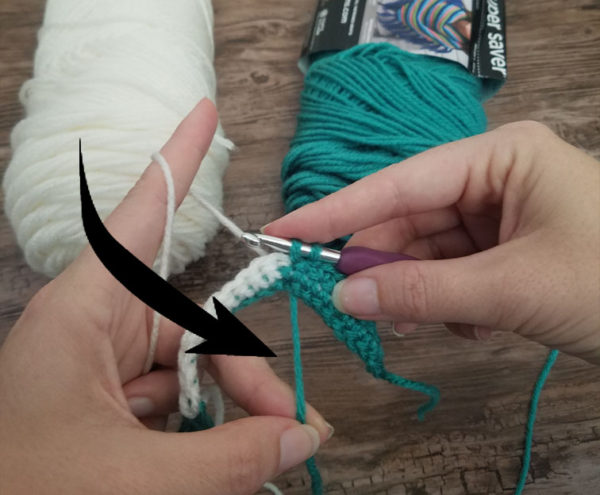
This will keep your skeins untangled and keep you crocheting without worry.
HOW TO START GINGHAM CROCHET
For single crochet gingham (or any stitch that requires only one chain), you’ll normally end up chaining multiples of 10 + 1 for your starting chain. This means if you want a project with 5 blocks across, you’ll want to chain 50+1, or 51. If you want a project that is 7 blocks across, you’ll want to chain 70+1, or 71.
Crocheting 10 stitches in 10 rows is a good way to figure out your gauge for your project. Once you know your gauge, you can decide how many blocks wide and tall you’ll want your project.
Keep in mind: Most (not all – you’ll see in my upcoming gingham tote bag pattern) gingham patterns are an odd number of blocks across and high, so that your rows start and end with the same color.
You will chain with the color you prefer to start your blocks with (you’ll find that it’s usually white), and place your first 10 stitches in that same color. You’ll finish your 10th stitch with your next color (medium) and place an additional 10 stitches across. You will continue this method across the row, changing color every 10 stitches.
You will continue this method for the next 10 rows. On the 11th row, you will trim your first color (white) and add in your dark color. From here, you will continue the stitch pattern as listed above, making sure your medium color is stacked on top of your light color from the previous block set and your dark color is stacked on top of your white.
Cool fact: You will never trim your medium colored yarn!
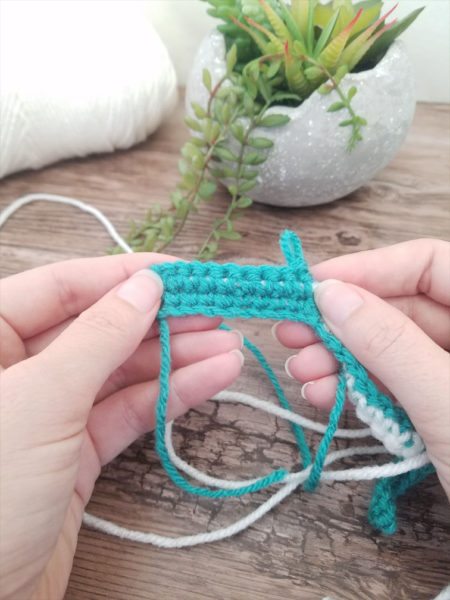
Throughout your crocheting, you will carry your non-working yarn. I find that I use about the same amount of yarn carrying the yarn versus cutting and weaving. Plus, cutting and weaving your yarn after every block is a total headache! I try to avoid weaving in ends as much as possible.
As a result of carrying your non-working yarn, you are hiding it and saving yourself the hassle of trimming and weaving after every block.
KEEP YOUR CARRIED YARN TIDY
Another essential tip for this crochet tutorial: Keep your yarn tidy.
You’ll want to make sure that the yarn you carry is kept tidy. If you hold your carried yarn too loose while single crocheting over it, it can stick out of your stitches and ruin the look of the project you’re working.
Make sure to pull your carried yarn tight if you find you’re having this issue before you change colors otherwise you won’t be able to make the carried yarn uniform later. Don’t pull it so tight that it warps your work, but pull it enough that it is uniform under your single crochets.
YOU CAN USE DIFFERENT STITCHES
In this crochet tutorial, I’m teaching you how to create gingham with single crochets, but you can use nearly any stitch you prefer. Double crochet, extended single crochet, half double… you name it.
It’s important to keep the math of gingham crochet in mind if you want to use other stitches, such as the star stitch which requires 3 chains. You’d need to do the math to figure out how many starting chains you need to use a more advanced stitch.
With gingham crochet, you typically want your blocks to be as wide as they are tall, so you’ll need to consider that with your stitch height as well.
HOW TO CHANGE COLORS
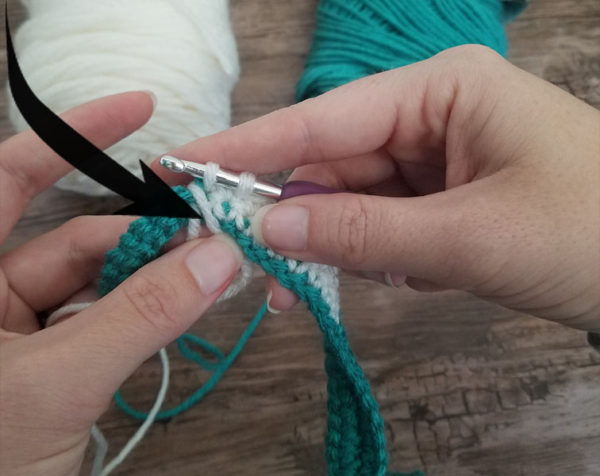
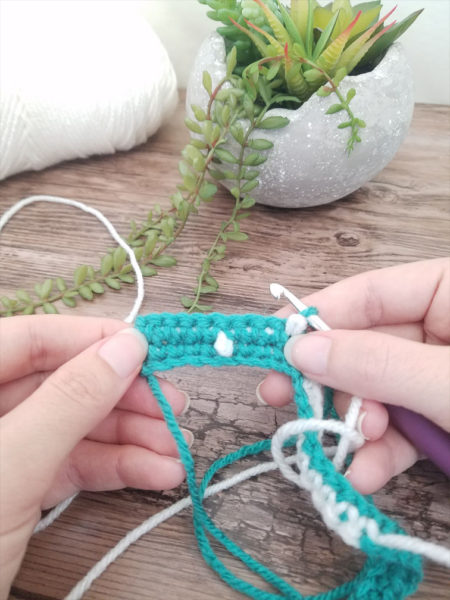
One of the main things you’ll need to know for gingham crochet is how to change colors. This sounds scary but don’t fret! The actual technical term for gingham crochet is tapestry crochet, which is the method of strategically changing colors throughout your rows to create an image. Once you know how to change colors in your rows, you’ll be able to create all kinds of images, not just gingham.
Simply put: To change color, you’re going to finish your stitch with a new color. That sounds harder than it is!
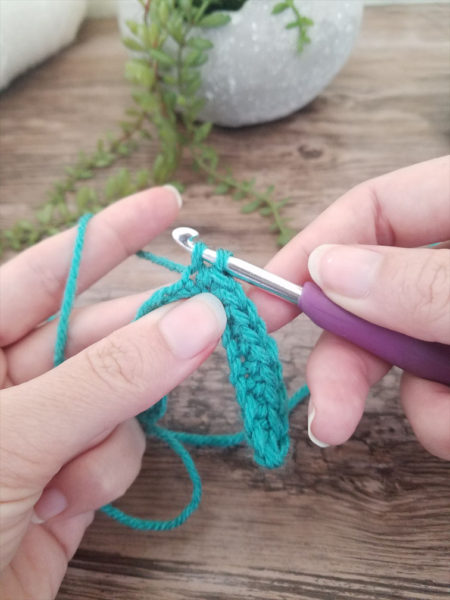
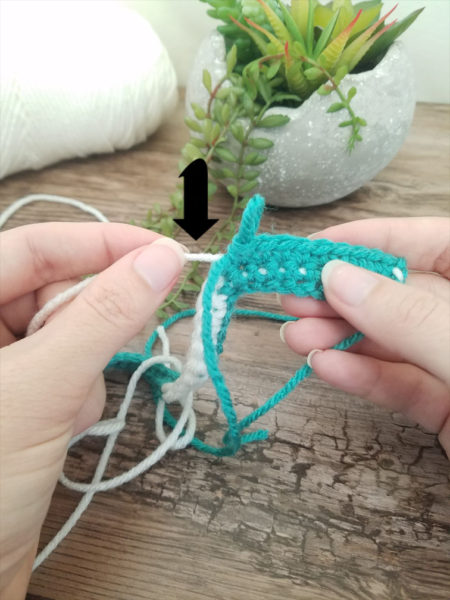
Step 1: On your last single crochet with your first color, work through inserting your hook into the stitch, yarn over and pull up a loop. Do not yarn over and pull through to finish the stitch.
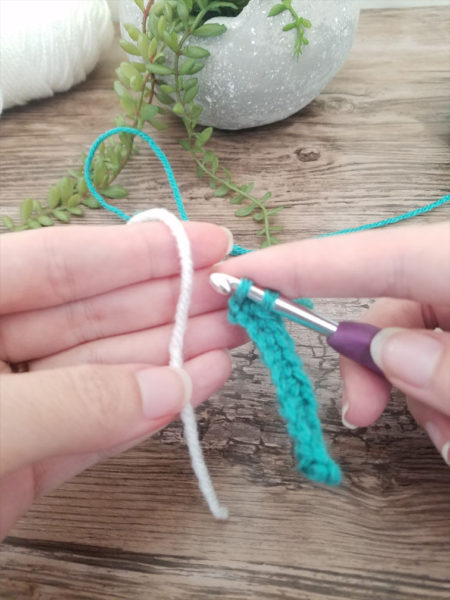
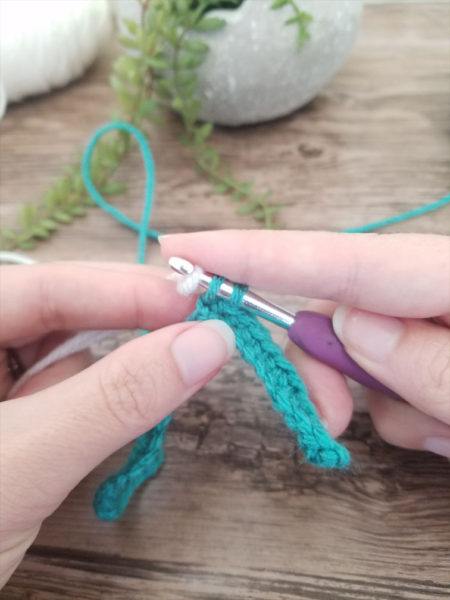
Step 2 & 3: Introduce new color. Yarn over with the new color.
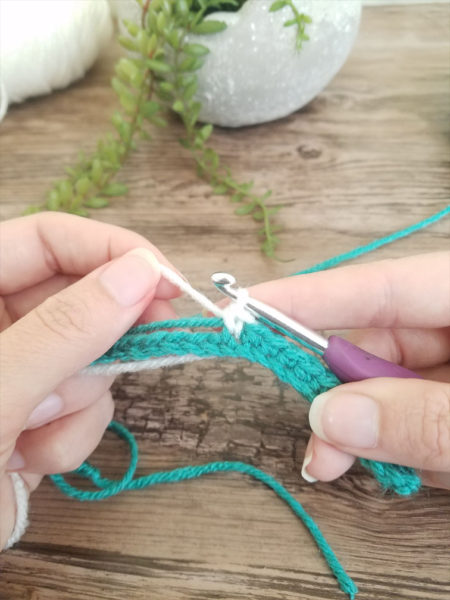
Step 4: Pull through both loops on hook.
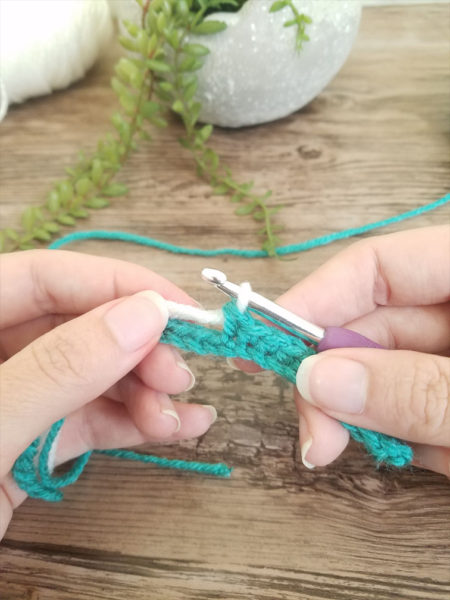
Step 5 and on: Continue with single crochet as normal, making sure to carry your non-working yarn.

PRACTICE MAKES PERFECT
I’m as tired of that cliche as you are, but seriously – Now all that’s left is to practice. I highly recommend practicing a few swatches before you start a bigger project, just to make sure you have the steps of gingham crochet down before you commit.
Once you’ve worked a few swatches of gingham, it’ll be second nature. You’ll find that your carried yarn stays uniform on it’s own and you’ll be able to work on these projects without having to think too hard about it.
PATTERN FOR PRACTICE
Here is small swatch written pattern to get you practicing. For simplicity, I’m calling white “A”, your medium color “B” and dark color “C”.
This practice pattern will create a gingham swatch that is 3 blocks wide x 2 blocks tall.
Chain 30+1 (31) with A
Sc your first 10 stitches with A. Don’t finish 10th stitch with A. Finish 10th stitch with B. Sc 10 stitches with B. Don’t finish 10th stitch with B. Finish 10th stitch with A.
Repeat for 9 more rows. Finish the last stitch of the 10th row with B.
For 10 rows: Sc your 10 stitches with B. Don’t finish 10th stitch with B. Finish 10th stitch with C. Sc 10 stitches with C. Don’t finish 10th stitch with C. Finish 10th stitch with B.
You now have all the basics of gingham crochet and can go forth and create your own gingham projects. What colors will you choose for yours? Let me know!
Now that you know how to gingham, you’ll love my Gingham Tote Bag!
Don’t forget to join my Facebook Group so we can chat all about your creations! We are a group for crocheters of all experiences, all interests and love to hang out together. Come join the fun!

If you’re excited by gingham and want more ideas, check out my Gender Neutral Gingham Baby Blanket.
Struggling with keeping your edges straight? This should help.
Come hang out with me on Facebook!
Follow my Instagram for more WIP pictures – be the first to know of upcoming patterns.
Do you know approximately how many yards of each color you used?
Hi Clarissa!
The yardage will depend on what type of project you’re creating. For this example, I didn’t use more than a couple yards for the photo tutorial.
However, a couple of exampless:
For my Gingham Tote pattern, I used approximately 273 yards of each color.
For my Gingham Baby Blanket pattern, I used approximately 350 yards of the darkest green, approximately 360-370 yards of the white and approximately 485 yards of the lighter green.
I hope this helps! Let me know if you need more clarification. Thank you!