The Sage Baby Blanket
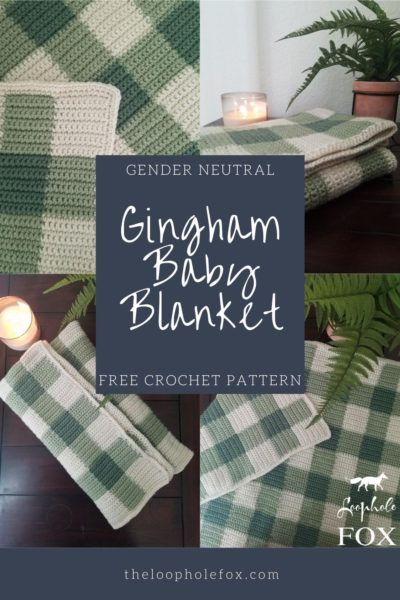
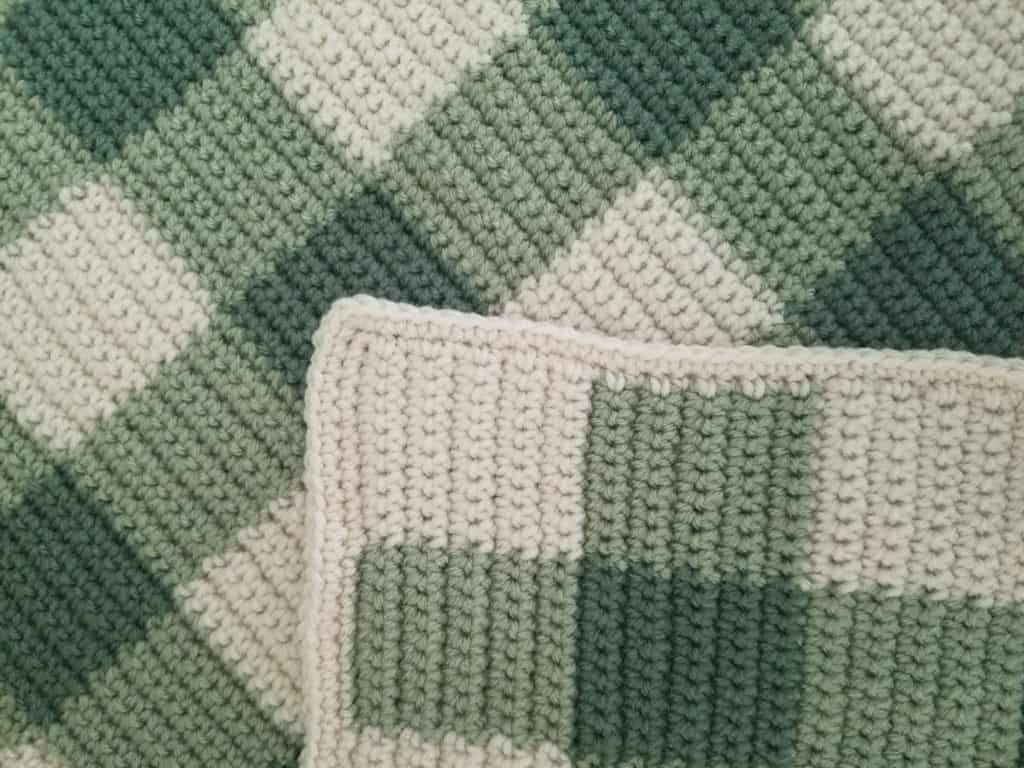
If you enjoy gingham crochet as much as I do, you’re going to love this easy gender neutral gingham crochet baby blanket pattern. This is easily one of my most favorite patterns and is perfect for any season and any baby. This unisex crochet baby blanket was designed with Red Heart yarn for easy accessibility, but can easily be altered to any other medium (4) weight yarn.

Green Unisex Gingham Crochet Baby Blanket
When a good friend of mine told me she was expecting, I couldn’t contain the excitement at creating a gingham crochet baby blanket just for her little one.
DISCLAIMER: This post includes affiliate links. This means, should you decide to purchase a product via one of these links, I will receive a small commission at no extra cost to you. I only recommend products I use and love (Or products I know others love, have heavily researched, know have good ratings and plan to purchase myself). These small commissions help to support this blog and continue keeping most of my patterns free. You can read more on my Privacy Policy, if you prefer.
She made the bold move of not announcing the gender to anyone, which had a huge hand in deciding on the color scheme for this gender neutral green gingham baby blanket. This has created a fan favorite pattern – this unisex crochet baby blanket can be created in any color for any baby.
You can easily crochet this baby blanket for a little girl in pinks or a little boy in blues – or keep this crochet baby blanket gender neutral with unisex colors like yellow, orange, teal or green, or to fit the parent’s nursery theme.
If you prefer a premium, ad-free PDF version of this pattern, you can grab one on either my Ravelry or my Etsy shop by clicking the buttons below.

This pattern was so fun to work and even more fun to shop for. Deciding on which gender neutral color we wanted to use for this gingham baby blanket (green, yellow?) and then choosing the specific shades for this blanket had me feeling like a kid in a candy store.
This unisex gingham baby blanket crochet pattern is perfect for expecting momma’s who are keeping their baby’s gender hush-hush but also love a timeless and classic look.
How do you crochet a gingham baby blanket?
If you’ve never worked gingham crochet before, I recommend you check out my How to Gingham Crochet for Beginners tutorial.
One of the main questions I receive regarding gingham crochet blankets is how to keep your carried yarn from peaking through. This pattern uses the abbreviation “cnwy” so if you’re unfamiliar with how to carry your yarn, I highly recommend reviewing the tutorial before you start.
This will also walk you through how to choose the perfect colors for any gingham crochet pattern (gender neutral or not) and the basics of how to keep your stitches crisp and clean while carrying your yarn.
SKILL LEVEL
Advanced Beginner. You will only be using single crochet, but you do need to work tapestry crochet, which includes changing color mid row and carrying yarn. I have a tapestry crochet tutorial specific to gingham crochet that I highly recommend you review before you get started.
MATERIALS
Medium (4) weight yarn of your choice in 3 colors
You will need approximately:
CA: 8 oz/ 226g/ 416 yards
CB: 10 oz/ 282g/ 520 yards
CC: 7 oz/ 198g/ 364 yards
Yarn Used
Red Heart Super Saver in colorways: Aran (CA), Frosty Green (CB) and Light Sage (CC)
TOOLS
5.5 mm (I-9) Hook
Tapestry needle
Scissors
Stitch markers, if you prefer them
GAUGE
My swatch of 10 stitches x 10 rows is approximately 2.5 inches x 2.5 inches.
This baby blanket is 15 blocks wide and 13 blocks tall (block = 10 st x 10 rows), you can alter this as you see fit to make a larger or smaller blanket. I prefer to end each row and column on an odd number so that all corners end in white, for example.
FINISHED SIZE
This gingham baby blanket with my tension ended up approximately 37 inches x 33 inches.
ABBREVIATIONS
This pattern is worked in US terms.
- Ch – chain
- Sc – single crochet
- St(s) – stitch(es)
- CA – Color A
- CB – Color B
- CC – Color C
- […] – Instructions inside brackets indicate pattern repeats.
- (…) – Stitch counts are listed at the end of row in ( ) and bold italics.
NOTES
- Chain 1 to begin a row does not count as a stitch. Always place the first single crochet of the row in the very first stitch.
- This pattern uses the tapestry crochet technique and is worked entirely in single crochet.
- You will need to change color several times mid row. To change color, begin your single crochet as normal by inserting your hook into the stitch, yarn over and pull through. Instead of yarning over again to complete the stitch, introduce the new color and pull through to finish. This will seamlessly change color.
- You will want to “carry” your yarn, which means to crochet over the yarn that you are not using. For example, in a row with white and green, when using white you will want to crochet over the green yarn and vice versa.
- Ensure that your carried yarn is flat against your stitches. You will want to pull this carried yarn “tight” so that it is hidden, flat and not sticking out of the stitches, but not so tight that it pulls the stitches and warps the work.
- Please see “how to read this pattern” on the next page for detailed instructions

How to Read this Pattern
For simplicity, this pattern simply states to create single crochets a certain number of times. It doesn’t refer to carry the yarn, change color, etc. Keeping this in mind, it’s important to understand what these instructions are telling you to do.
For example:
“Row 2 – With CA, ch 1 and turn. Place 1 sc in next 10 sts with CA. [1 sc next 10 sts with CB, 1 sc next 10 sts with CA]. Repeat inside brackets 7x across the row to the end. (150)”
Let’s break down this row so we have a good understanding of what we need to do. All rows are worked similar to Row 2; they just use different colors.
Row 2 – With Color A (CA), we will chain 1 and turn. We will place 1 single crochet in the next 10 stitches with CA. Then, we begin a repeat. We will [Place 1 single crochet in the next 10 stitches using Color B (CB), then place 1 single crochet in the next 10 stitches using CA.
You’ll notice that this pattern doesn’t specifically state “on the 10th stitch, finish stitch with COLOR”. This is to keep the pattern clear and concise. On the 10th stitch of every “block”, you will change to the next color.
Choosing Colors
Choosing colors for a Gingham pattern is fun and exciting, once you know what you’re looking for. For Gingham, you’ll typically want one of your colors to be a white or a cream. For the two other colors, you’ll want to choose colors in the same family. This means you’ll want to choose a base color and find one that is a similar color but a lower saturation.
For example, if the expecting parents are looking for a “rose” inspired blanket, you’d want to choose a well saturated, darker rose color. Then, you’d want to choose a lighter, “dustier” pink but not a hot, bright pink. Or, if they wanted a “navy” blue blanket, you’d choose a darker Navy blue and a similar but lighter blue, but not a bright turquoise.
You wouldn’t want to choose, for example, a dark forest green and a neon pink as the colors tend to clash (unless that’s what you’re looking for, of course!)
How to Make this Gender Neutral Baby Blanket
With CA, Ch 151.
*Prepare to carry CB yarn so that your gauge stays correct through the pattern. Once your chains are completed, lay CB under your stitches so that you crochet over it along the chains.
Row 1 – Sc in 2nd ch from hook and next 9 sts with CA. [1 sc 10 sts with CB, 1 sc next 10 sts with CA] Repeat inside brackets 7x across the row to the end. (150)
*You should now have 15 “blocks” of color, starting with CA and ending with CA.
Row 2 – With CA, ch 1 and turn. Place 1 sc in next 10 sts with CA. [1 sc next 10 sts with CB, 1 sc next 10 sts with CA]. Repeat inside brackets 7x across the row to the end. (150)
Rows 3 through 10 – Repeat Row 2. On the last sc of Row 10, finish sc with CB. Trim CA. You will now crochet with CB and CC.
Row 11 – With CB, ch 1 and turn. Place 1 sc in next 10 sts with CB. [1 sc next 10 sts with CC, 1 sc next 10 sts with CC]. Repeat inside brackets 7x across the row to the end. (150)
*You should see your sets of 10 CB single crochets over your 10 CA single crochets from the row below and your 10 CC single crochets over your 10 CB single crochets from the row below.
Rows 12 through 20 – Repeat Row 11. On the last sc of Row 20, finish sc with CA. Trim CC. You will now crochet with CA and CB.
Rows 21 through 30 – Repeat Row 2. On the last sc of Row 30, finish sc with CB. Trim CA. You will now crochet with CB and CC.
Rows 31 through 40 – Repeat Row 11. On the last sc of Row 40, finish sc with CA. Trim CC. You will now crochet with CA and CB.
Rows 41 through 50 – Repeat Row 2. On the last sc of Row 50, finish sc with CB. Trim CA. You will now crochet with CB and CC.
Rows 51 through 60 – Repeat Row 11. On the last sc of Row 60, finish sc with CA. Trim CC. You will now crochet with CA and CB.
Rows 61 through 70 – Repeat Row 2. On the last sc of Row 70, finish sc with CB. Trim CA. You will now crochet with CB and CC.
Rows 71 through 80 – Repeat Row 11. On the last sc of Row 80, finish sc with CA. Trim CC. You will now crochet with CA and CB.
Rows 81 through 90 – Repeat Row 2. On the last sc of Row 90, finish sc with CB. Trim CA. You will now crochet with CB and CC.
Rows 91 through 100 – Repeat Row 11. On the last sc of Row 100, finish sc with CA. Trim CC. You will now crochet with CA and CB.
Rows 101 through 110 – Repeat Row 2. On the last sc of Row 110, finish sc with CB. Trim CA. You will now crochet with CB and CC.
Rows 111 through 120 – Repeat Row 11. On the last sc of Row 100, finish sc with CA. Trim CC. You will now crochet with CA and CB.
Rows 121 through 130 – Repeat Row 2. Finish Row 130 as normal. Trim yarn, weave all ends.
Border
This baby blanket pattern comes with a very simple border that you can create as is or is a perfect basis to add a “fancier” border to.With whichever color you prefer (I used CA), create a single crochet border around the blanket, working two rounds.
To do this, join your yarn in first stitch of the last row worked. Working along this row, place 1 single crochet. When you reach the corner, chain 2 and turn 90 degrees to work along the raw edge of the blanket. Place 1 single crochet in the side of each single crochet down the side of the blanket.
Continue working in this method all the way around the blanket. At the end, chain 2 to create the corner and then slip stitch to the first single crochet made to close.
For Round 2 of the blanket, you’ll simply chain 1 and place 1 single crochet in each single crochet around and 3 single crochet in each chain 2 corner. At the end, slip stitch to close and finish off your yarn. Weave in the ends and you’re all done!
You can, of course, add an additional border if you prefer. That’s up to you! 🙂

Now it’s time to sit back and admire your gorgeous gender neutral crochet baby blanket!
One of my greatest joys is seeing your finished crochet projects from my patterns or tutorials, so when you post to Instagram, don’t forget to tag me so I can show you some love! I’m @theloopholefoxcrochet. You can also share pictures on my recent posts on Facebook or within my Facebook group!
And don’t forget to pin this to your Pinterest boards, so you can remember it for later!
Don’t forget to join my Facebook Group so we can chat all about your creations! We are a group for crocheters of all experiences, all interests and love to hang out together. Come join the fun!
Shannon | Designer & Editor
Shannon helps crocheters find their next project and build their skills with in depth tutorials and crochet patterns on her blog, theloopholefox.com.
With more than a decade of crochet experience, Shannon knows that understanding why we do something matters just as much as how we do it. She teaches new techniques and crochet stitches in depth so you can crochet with confidence.
Find More Free Crochet Patterns:
More Baby Blankets – These patterns can easily be created in unisex colors.
Gingham Tote
Nebula Infinity Scarf


