
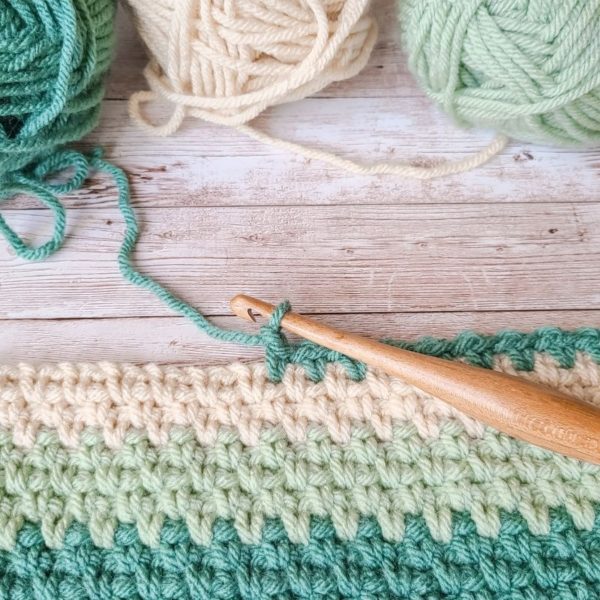
Moss Stitch – How to Crochet It & How to Create Your Own Project Size
It’s no secret that when it comes to crochet, I love the moss stitch. The crochet Moss Stitch (which is also sometimes known as the Linen or Granite stitch) is a fantastic crochet stitch for beginners or experienced crocheters alike. This stitch uses basic, beginner stitches to create a beautiful woven texture that’s fast and easy to work up (once you know how to do it, anyway!).

Love this crochet Moss Stitch tutorial? Pin it to Pinterest!
The crochet Moss Stitch creates a woven texture because we only work into chain spaces. By working only into the chain spaces, the single crochets zig zag and then stack on top of each other. This creates a mesh and is what makes the crochet Moss Stitch so stretchy. This stitch has a bit of stretch side to side and a lot of stretch length wise.
The Moss Stitch is a fantastic crochet stitch to use for all sorts of projects. Anything from baby blankets to sweaters to bags, this crochet stitch is a great option.
This tutorial includes: How to work the moss stitch, why it works (the anatomy), a video tutorial and how to create a gauge swatch so you can make a project of any size. This tutorial also includes instructions on how to create a wash cloth using the crochet Moss Stitch, so you can practice your new skills on something a little bigger than a swatch!
Notes & Information
Before we get into the tutorial, I want to go over a couple of things. The Moss Stitch is a fairly simple crochet stitch to work out, but there are a couple of little things we want to pay attention to.
- We always work in chain 1 spaces – never into the top of a single crochet
- In the Moss Stitch pattern, we count both the chain 1 spaces and the single crochet as a “stitch”.
- The stitch pattern itself will always be an even amount of stitches. So when you chain, you’ll always want your chain to be a multiple of 2 + 1 turning chain.
- Example: If you want 12 stitches (6 single crochet, 6 chain 1 spaces), you’ll need to chain 13.
- To achieve an even amount of stitches, we need to chain an odd amount (you’ll see what I mean in the tutorial)
- All rows of the crochet Moss Stitch beyond Row 1 are worked exactly the same.
- You can use this stitch with any weight of yarn – it looks great in one color, variegated yarn or in planned colors.
DISCLAIMER: This post includes affiliate links. This means, should you decide to purchase a product via one of these links, I will receive a small commission at no extra cost to you. I only recommend products I use and love (Or products I know others love, have heavily researched, know have good ratings and plan to purchase myself). These small commissions help to support this blog and continue keeping most of my patterns free. You can read more on my Privacy Policy, if you prefer.
To practice the crochet Moss Stitch, you’ll need any yarn, a hook that corresponds to the yarn weight and a couple of stitch markers. For this tutorial, I’m using Bernat Softee Chunky in Sea Green, my 7 mm Furls Streamline Wood in Teak and some basic stitch markers.
In the video tutorial, I show you in depth both how to work this stitch with stitch markers and without. As you’re learning, a stitch marker in the start of the rows can be very helpful. However, as you become more comfortable with the crochet Moss Stitch, you shouldn’t need the stitch markers anymore. The video shows you how to find the chain 1 space that started each row both with and without the marker.
How to Work the Moss Stitch

To begin the crochet Moss Stitch, we want to start with an ODD number of chains. For the purposes of this tutorial, I have chained 13.
You can chain as many or as few as you like, as long as you have an odd number of chains. I would recommend starting with a smaller swatch while you’re learning before moving on to a bigger project.

We are now going to place a single crochet in the 3rd chain from the hook.
Why: Typically with single crochet stitches, you’d place your first stitch in the second chain from the hook. Why aren’t we doing that with the Moss Stitch? The two chains we skip do two things. One, the second chain from the hook acts as your turning chain and keeps your work going straight up. Two, the first chain from the hook acts and counts as a chain one space.
This will make a little more sense in a second, I promise!

While you’re learning this stitch, I would recommend placing a stitch marker AROUND the two chains we are going to skip. Slip the stitch marker around the chains and close it. We don’t want the stitch marker going actually into or through any of the chains because we don’t want to create a false chain 1 space.

Now we have placed our first single crochet. The stitch marker is still wrapped around the chains. This marks the chain 1 space created by skipping two chains and putting the single crochet into the third. Technically we now have two stitches in our first row because we are counting chain spaces and single crochets as stitches.
From here, we are going to chain 1, skip 1 chain, and single crochet in the next chain.
The images below are exactly the same, but second image has a white arrow. That arrow is pointing to the chain 1 space we’ve just created.

Across Row 1, we are going to repeat: Chain 1, skip 1 chain, and single crochet in the next chain. Your last stitch should be a single crochet.
At the end of the first row, you should have 6 single crochets and 6 chain 1 spaces (including the first chain 1 space we marked with a stitch marker).
Here’s what your work should look like after Row 1. The pictures are the same, however, the second picture has black arrows pointing to the chain 1 spaces to help identify them.


With the nature of working into chains, the first row of the Moss Stitch can look a little wonky – especially if you don’t have great tension yet. You can pull and stretch the work a bit to help identify those chain 1 spaces moving forward. In the video tutorial, I do show how to find these chain 1 spaces by stretching the work.
Before we move on to working Row 2, let’s talk about the anatomy of Row 1 a little bit.


The pictures above are exactly the same, however the second picture has some added items to help identify what is going on with this row. I’ve listed these pictures together so you can see it both without the added items and with them, so you can understand the anatomy of the crochet Moss Stitch.
As we’ve established throughout this tutorial, the Moss Stitch is created of single crochets and chain 1 spaces. On this first row, it can be difficult to find these spaces, especially if you’re a beginner and you don’t have your tension figured out yet. It’s important to know how to place the stitches, why we place them the way we do and where stitches are so that you can accurately move up to the next row.
The semi-transparent white V’s in the second picture show you where the posts of the single crochets are. The black arrows pointing downward show where each chain 1 space is (including the chain 1 space we marked at the beginning of Row 1). Each of the single crochet are separated by a chain 1 space.
As you continue working this stitch and working up rows, these chain 1 spaces will be much easier to find because they are more firmly held up by the row below. This first row can get a bit wonky because the chain base doesn’t hold firm as much as the other rows do.
Let’s move on to Row 2 (And all subsequent rows).
All rows with the crochet Moss Stitch are worked exactly the same beyond Row 1.
To begin Row 2 (and all subsequent rows), we are going to chain 2 and turn. Why chain 2?
Remember on our first row how we skipped 2 chains to create a chain 1 space? We are doing the same thing here. You can place a stitch marker around these 2 chains as we did in Row 1, if you like. For the sake of showing you how it looks both ways, I did not use a stitch marker this time.
So, chain 2, skip the first single crochet and place a single crochet in the chain 1 space. (If you need reference, check out the second image in the above set. You will skip the right most V and put a single crochet in the space the right most black arrow is pointing to).


Here’s what your work will look like after completing the first single crochet. Once again, I’ve included two pictures. In the second picture, the semi-transparent V shows where the single crochet is and the black arrow points to the chain 1 space we created by chaining 2 and skipping the first single crochet.
This first chain 1 space of the second row (and all rows following) can be a little difficult to find as you’re learning without a stitch marker. If you’ve watched my tutorial video, you’ve seen me pulling on the chains a bit to help isolate the chain 1 space and make it easier to find.
Across the row, repeat: chain 1, skip the single crochet and single crochet in the next chain 1 space. When you come to the end of the row, you’ll need to identify the last chain 1 space (which we have marked with a stitch marker).

In the picture above, you can see I’ve chained 1 to prepare to skip the single crochet and I’m at the end of the row. We need to place a single crochet in the chain 1 space marked with the stitch marker.
You can pull on that stitch marker a little to help identify the chain 1 space. Make sure when you insert your hook into the space, your hook is between the single crochet and the 2 chains.


Here is Row 2 finished, showed both ways as I have throughout this tutorial. White V’s indicate the posts of single crochets, black arrows point to chain spaces.
All rows following Row 2 are worked exactly the same as Row 2.
So you will: Chain 2, turn. Skip the first single crochet and single crochet in the first chain 1 space. Then, repeat chain 1, skip the single crochet, and single crochet in the next chain 1 space to the end.
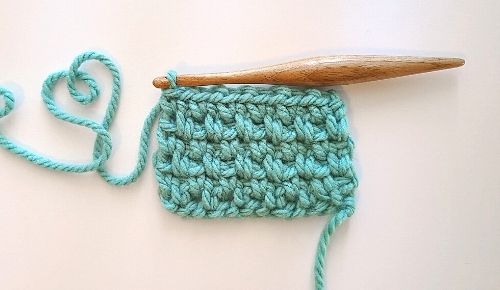
Here is what the Moss Stitch looks like after crocheting 6 rows.
How to Gauge Swatch the Moss Stitch
So you’ve got the crochet Moss Stitch down and now you’re ready to make something. Yay! Usually if you’re creating something on your own, it will be something like a baby blanket, a wash cloth or something else that is square or rectangle.
So you’ve got your hook, your yarn, your stitch and you’re ready to go! But wait… How many chains do I start with? How big will the item be?
To figure out how many chains you personally need to start with for a simple project, you’ll want to do a gauge swatch. Grab your ruler or measuring tape and let’s do some math!
You’re likely familiar with gauge swatches from following designer patterns before. We’re going to do essentially the same thing here, only this time you’re figuring out your gauge for your project you’re coming up with. Exciting!
You’ll want to make a square that is larger than 4 inches by 4 inches. This means you might have to experiment some with your starting chain number for this swatch. That’s okay!
For the Moss Stitch specifically, we know we need an odd number of chains to start the stitch pattern successfully. So, start chaining! Any odd amount will do. When your chain is longer than 4 inches, start working the stitch pattern. You’ll want to work this stitch pattern for several rows – ideally until your swatch measures 4 inches in height. Luckily with the Moss Stitch, crocheting this swatch will take little time.
Using this Super Bulky yarn, I only had to chain 15 to reach 4.5 inches wide.

You should now have a square (or rectangle, is fine), that measures at least 4 inches wide and at least 4 inches tall. Bigger is good but if your swatch is smaller, you’ll want to start over with more chains.
Now we are going to place the ruler or measuring tape along the base of one of the rows in the middle. Place your ruler or measuring tape so that it lines up with one of the stitches that isn’t directly on the side of the swatch.
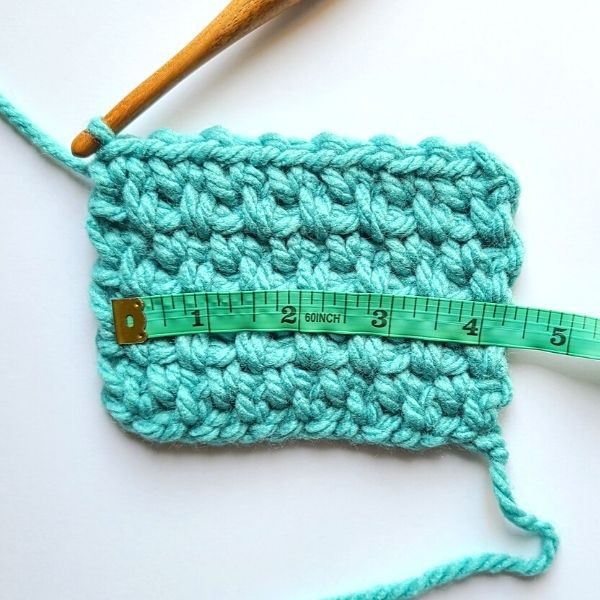
Now, count your stitches up to 4 inches. Starting from the beginning of the ruler or measuring tape and up to 4 inches, count both the single crochets and the chain spaces up to 4 inches. Make a note of that number. For me, that number is 12. Your number will probably be different based on the yarn and hook you use, as well as your tension.

If your stitch count is odd, you’ll want to either round up or down 1 to make an even number. This won’t change your ending result by much.
Now we have figured out how many stitches are in 4 inches using the crochet Moss Stitch. From here, we need to figure out how many chains we need to start a project that is our desired size.
Let’s say we are making a baby blanket. Most baby blankets are approximately 32 inches wide (prior to a border, at least!). We need to figure out how many times 4 inches fits into 32 inches (and in this case, that’s easy – it’s 8 times!).
So now we need to do a little math. We know that to create a project that is 4 inches wide, we need 12 stitches. That 4 inches fits into 32 inches 8 times. So, we will multiply 12 (stitches) by 8 to figure out how many stitches we would need to create a project that is approximately 32 inches wide.
12 times 8 equals 96. We need 96 stitches.
And, as we know from this crochet Moss Stitch tutorial, we need to start with an ODD number of chains, so add 1 chain to make the number odd.
We will need to chain 97 to end up with 96 stitches to create a baby blanket that is approximately 32 inches wide.
Sometimes your math might end up being in fractions because 4 inches doesn’t divide evenly by all numbers. That’s okay. Multiply your gauge stitches by that fraction number and round to the nearest whole number. If the number is odd, great. Use that for your chain amount. If it’s even, add one chain to make it odd and you’re good to go!
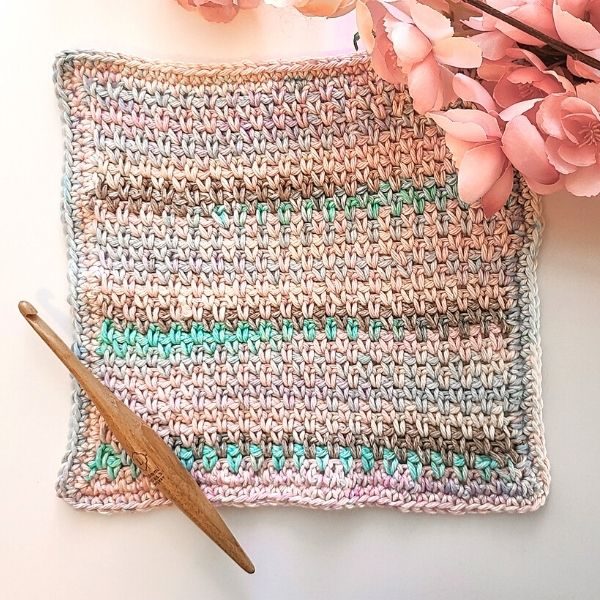
Moss Stitch Wash Cloth Pattern
Now that you’ve learned the Moss Stitch, you’re likely interested in working on a bigger project that isn’t just a few chains. I’ve included this basic washcloth pattern in this tutorial for you to practice on.
Tools & Materials
You’ll need cotton yarn for this wash cloth, as it needs to be durable and washable. I used I Love This Cotton in Pastel Print.
You will also need a 5 mm hook.
Gauge
Isn’t a huge deal, since it’s a wash cloth after all and this is for you to practice on! 🙂
Notes
Please refer back to the tutorial for any steps you might need help with.
Make sure you always place single crochets in chain 1 spaces, NOT the single crochets from the row below.
Size
Approximately 8 inches by 8 inches.
Abbreviations (US Terms)
Sc – Single Crochet
Pattern Instructions
Chain 39
R1 – sc in 3rd chain from hook. [chain 1, skip 1 chain, 1 sc in the next]. Repeat across the row to the end. Your final sc should be in the last chain. (38 stitches, counting chain spaces as stitches)
R2 – chain 2, turn. Skip the first sc, place 1 sc in the first chain 1 space. [chain 1, skip the sc, 1 sc in next chain 1 space]. Repeat inside brackets across the row to the end. Your last sc should be in the last chain 1 space. (38 stitches, counting chain spaces as stitches)
R3 through 33 – Repeat R2.
Border – Ch 1, turn. Place 1 sc in each sc and chain 1 space across the row. When you reach the end, chain 2 and turn your work so that you are working along the raw edge of the wash cloth. Place 1 sc in the side of each row down the length. When you reach the end, chain 2 and turn your work so that you are working along the bottom bumps of your starting chains. Place 1 sc in each chain across the row. When you reach the end, chain 2, turn so you are working along the final edge. Place 1 sc in the side of each row up the length. When you reach the end, chain 2, slip stitch to the first sc to close.
Finish off and weave ends – You have a wash cloth! 🙂

That’s it for this Moss Stitch crochet tutorial! I hope this tutorial set helped you feel confident working this stitch. Thanks so much for hanging out with me today. Happy crocheting!
Don’t forget to join my Facebook Group so we can chat all about your creations! We are a group for crocheters of all experiences, all interests and love to hang out together. Come join the fun!

Shannon | Designer & Editor
Shannon helps crocheters find their next project and build their skills with in depth tutorials and crochet patterns on her blog, theloopholefox.com.
With more than a decade of crochet experience, Shannon knows that understanding why we do something matters just as much as how we do it. She teaches new techniques and crochet stitches in depth so you can crochet with confidence.
Test your new skills on these patterns or check out my other Crochet Stitch Tutorials!
The Fledgling Baby Afghan
The Thursday Shawl
The Sunday Clutch
Or, learn a different “moss” stitch, the Even Moss Stitch!
