The Fledgling Baby Afghan
One of my favorite things to crochet are easy crochet baby afghans, especially when it’s made special for a little newcomer. There is nothing more special than offering a handmade heirloom crochet baby blanket to an expecting momma and knowing that she will be wrapping up her bundle of joy in it.
If you’re looking for an each crochet baby afghan pattern, you’ve come to the right place. This crochet baby blanket works up fairly fast, has a ton of personality with it’s color pattern and is easy to crochet as it uses only single crochet and chains. This makes this blanket beginner friendly, while keeping it fast and interesting for experienced crocheters.
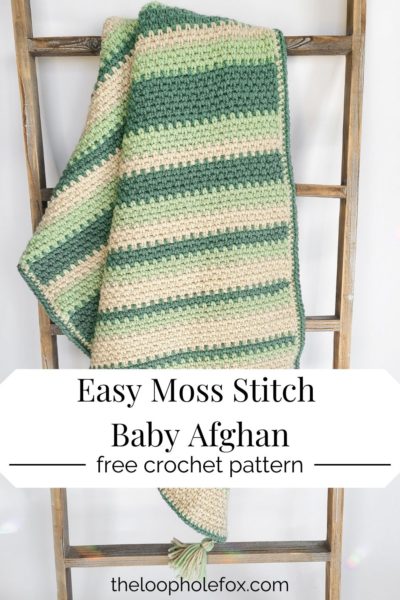
Easy Crochet Baby Afghan – Inspiration
An old friend of mine announced she was expecting her first babe a few months ago. If you’ve been here for a while, you know I jumped on the opportunity to offer her a crochet baby blanket. The two of us had a ton of fun talking about colors, style and what we wanted the crochet baby afghan to look like.
She gave me two directives for her crochet baby afghan: Sage greens and stripes.
I love to add as much personality as I can into easy crochet patterns, so I did some thinking and decided to use the Moss Stitch (also known as the linen stitch).
Using the Moss crochet stitch, the finished product is a lovely, stretchy mesh fabric. Because of the way the Moss Stitch works up, it can create fun “zig zag” stripes when changing color. This adds a ton of fun to the stripes while staying an easy crochet baby afghan pattern.
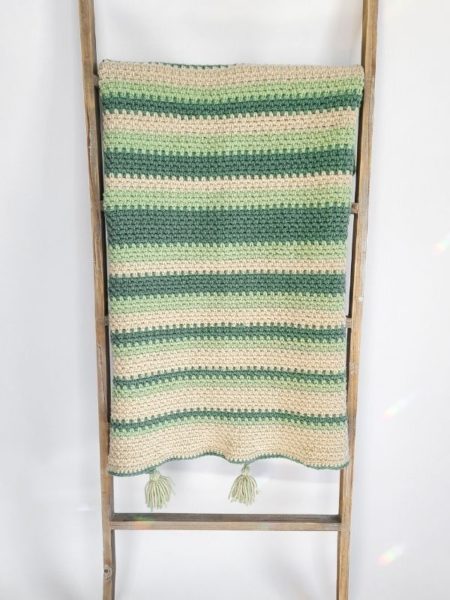
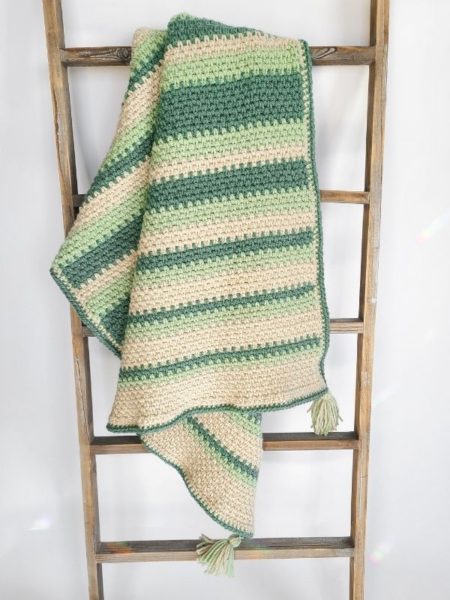
The stripes themselves are made of three colors, and start small but get bigger and bigger toward the middle. In the middle, there is one large strip and then the stripes reflect the pattern all the way to the end, getting smaller and smaller as you work.
This creates a lovely “reflection” and looks gorgeous laying flat, hanging, or folded. And, of course, being a tummy-time blanket!
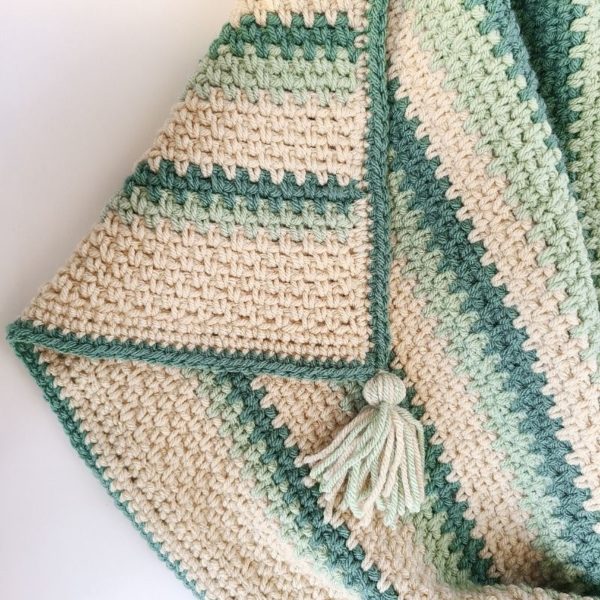
A simple border of single crochets and tassels in all four corners finishes off the blanket, but doesn’t distract from the beautiful stripes.
DISCLAIMER: This post includes affiliate links. This means, should you decide to purchase a product via one of these links, I will receive a small commission at no extra cost to you. I only recommend products I use and love (Or products I know others love, have heavily researched, know have good ratings and plan to purchase myself). These small commissions help to support this blog and continue keeping most of my patterns free. You can read more on my Privacy Policy, if you prefer.
If you’re ready to get started on this easy crochet baby afghan pattern, let’s do it!
Where to Get this Free Easy Crochet Baby Afghan Pattern
The Fledgling Baby Blanket is a free crochet baby afghan pattern in this blog post. Scroll down to view the free version.
However, if you’d like a more robust pattern with a photo tutorial, the steps for the photo tutorial written out in full sentences and a printer friendly version of the PDF, I recommend you purchase the PDF pattern.
With the PDF pattern, you will receive a detailed photo tutorial for the first few rows which will set you up to work this crochet cowl pattern with confidence. The photos include highlighted stitches and details with arrows or dots, when necessary.
SKILL LEVEL
Easy (Bulk of pattern uses the Moss (or Linen) stitch, which uses only single crochet and chains).
MATERIALS & TOOLS
This pattern is written to bulky (5) weight.
You will need three colors.
Color A: Approximately 10.5 oz or 447 yards
Color B: Approximately 7 oz or 298 yards
Color C: Approximately 7 oz or 298 yards
I used Paintbox Simply Chunky
Color A: Vanilla Cream – 3 skeins (10.5 oz or 447 yards)
Color B: Pistachio Green – 2 skeins (7 oz or 298 yards)
Color C: Slate Green – 2 skeins (7 oz or 298 yards)
I used most of these skeins for the entire blanket and the border. I had enough yarn left over to make 4 tassels and still had a small amount of scraps left.
Paintbox has a ton of gorgeous colors to choose from, I highly recommend checking their palettes out!
You will also need a 6 mm hook (here’s my favorite), scissors, tapestry needle and stitch markers, if you prefer them.
GAUGE
16 sts x 13 rows = Approximately 4 inches x 4 inches.
To test gauge, chain 17.
Follow the written pattern for 13 rows.
As this is a baby blanket and all baby blankets are lovely regardless of their size, your gauge test isn’t massively important. As long as you are close enough in gauge, or even slightly larger, you should be fine. 🙂
FINISHED SIZE
Approximately 30 inches wide x 34 inches long.
Remember: The Moss Stitch has some stretch to it.
ABBREVIATIONS
In US Terms;
- Ch(s) – Chain(s)
- Sl st – Slip stitch
- Sc – Single crochet
- St – Stitch
- Sk – Skip
- CA – Color A
- CB – Color B
- CC – Color C
NOTES
- When the pattern states to chain 2, this chain 2 is going to count as a chain 1 space. These should be fairly easy to find at the end of each round to work into, but you might benefit from placing a stitch marker around those chains if you are new to the stitch.
- If you decide to change the size of your baby blanket, you are welcome to do so. This pattern requires an EVEN amount of stitches. As long as you chain an ODD amount, you should be fine.
- To change color, finish your last single crochet of the row with the new color.
- You can crochet over the ends as you change colors if you prefer but I decided to weave mine in at the end.
- I chose to weave mine at the end because, if you choose to crochet over both of the tails (the ending tail from your previous yarn and the starting tail from your new yarn), it will bulk the blanket up a bit in that one area. I personally did not like the look of this, and chose to weave mine in before working the border.
- If you do decide to crochet over your ends, make sure that on the row after your first row where you crocheted over the ends, you pick up the tail yarn that is hanging out in the chain 1 space from the previous row.
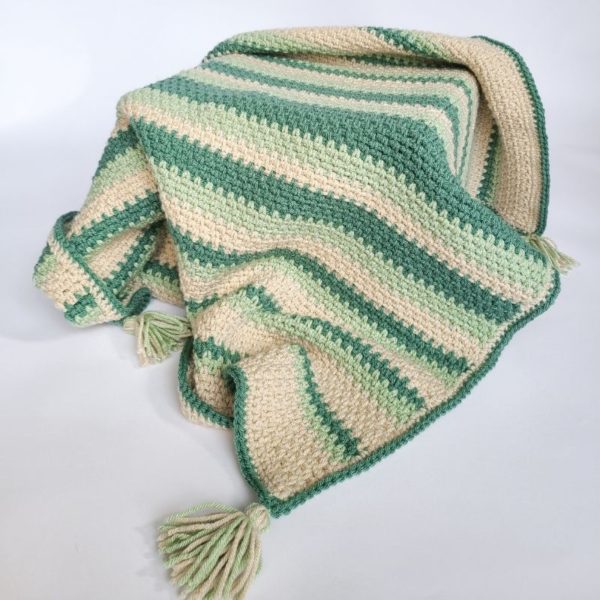
How to Make This Easy Crochet Baby Afghan
With CA, chain 119.
Your stitch count for each row will always be 118.
R1 – sc in 3rd chain from hook. [ch 1, sk 1 chain, 1 sc in the next]. Repeat across the row to the end. Your final sc should be in the last chain.
R2 – ch 2, turn. Sk the first sc, place 1 sc in the first chain 1 spc. [ch 1, sk the sc, 1 sc in next ch 1 spc]. Repeat across the row to the end. Your last sc should be in the chain space created at the beginning of R1.
(A good time to put a stitch marker around the ch 2 if you want to mark your chain 1 space is before you work the first sc of the row).
R3 through R7 – Repeat R2 with CA. On the final sc of R7, change to CB.
R8 and R9 – Repeat R2 with CB. On the final sc of R9, change to CC.
R10 and R11 – Repeat R2 with CC. On the final sc of R11, change to CA.
R12 through R17 – Repeat R2 with CA. On the final sc of R17, change to CB.
R18 through R20 – Repeat R2 with CB. On the final sc of R20, change to CC.
R21 and R22 – Repeat R2 with CC. On the final sc of R22, change to CA.
R23 through R27 – Repeat R2 with CA. On the final sc of R27, change to CB.
R28 through R30 – Repeat R2 with CB. On the final sc of R30, change to CC.
R31 through R33 – Repeat R2 with CC. On the final sc of R33, change to CA.
R34 through R37 – Repeat R2 with CA. On the final sc of R37, change to CB.
R38 through R41 – Repeat R2 with CB. On the final sc of R41, change to CC.
R42 through R46 – Repeat R2 with CC. On the final sc of R46, change to CA.
R47 through R49 – Repeat R2 with CA. On the final sc of R49, change to CB.
R50 through R53 – Repeat R2 with CB. On the final sc of R53, change to CC.
R54 through R61 – Repeat R2 with CC. On the final sc of R61, change to CB.
R62 through R65 – Repeat R2 with CB. On the final sc of R65, change to CA.
R66 through R68 – Repeat R2 with CA. On the final sc of R68, change to CC.
R69 through R73 – Repeat R2 with CC. On the final sc of R73, change to CB.
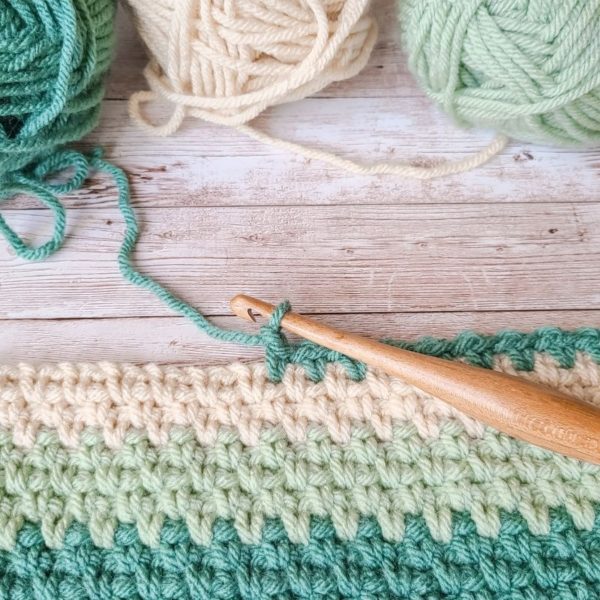
R74 through R77 – Repeat R2 with CB. On the final sc of R66, change to CA.
R78 through R81 – Repeat R2 with CA. On the final sc of R81, change to CC.
R82 through R84 – Repeat R2 with CC. On the final sc of R84, change to CB.
R85 through R87 – Repeat R2 with CB. On the final sc of R87, change to CA.
R88 through R92 – Repeat R2 with CA. On the final sc of R92, change to CC.
R93 and R94 – Repeat R2 with CC. On the final sc of R94, change to CB.
R95 through R97 – Repeat R2 with CB. On the final sc of R97, change to CA.
R98 through R103 – Repeat R2 with CA. On the final sc of R103, change to CC.
R104 and R105 – Repeat R2 with CC. On the final sc of R105, change to CB.
R106 and R107 – Repeat R2 with CB. On the final sc of R107, change to CA.
R108 through R114 – Repeat R2 with CA.
Do not trim yarn. You might find it best to place a stitch marker in the working yarn so that you do not lose your place.
Before working the border, you’ll want to weave in your ends (if you did not crochet over them). Using your tapestry needle, weave your ends in through the stitches that match the color of the end.
Once you have weaved in all of your ends, we can move on to the border.
BORDER
Reintroduce your hook to your working yarn (CA).
R1 – Ch 1, turn. Place 1 sc in each sc and ch 1 space across the row. When you reach the end, chain 2 and turn your work so that you are working along the raw edge of the blanket. Place 1 sc in the side of each row down the length. When you reach the end, chain 2 and turn your work so that you are working along the bottom bumps of your starting chains. Place 1 sc in each chain across the row. When you reach the end, chain 2, turn so you are working along the final edge. Place 1 sc in the side of each row up the length. When you reach the end, chain 2, slip stitch to the first sc to close.
R2 – Change to CC. Place 1 sc in each stitch around. In the ch 2 corner spaces, place 1 sc, chain 1, 1 sc. Once you have worked your way around, slip stitch to the first sc to close, finish off and weave in any remaining ends.
Of course, you can add any border you like onto the blanket, but I felt the two rounds were a perfect, simple border for this easy crochet baby afghan pattern as I wanted the color pattern to stand out. After some discussion, the expecting momma and I decided on tassels to finish off this afghan. Originally we had considered fringe, but we decided that the simple finish of tassels added a little something to the baby blanket without taking away from the overall personality.
You can forgo the tassels if you prefer. If you would like to add tassels but have never made them before, check out my tassel tutorial. Once you’ve created your four tassels, attach one to each corner of the baby blanket in the chain 1 spaces.
Once you’ve finished with your border and adding your tassels (or fringe or neither, up to you!), you’re all done!
I hope you love the Fledgling Baby Afghan as much as myself and the expecting momma do. Enjoy!
One of my greatest joys is seeing your finished crochet projects from my patterns or tutorials, so when you post to Instagram, don’t forget to tag me so I can show you some love! I’m @theloopholefoxcrochet. You can also share pictures on my recent posts on Facebook or within my Facebook group!
And don’t forget to pin this to your Pinterest boards, so you can remember it for later!
Don’t forget to join my Facebook Group so we can chat all about your creations! We are a group for crocheters of all experiences, all interests and love to hang out together. Come join the fun!
Shannon | Designer & Editor
Shannon helps crocheters find their next project and build their skills with in depth tutorials and crochet patterns on her blog, theloopholefox.com.
With more than a decade of crochet experience, Shannon knows that understanding why we do something matters just as much as how we do it. She teaches new techniques and crochet stitches in depth so you can crochet with confidence.
Find More Free Crochet Baby Afghan Patterns:
Something New Baby Blanket
Strawberry Shortcake Baby Blanket
Gingham Baby Blanket
Rising Star Baby Blanket
Piper Baby Blanket


The colors in the baby blanket are gorgeous! Perfect!
Thank you! I must give credit to the expecting momma, she knocked it out of the park with her color scheme!