How to Crochet the Even Moss Stitch
I think perhaps my favorite thing about crochet is how you can make so many different textures and styles with just a hook and some yarn. It can be so easy to add fun textures and personalities to our work by using simple crochet stitches. One of my favorite crochet stitches is the even moss stitch, a very simple “technique” that can add a ton of textured personality to our projects.
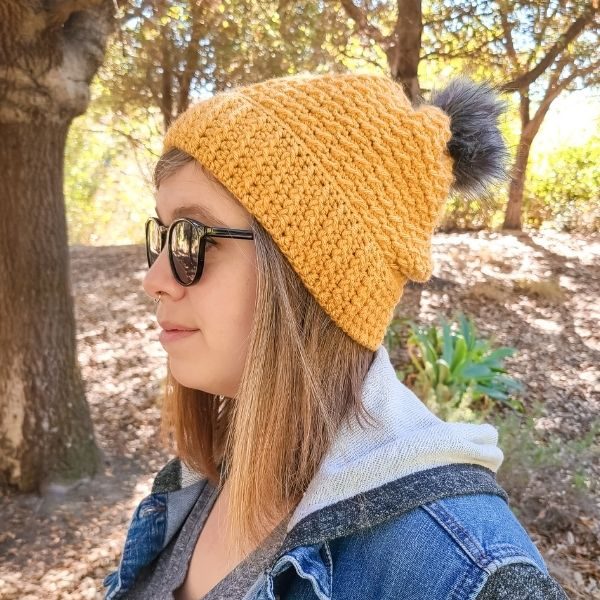
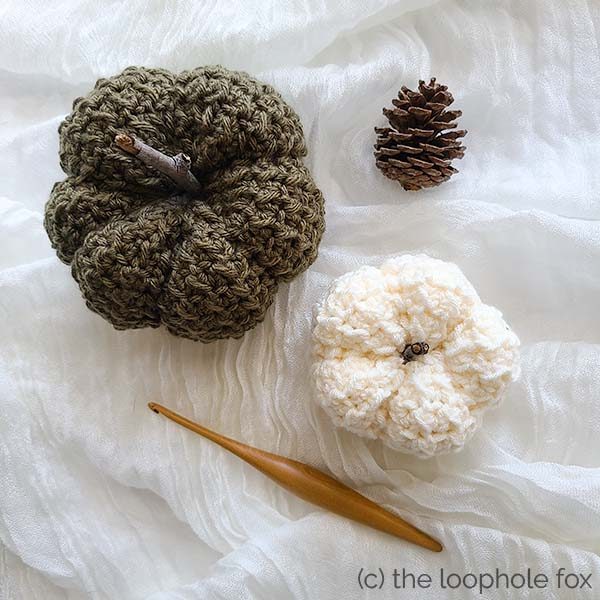
Honestly, I have to actively stop myself from using the even moss stitch in basically every pattern I write. I love it. I’ve used it in several of my patterns, including my Arctic Beanie and my Woodland Pumpkin Pattern.
DISCLAIMER: This post includes affiliate links. This means, should you decide to purchase a product via one of these links, I will receive a small commission at no extra cost to you. I only recommend products I use and love (Or products I know others love, have heavily researched, know have good ratings and plan to purchase myself). These small commissions help to support this blog and continue keeping most of my patterns free. You can read more on my Privacy Policy, if you prefer.
The even moss stitch creates a lovely textured finish in a dense, closed stitch without being to heavy or bulky. Some textured stitches create a lot of bulk and thickness when worked, which can be great for some projects, but the crochet even moss stitch is light weight enough for beanies, scarves and other projects that you would generally want to be a lighter weight. This keeps these projects light weight and easy to wear yet warm enough to keep the cold at bay. It also has enough texture that it could make a great textured crochet washcloth or really anything you can think of.
You can see different uses of the even moss stitch in my Arctic Beanie, my Adorable Little Pumpkins and in my Kinship Square, a 9 inch x 9 inch square for The Friendship Blanket CAL.
How to Crochet the Even Moss Stitch
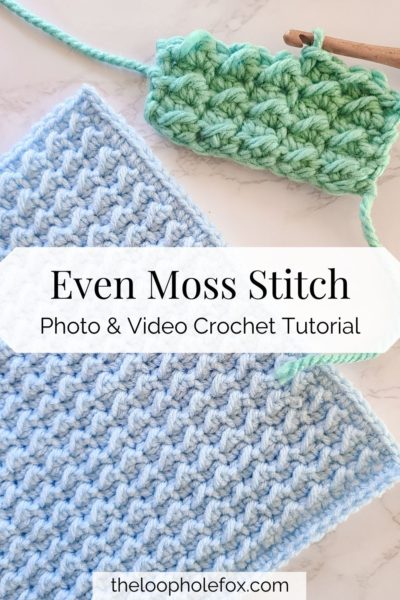
To practice this stitch, you can use any yarn weight and a hook that corresponds with the yarn. In the pictures and video tutorial below, I am using Bernat Softee Chunky in Sea Green which is a chunky (6) weight yarn, and my 7 mm Furls Streamline Wood in Teak.
Things to remember about the Even Moss Crochet Stitch before you start practicing:
- This stitch requires an odd stitch count. You don’t have to worry about having enough chains to work into for the stitch pattern to repeat or anything fancy. As long as you have an odd stitch count, you’re set!
- This means you will chain an even amount of chains. We chain an even amount because we want an odd stitch count plus one turning chain.
- The row repeats do not change. You will always be working the same row repeat.
- You will always start your row with a slip stitch in the first stitch and a slip stitch in the last stitch.
- You will always place a slip stitch in to the slip stitch from the row below, and a half double crochet in the half double crochet from the row below (this will make sense later, I promise. (: )
- Always work into the TOP of the half double crochet and make sure to not pick up the 3rd loop.
- And always have fun. 🙂
If you prefer to learn via video, you can use the video below to learn how to crochet the even moss stitch. Scroll past the video to get to the photo tutorial, if you prefer photo tutorials.
Let’s get started!
ROW 1
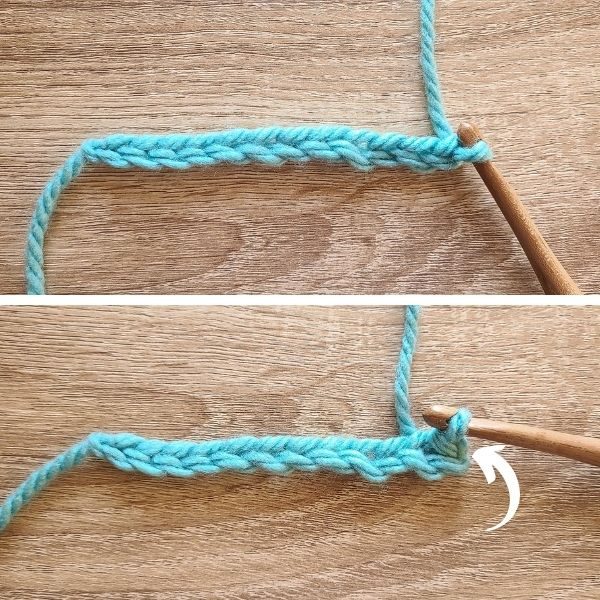
Step 1: Chain an even amount of chains. In this example, I have chained 12.
*Remember, we want to have an odd number of stitches on the first row which is why we chain an even number.
Step 2: Slip stitch into the second chain from the hook. You can see a white arrow pointing to my first slip stitch of this row.
*If you find it difficult to find the slip stitches at the beginning and end of each row, try using stitch markers.
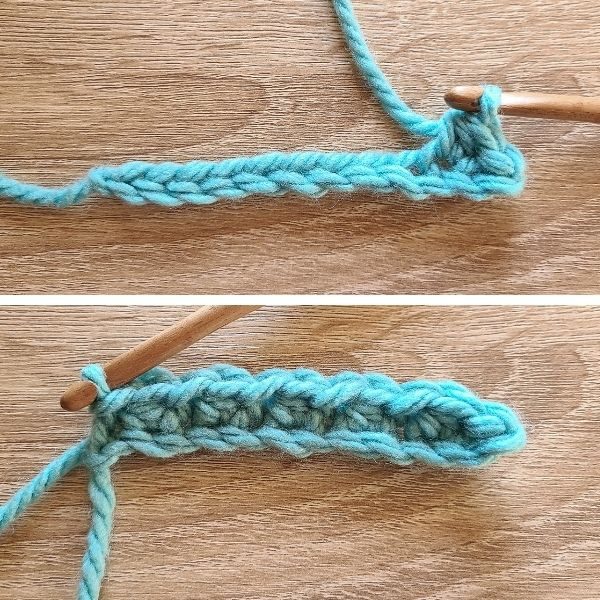
Step 3: In the next stitch, place one half double crochet. You can see my first half double crochet in the top picture.
Step 4: Across the row, you will repeat putting one slip stitch and one half double crochet. So, from where Step 3 left off, we will place a slip stitch in the next stitch, a half double crochet in the next, then a slip stitch, then a half double crochet, etc. Your last stitch of the row should be a slip stitch. Your work should look like the second picture.
This completes row 1 of the even moss crochet stitch. It might look a little wonky, but don’t worry! When you turn your work, you will see the effect the slip stitches have on the half double crochets sandwiched in between them. Because the slip stitches are so short, they cause the half double crochet to shrink down a bit and now the half double crochets have a very pronounced 3rd loop.
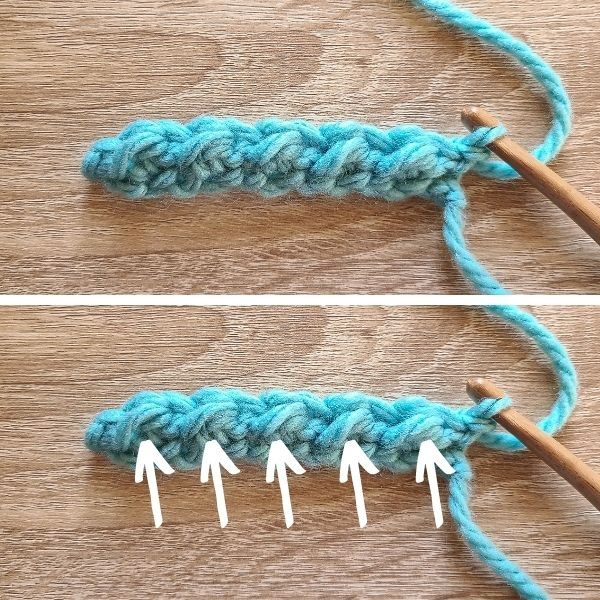
In the pictures above, I’ve shown how the work looks when you turn and used white arrows to point out the 3rd loops of the half double crochets.
Let’s move on to row 2 (and all subsequent rows).
ROW 2 (And every row moving forward)
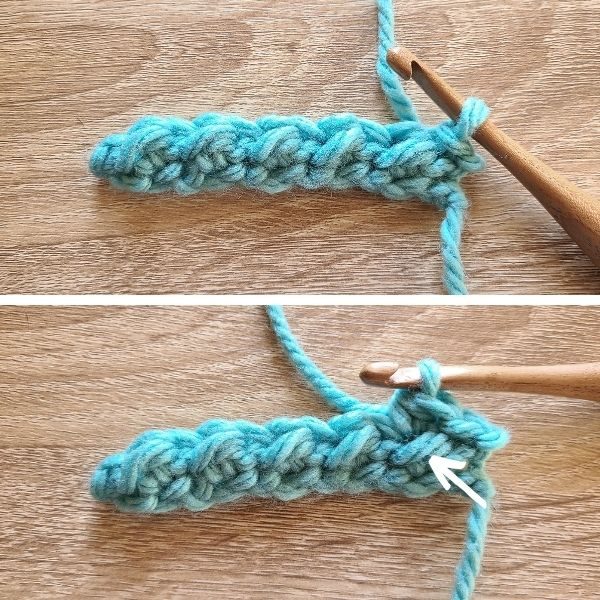
Step 1: Chain 1 and turn (if you haven’t already). Locate the last slip stitch you placed into the previous row. Slip stitch into it. (Top picture above)
*Personally, I think it is better to chain 1 and slip stitch into the first slip stitch versus just counting the chain 1 as a slip stitch. Here’s why: Throughout this work, you do need to build some height to keep your work from bowing a bit on the sides. The slip stitches, of course, are very short stitches and therefore benefit from the chain one and placing a slip stitch in the slip stitch because it brings the sides of your work up to meet the rest of the row. It also makes it much easier to place a border around your work later.
Step 2: Place a half double crochet in the TOP of the half double crochet. Make sure you don’t pick up the third loop, which is indicated with a white arrow in the second picture above.
*The 3rd loop creates that gorgeous wavy texture in this stitch, so we absolutely want to make sure we don’t pick that up.
Step 3: Complete the row by alternating a slip stitch and a half double crochet. Always place your slip stitch in the slip stitch from the previous row and your half double crochet in the top of the half double crochet of the previous row.
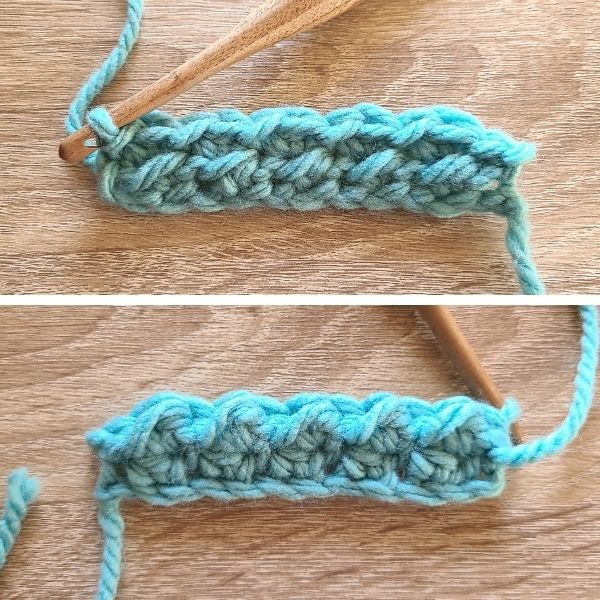
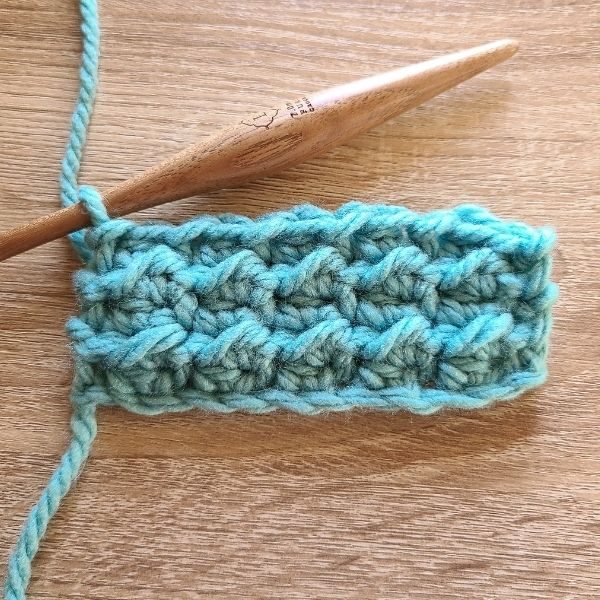
At the end row, you should now have a wavy, looped texture in between your two rows. You can see what I mean in the top picture above.
When you turn your work (lower picture above), the texture of the even moss stitch is now beginning along the row you’ve just completed.
Throughout your work using the even moss stitch, these textured rows will alternate and create the lovely textured pattern on both sides of your work.
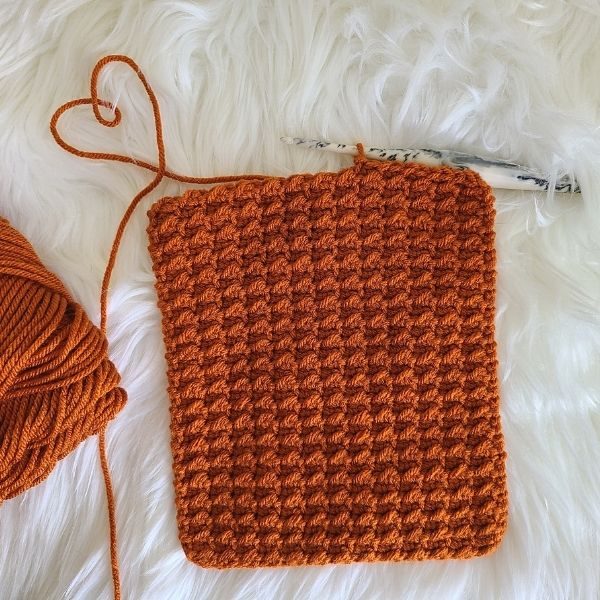
Here I’ve completed a few more rows using this stitch so you can see how the texture plays out.
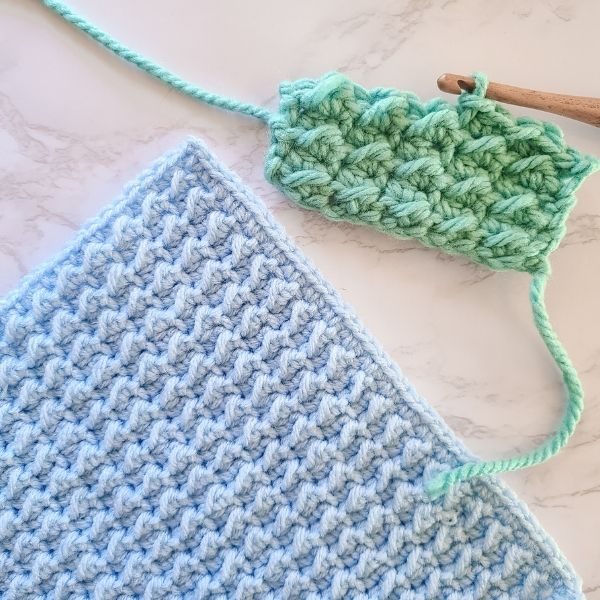
And here you can see how this stitch looks in a bulky weight yarn and in a medium weight yarn. Lovely either way!
The even moss stitch is such an easy and fun way to add a lightweight yet dense texture to any project you can think of. I think you will absolutely love it.
If you’re looking for a simple pattern to test your new crochet stitch skills on, I highly recommend my Kinship Square for the Friendship Blanket CAL. You can work this square alone and use it as a wash cloth or practice swatch, or you can join the CAL if you like!
Or, you can try some of my other patterns that feature the even moss stitch such as my Arctic Beanie
or my Woodland Pumpkins.
I hope you love this stitch and I hope you feel confident moving forward with using it in anything you can think of after this tutorial.
Is there a stitch tutorial you’d like to see on my blog? Let me know in the comments!
One of my greatest joys is seeing your finished crochet projects from my patterns or tutorials, so when you post to Instagram, don’t forget to tag me so I can show you some love! I’m @theloopholefoxcrochet. You can also share pictures on my recent posts on Facebook or within my Facebook group!
Don’t forget to join my Facebook Group so we can chat all about your creations! We are a group for crocheters of all experiences, all interests and love to hang out together. Come join the fun!

Shannon | Designer & Editor
Shannon helps crocheters find their next project and build their skills with in depth tutorials and crochet patterns on her blog, theloopholefox.com.
With more than a decade of crochet experience, Shannon knows that understanding why we do something matters just as much as how we do it. She teaches new techniques and crochet stitches in depth so you can crochet with confidence.