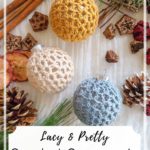
Eulah Bauble Ornaments
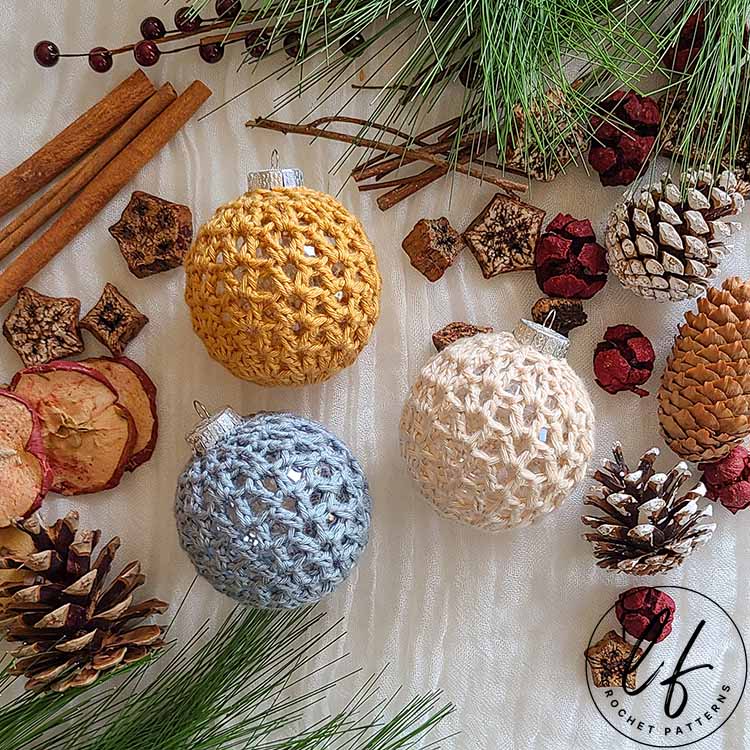
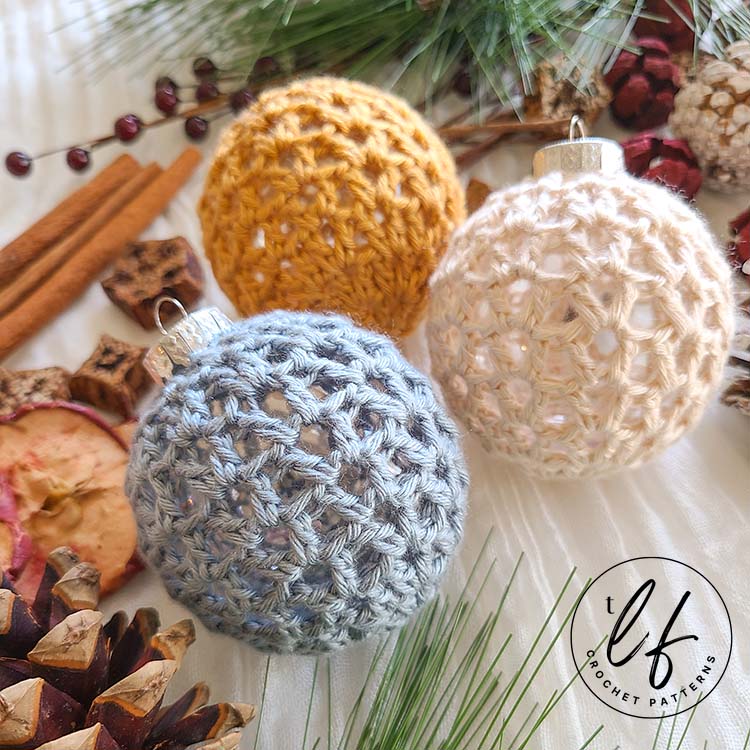
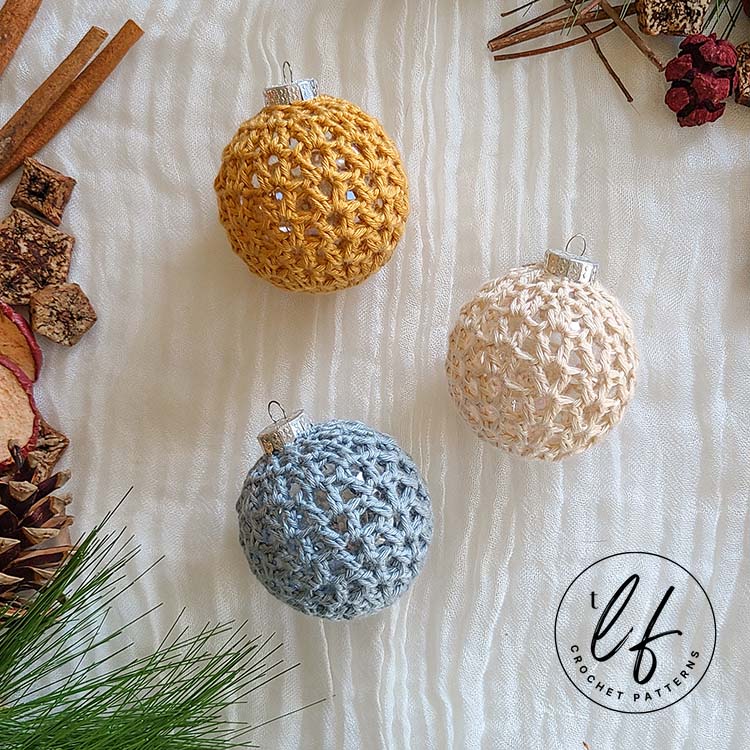
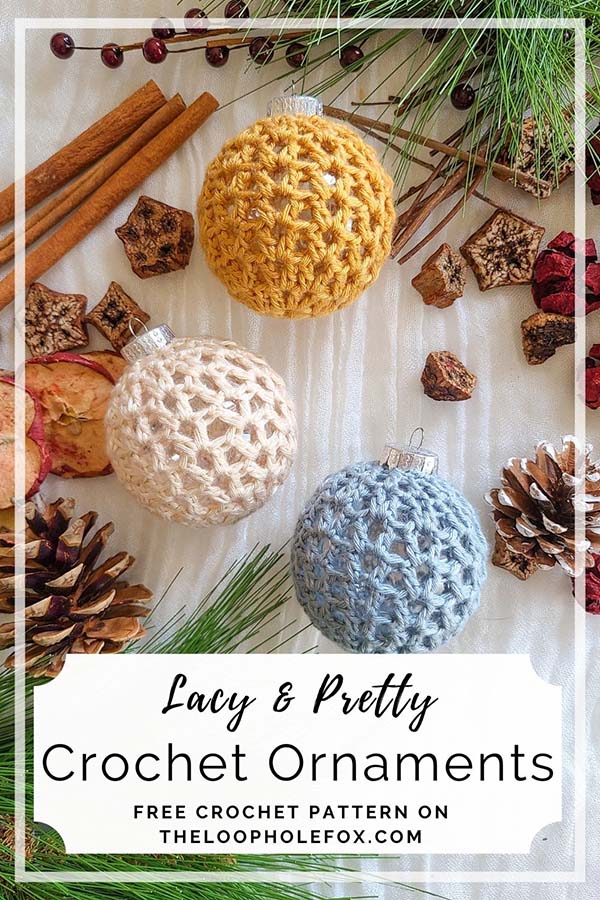
It’s time to start decorating our trees to celebrate the holiday season! These Eulah crochet Christmas baubles will be a perfect addition to your crochet Christmas ornaments this year.
Love these crochet Christmas baubles? Pin them to Pinterest!
I love the idea of delicate, pretty Christmas ornaments that look impossibly crafted and beautifully done. My grandmother was the queen of creating crocheted Christmas ornaments, though they weren’t baubles. When we pulled the tree out to decorate every year, I marveled over these small doilies, snowflakes and stars that clearly were made from thread but were structured and hard, so has to stand firm. Of course, she starched them so that they’d stay open and beautiful while hanging but kiddo me that didn’t know how to crochet didn’t know that. 😉
DISCLAIMER: This post includes affiliate links. This means, should you decide to purchase a product via one of these links, I will receive a small commission at no extra cost to you. I only recommend products I use and love (Or products I know others love, have heavily researched, know have good ratings and plan to purchase myself). These small commissions help to support this blog and continue keeping most of my patterns free. You can read more on my Privacy Policy, if you prefer.
Inspiration for the Eulah Crochet Christmas Baubles
So, when inspired to create a crochet Christmas baubles ornament pattern, I was reminded of these special treasures that my grandmother had made. I wanted to honor the style of a lacy crochet ornament from her era but bring it to life in our current, modern style.
To avoid needing to starch and shape the work, I decided on crocheting over a plastic Christmas bauble. This keeps us from having to fiddle around with a bunch of steps to create a structured orb and gives the work the perfect, Christmas bauble shape that we love to see on our trees.
I have to admit… I’m not the biggest fan of general “Christmas Colors” such as red, green and white. I’ve absolutely loved seeing the style of Christmas decorations change over the years to include more colors that may not be quite as obviously “holiday” colors, such as blues and yellows.
I just so happened to have some blue, yellow and cream yarn left over from my Thursday Shawl pattern and, ever the frugal girl, I used those scraps to create these beautiful crochet Christmas baubles.
If you’d prefer a premium PDF of this pattern, with a step by step photo tutorial, you can grab one in my Etsy Shop! Click the button below.
Eulah Ornament Construction Technique and Information
These crochet Christmas baubles are crocheted around a plastic, clear ball ornament. While technically all of the rounds except the final round are crocheted separately, the finished piece will sit firmly over the ball ornament with no seaming required.
This crochet Christmas baubles pattern is worked using 2 – Fine (Sport) weight yarn and a specific size of ornament. You could likely double up on 1 – Super Fine (Fingering) weight yarn if you have some laying around, but I have not tested the specifics of using fingering weight doubled.
It is important to check your gauge with this pattern, to ensure the work will fit over the bauble. Your work should be snug against the Christmas ball ornament, but it shouldn’t be so tight that you have to fight to slip it over.
SKILL LEVEL
Advanced Beginner to Intermediate – This crochet Christmas baubles pattern requires basic stitches such as slip stitch, chains and double crochets. It also requires knowing how to create chain spaces, identify them and work into them, work in closed rounds and check gauge. Advanced Beginners should be able to work this pattern just fine. The most fiddly part is the last round, which we work while the project is ON the ball ornament. This feels fiddly if you haven’t done it before, but is otherwise a straightforward round to work.
MATERIALS
Yarn
Fine (Sport Weight – 2) weight yarn of your choice in any color you prefer.
You will need approximately:
0.5 oz/ 10 g/ 30 yards
Yarn Used
Brand: Yarn Bee Yarntopia
Blue – Colorway: Cerulean Sea
White – Colorway: Ivory
Yellow – Colorway: Gold
ADDITIONAL MATERIAL/ITEM REQUIRED
You will also need Plastic Christmas Baubles approximately 2 ⅝ inches in diameter, as many as you prefer to make. Measured with a cloth measuring tape, this is approximately 8 ½ inches in circumference around the widest portion of the bauble.
I used ball ornaments I purchased as single baubles from Hobby Lobby last year, though I don’t know that they still have those available.
Here’s a pack of 25 Christmas ball ornaments on Amazon in the correct size, which can help you start your search if you need to purchase some.
I would recommend to use plastic, not glass. While the work isn’t so tight that it would break the ornament, plastic is safer when working the last round and in general – especially if you have kiddos!

TOOLS
4 mm (G-6) Hook (Or hook size needed to achieve gauge) – I used my favorite Furls Streamline Swirl in Cookies and Cream!
Tapestry needle
Scissors
Stitch Markers
GAUGE
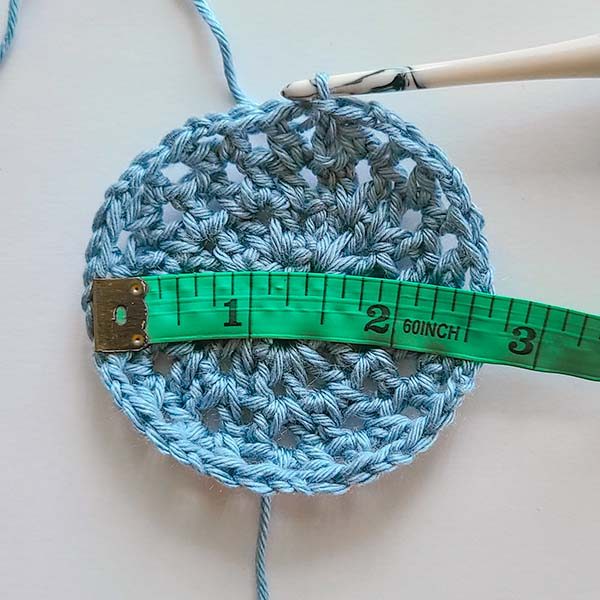
Your work after Round 4 should measure approximately 2 ½ inches across (in diameter).
Note: I am a tight crocheter, though I made a point to not crochet as tightly for these ornaments. If your work is too big, go down a hook size. If your work is too small, go up a hook size.
If you’re just about 2 ½ inches, your work should fit over the bauble just fine.
FINISHED SIZE
This crochet project fits a plastic Christmas Bauble that is approximately 2 ⅝ inches in diameter.
ABBREVIATIONS
- Ch – Chain
- Sl St – Slip Stitch
- Dc – Double Crochet
- Spc(s) – Space(s)
- St(s) – Stitch(es)
- (…) – Stitch counts are listed at the end of row in ( ) and bold italics.
- […] – Pattern repeats are listed within brackets.
- (…Instructions…) – Instructions written within parentheses indicate to work all stitches in the same indicated space.
NOTES
- This pattern uses the “V” stitch in two different versions to slowly increase and decrease. There is both the “standard” V stitch with 1 chain space between double crochets, and a “wide” version with a chain 2 space between double crochets.
- While this is the stitch used in the work, the pattern instructions will state actual stitches to be worked – it won’t call it a “V” stitch. For example, in some rounds it states “(1 dc, ch 1, 1 dc)” and in some rounds it states “(1 dc, ch 2, 1 dc)”. These are the different versions.
- The pattern writes out each step specifically to avoid confusion. These different variations of the V stitch are used to slowly increase and decrease as necessary.
- This pattern is worked entirely in closed rounds.
- Chain 2 does not count as a stitch.
- Chain 3 at the beginning of rounds count as a double crochet and a chain 1 space.
- Chain 4 at the beginning of rounds count as both a double crochet and a chain 2 space.
- All stitches are worked into chain spaces. You will never place a stitch into the top of another stitch.
If you’re a crocheter who prefers visuals and would like to see each step of the process of creating these crochet Christmas baubles, I recommend the inexpensive PDF pattern! The PDF comes with a photo tutorial with all steps written out in full sentences to help beginners through. A second Printer Friendly version also comes with your purchase.
How to make these crochet Christmas baubles
Round 1 – In magic circle, ch 3 (counts as dc + ch 1 here and throughout), [place 1 dc, ch 1]. Repeat inside brackets 5x. Sl st to 2nd ch of ch 3 to close. (6 dc, 6 ch 1 spc)
Round 2 – Sl st into ch 1 spc. Ch 3, in same ch 1 spc, work (1 dc, ch 1, 1 dc). [sk 1 st, work (1 dc, ch 1, 1 dc, ch 1, 1 dc) in ch 1 spc]. Repeat inside brackets 5x. Sl st to 2nd ch of ch 3 to close. (18 dc, 12 ch 1 spcs)
Round 3 – Sl st into ch 1 spc. Ch 4, (counts as dc + ch 2 here and throughout), dc same ch 1 spc. Sk 1 st, work (1 dc, ch 2, 1 dc) in ch 1 spc. [Sk 2 sts, work (1 dc, ch 2, 1 dc) in ch 1 spc. Sk 1 st, work (1 dc, ch 2, 1 dc) in ch 1 spc]. Repeat inside brackets 5x. Sk last st, sl st to 2nd ch of ch 4 to close. (24 dc, 12 ch 2 spcs)
Round 4 – Sl st into ch 1 spc. Ch 4, dc same ch 2 spc. [Sk 2 sts, work (1 dc, ch 2, 1 dc) in ch 2 spc]. Repeat inside brackets 11x. Sl st to 2nd ch of ch 4 to close. (24 dc, 12 ch 2 spcs)
Stop here and check gauge!
Round 5 through Round 7 – Repeat Round 4.
Round 8 – Sl st into ch 1 spc. Ch 3, dc same ch 2 spc. [Sk 2 sts, work (1 dc, ch 1, 1 dc) in ch 2 spc]. Repeat inside brackets 11x. Sl st to 2nd ch of ch 4 to close. (24 dc, 12 ch 1 spcs)
Place bauble inside of work with the right side of work facing out. The final round is worked with the bauble inside. There should be about an inch of space left between the work and the “stem”.
Round 9 – Sl st into ch 1 spc. Ch 2 (doesn’t count as a stitch), place dc in same ch 1 spc. [Sk 1 st, 1 dc in ch 1 spc]. Repeat inside brackets 11x. Sl st to the top of the first dc to close. (12)
Trim yarn, leave a tail of about 3-4 inches for cinching top closed and weaving ends.
Your final round should be pretty snug against the stem of the bauble. We can ensure the snugness by cinching the top. With your tapestry needle, weave the yarn in and out of the tops of the stitches from Round 9. Once all the way around, pull tight to ensure snugness. Tie a knot to hold the yarn in place, then weave in your ends.
You’re done!
Don’t forget! If you’d like to grab an inexpensive, PDF version of this pattern with photos and the steps written out in detail, you can grab a copy by visiting my Etsy shop by clicking the button below.
Aren’t they so simple and pretty? I can’t wait to have them hanging on my Christmas tree this year. Enjoy!
One of my greatest joys is seeing your finished crochet projects from my patterns or tutorials, so when you post to Instagram, don’t forget to tag me so I can show you some love! I’m @theloopholefoxcrochet. You can also share pictures on my recent posts on Facebook or within my Facebook group!
And don’t forget to pin this to your Pinterest boards, so you can remember it for later!
Don’t forget to join my Facebook Group so we can chat all about your creations! We are a group for crocheters of all experiences, all interests and love to hang out together. Come join the fun!

Shannon | Designer & Editor
Shannon helps crocheters find their next project and build their skills with in depth tutorials and crochet patterns on her blog, theloopholefox.com.
With more than a decade of crochet experience, Shannon knows that understanding why we do something matters just as much as how we do it. She teaches new techniques and crochet stitches in depth so you can crochet with confidence.
Looking for more Crochet Christmas Patterns? Check these out!
Classic Christmas Stocking Pattern
Crochet Santa and Elf Stocking Cap Pattern
C2C Reindeer Afghan Square