
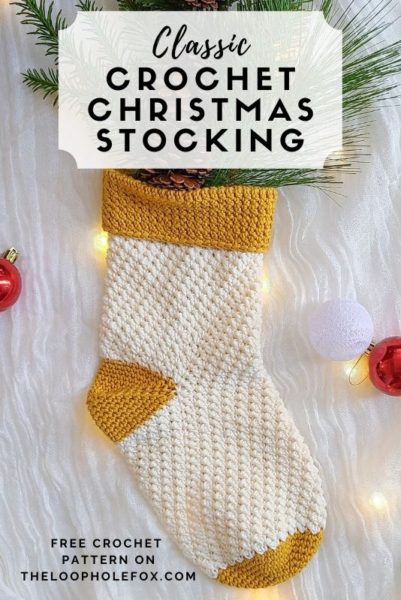
Classic Christmas Stocking
When I was a kiddo, I absolutely loved being handed my Christmas stocking filled with little trinkets and goodies. It was so fun to see how many items were stuffed inside and appreciating the little prizes. The Classic Crochet Christmas Stocking is perfect for packing full of stocking stuffers. Designed using a tight stitch, there will be no peaking until Christmas morning!
It’s Cute, It’s Classic, It’s Textured!
A staple in Christmas Decorations is the stocking. Wherever they’re hung, Christmas Stockings add the final warm touch to holiday decor. Make your Christmas decor even more comfy and cozy with these crochet Christmas stockings!
Personally, I love classic yet modern takes on all sorts of things. When I set out to design this crochet Christmas stocking, I knew I wanted it to be classic with a bit of a modern twist. That, of course, meant texture and fun colors that aren’t the standard red, white and green.
Because I love my crochet projects to be practical, I decided on a crochet stitch that would create a crochet Christmas stocking free from gaps and holes. While I love the look of lacy stockings, they can be a little difficult to put gifts inside without getting the edges of the presents stuck in the beautiful, open stitches.
DISCLAIMER: This post includes affiliate links. This means, should you decide to purchase a product via one of these links, I will receive a small commission at no extra cost to you. I only recommend products I use and love (Or products I know others love, have heavily researched, know have good ratings and plan to purchase myself). These small commissions help to support this blog and continue keeping most of my patterns free. You can read more on my Privacy Policy, if you prefer.
If you prefer an inexpensive PDF version of this pattern with step by step photo tutorials, you can grab one on either my Ravelry or my Etsy shop by clicking the buttons below.
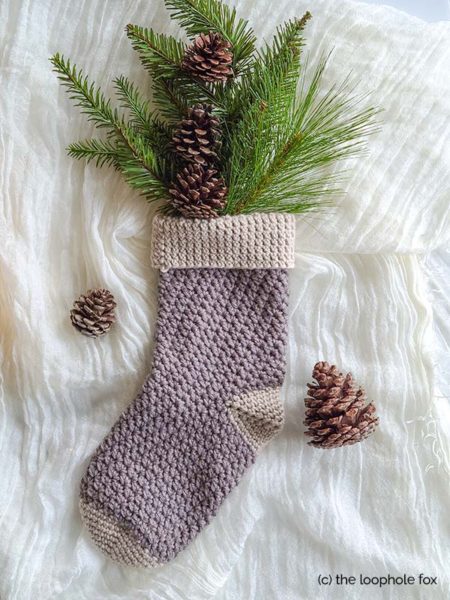
This crochet Christmas stocking looks great in any fiber you might like to use. For the original design, I used We Crochet’s Swish Bulky (white and grey stocking), which is a 100% wool yarn. It turned out lovely with beautiful texture that doesn’t overwhelm or take away from the classic look.
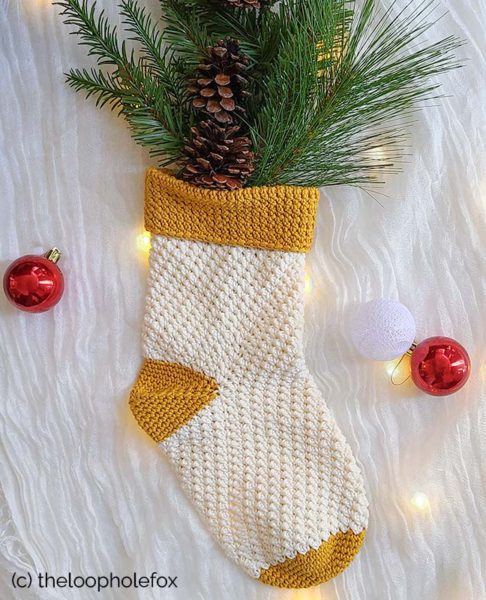
I loved the texture of the stocking using this yarn and I wanted to see how it would turn out using a cotton blend yarn (white and yellow stocking). So, I created a second crochet Christmas stocking using Bernat Softee Cotton, which is a cotton/acrylic blend similar to a Caron Cotton Cake. With the cotton/acrylic blend yarn, the texture stood out even more and had a bit more of a crisp look.
With the simple texture and ability to use any yarn you prefer depending on the finish you’d like, this classic Christmas stocking is a fantastic piece of holiday decor for any style.
Classic Crochet Christmas Stocking Overview
This crochet Christmas stocking it worked from the toe up, with an afterthought heel. This means that the heel is worked last and is worked directly onto the stocking in rounds. We will work the toe, then the foot, create an opening for the heel, work the leg and the cuff. The heel is worked directly into the opening we created using closed decrease rounds.
SKILL LEVEL
Advanced/Confident Beginner – This crochet Christmas stocking mostly uses basic stitches such as single crochet and double crochet. There are some advanced stitches, such as Extended Single Crochet and Single Crochet 2 Together that are used but aren’t super advanced. Crocheters looking to make this crochet Christmas stocking should know how to: chain, slip stitch, single crochet, double crochet, work in closed rounds and work into the bottom of chains.
MATERIALS
A lighter Bulky (5) or a heavier Medium (4) weight yarn of your choice. You will need two colors.
You will need approximately:
Color A: 1.5 oz/ 45g/ 62 yards
Color B: 4.1 oz/ 115g/ 160 yards
Yarn Used – White and Grey stocking
Color A: We Crochet Swish Bulky in Nutmeg Heather (White)
Color B: We Crochet Swish Bulky in Squirrel Heather (Grey)
If you’d like a smaller stocking, you can easily alter the size by going down a yarn weight to a Medium worsted or even a DK. This design looks fantastic in a Medium Cotton/Acrylic blend, as seen with the white and yellow stocking in the images on this page. For this stocking, I used Bernat Softee Cotton which is a DK cotton weight yarn. I used colorways Golden (yellow) and Cotton (white).
TOOLS
5 mm (H-8) Hook – Check out my favorite hooks, the Furls Streamline Swirls!
Tapestry needle
Scissors & Stitch Markers
GAUGE
After working Round 8, your flat circle should be approximately 3.5 – 4 inches in diameter.
If your gauge is off, it’s not something to worry over. You can try a smaller or larger hook size, if preferred but your stocking will still look gorgeous regardless of whether or not it’s a little big or a little small.
NOTE: I am a tight crocheter, which means my tension is typically tighter than others.
FINISHED SIZE
Width: Approximately 5.5 inches.
Length (when hanging): Approximately 14.5 inches.
ABBREVIATIONS
- Ch – Chain
- Sl St – Slip Stitch
- Sc – Single Crochet
- Dc – Double Crochet
- Esc – Extended Single Crochet *
- Sk – Skip
- St(s) – Stitch(es)
- Sc2tog – Single Crochet 2 together *
- CA – Color A
- CB – Color B
- […] – Pattern repeats are shown inside brackets.
- (Instructions) – Instructions listed within the pattern indicate to work all stitches in the same stitch. Example: (1 sc, 1 dc).
- (…) – Stitch counts are listed at the end of row in ( ) and bold italics.
- * – See Special Stitches
NOTES
- This stocking is worked from the bottom up. We work the toe, the foot, create an opening for the heel, the leg and then the cuff.
- The heel for this stocking is an afterthought heel, which means it is the last portion of the stocking worked.
- The afterthought heel is created by working several decrease rounds and then seaming the heel opening closed.
- This stocking is worked entirely in closed rounds, including the heel.
- You will always slip stitch to the first stitch of the round to close.
- The rounds are never turned unless otherwise noted within the pattern.
- Chain 1 to begin a round never counts as a stitch.
- This stocking pattern was designed using a Bulky (5) weight yarn. The yarn used feels closer to an Aran (heavier Medium (4) weight) yarn.
- If you decide to substitute the yarn, I highly recommend looking for a Bulky (5) weight that is on the lighter side, or a heavier Medium. I Love This Yarn from Hobby Lobby, for example, would be a great substitution in the Medium (4) range.
SPECIAL STITCHES & TECHNIQUES
MAGIC CIRCLE
This pattern is written to use a magic circle. You can use the magic circle or you can chain 3 and slip stitch to the first chain made to create a circle to work into. Your choice!
If you don’t know how to work a magic circle but would like to learn, you can check out my Magic Circle photo and video tutorial!
EXTENDED SINGLE CROCHET (ESC)
Extended single crochet stitches are a variation of single crochets. They’re slightly taller and a little more room-y than standard single crochet stitches are.
If you notice your extended single crochets becoming significantly wider than your single crochets, switch to a smaller hook size.
To work an esc, you will: Insert hook into indicated stitch, yarn over and pull up a loop. Two loops on hook. Yarn over, pull loop through first loop on hook only. Two loops on hook. Yarn over, pull through two loops. Esc complete!
SINGLE CROCHET 2 TOGETHER (SC2TOG)
The afterthought heel of this stocking is worked by working decreasing rounds until nearly closed and then sewing the heel shut.
To decrease, we use sc2tog (single crochet 2 together).
To sc2tog, you will: Insert your hook into the first stitch, yarn over and pull up a loop. Insert hook into the next stitch, yarn over and pull up a loop. 3 loops on hook. Yarn over, pull through all 3 loops.
AFTERTHOUGHT HEEL
This stocking pattern uses an “afterthought” heel, which means the heel of the stocking is worked last and directly onto the work.
When you reach Round 27, you will make an opening for the heel with chains, but you will not work the heel. The heel is worked as the final portion of this project.
How to make this Classic Crochet Christmas Stocking
With CA,
Round 1 – In magic circle, ch 1 and place 5 sc. Sl st to first sc to close. (5)
Round 2 – Ch 1, place 2 sc in each st around. Sl st to first sc to close. (10)
Round 3 – Ch 1, [1 sc 1st st, 2 sc next]. Repeat inside brackets 5x. Sl st to first sc to close. (15)
Round 4 – Ch 1, [1 sc next 2 sts, 2 sc next]. Repeat inside brackets 5x. Sl st to first sc to close. (20)
Round 5 – Ch 1, [1 sc next 3 sts, 2 sc next]. Repeat inside brackets 5x. Sl st to first sc to close. (25)
Round 6 – Ch 1, [1 sc next 4 sts, 2 sc next]. Repeat inside brackets 5x. Sl st to first sc to close. (30)
Round 7 – Ch 1, [1 sc next 5 sts, 2 sc next]. Repeat inside brackets 5x. Sl st to first sc to close. (35)
Round 8 – Ch 1, [1 sc next 6 sts, 2 sc next]. Repeat inside brackets 5x. Sl st to first sc to close. (40)
Round 9 – Ch 1, place 1 sc in each stitch around. Sl st to first sc to close. (40)
*Finish last st of Round 9 with CB. Trim CA yarn.
Round 10 – Ch 1, (1 sc, 1 dc) in first st, sk 1 st. [(1 sc, 1 dc) in next st, sk 1 st]. Repeat inside brackets around to end. Sl st to first sc to close. (40)
Round 11 through 26 – Repeat Round 10.
(For Rounds 11 through 26, you will always be placing the (1 sc, 1 dc) in a sc and skipping the dc).
It can be helpful to mark the first single crochet of Round 26 with a stitch marker. You will need to identify this stitch later when we work the Afterthought Heel.
Round 27 – Ch 20. Sk 1st st and next 19 sts (20 sts total skipped), place (1 sc, 1 dc) in 21st st. Sk 1, [(1 sc, 1 dc) next st, sk 1 st]. Repeat inside brackets around to end. Sl st to first ch of ch 20 to close. (40 sts, including chains)
(The 21st st that you work into should be a sc).
Round 28 – Ch 1, 1 sc in first ch, 1 dc in next ch. [1 sc next ch, 1 dc next ch]. Repeat inside brackets 9x across chains to meet worked stitches from Round 27. Place (1 sc, 1 dc) in sc, sk 1 st. [(1 sc, 1 dc) in next st, sk 1 st]. Repeat inside brackets 9x across stitches. Sl st to first sc to close. (40)
If you’d like a picture tutorial to help walk you through the entire crochet Christmas stocking, including creating this opening and working the afterthought heel, you can purchase the inexpensive PDF! The PDF pattern includes a full picture tutorial with the steps written out in full sentences, to help you through.
Round 29 through 49 – Repeat Round 10.
*Finish last st of Round 49 with CA. Trim CB yarn.
Round 50 – Ch 1, TURN. Place 1 esc in each st around. (40)
(You should be working with the wrong side (or inside) of the stocking facing you).
Round 51 – Ch 1, do not turn. Place 1 esc in each st around. (40)
Round 52 through 58 – Repeat Round 51.
(If you notice your esc stitches becoming significantly wider than the leg of your stocking, switch to a smaller hook size).
Finish off yarn, weave in ends. Fold cuff over the leg of the stocking.
AFTERTHOUGHT HEEL
With CA,
Join yarn in first sc of Round 26 with a slip stitch. If you marked your first sc in Round 26 with a stitch marker, that is the indicated stitch.
With your stocking laid flat and your heel opening facing to the left, this stitch is in the bottom corner on the right hand side. (If you’re left handed, your heel opening will be facing to the right. This stitch is in the bottom corner on the left hand side).
Round 1 – Ch 1, place 1 sc in same st and next 19 stitches to corner of heel. Turn the stocking to work along the bottom of the chains made in Round 27 and work 1 sc in each chain across. Sl st to first sc made to close. (40)
(Try your best to keep this uniform and double check that you have 40 stitches before continuing on to Round 2.)
Round 2 – Ch 1, sc2tog, place 1 sc in each of the next 16 sts, sc2tog 2x, place 1 sc in each of the next 16 sts, sc2tog. Sl st to first sc2tog to close. (36)
Round 3 – Ch 1, sc2tog, place 1 sc in each of the next 14 sts, sc2tog 2x, place 1 sc in each of the next 14 sts, sc2tog. Sl st to first sc2tog to close. (32)
Round 4 – Ch 1, sc2tog, place 1 sc in each of the next 12 sts, sc2tog 2x, place 1 sc in each of the next 12 sts, sc2tog. Sl st to first sc2tog to close. (28)
Round 5 – Ch 1, sc2tog, place 1 sc in each of the next 10 sts, sc2tog 2x, place 1 sc in each of the next 10 sts, sc2tog. Sl st to first sc2tog to close. (24)
Round 6 – Ch 1, sc2tog, place 1 sc in each of the next 8 sts, sc2tog 2x, place 1 sc in each of the next 8 sts, sc2tog. Sl st to first sc2tog to close. (20)
Round 7 – Ch 1, sc2tog, place 1 sc in each of the next 6 sts, sc2tog 2x, place 1 sc in each of the next 6 sts, sc2tog. Sl st to first sc2tog to close. (16)
Round 8 – Ch 1, sc2tog, place 1 sc in each of the next 4 sts, sc2tog 2x, place 1 sc in each of the next 4 sts, sc2tog. Sl st to first sc2tog to close. (12)Cut your yarn but leave a tail of several inches for seaming. Tuck the tail of the yarn into the inside of the stocking.
Turn your stocking inside out. Seam the opening of the heel with your yarn and tapestry needle by sewing in and out of the stitches of Round 8 or slip stitch each of them closed. Whichever seaming method you prefer will work fine.
Weave in your ends and trim excess yarn. Turn your stocking right side out.
You’re done! You can now thread a piece of ribbon a few inches long through the top and back side of the cuff to hang your stocking.
Enjoy!
I hope you love your crochet Christmas stockings and I hope you and your loved ones have a lovely holiday season. Enjoy!
One of my greatest joys is seeing your finished crochet projects from my patterns or tutorials, so when you post to Instagram, don’t forget to tag me so I can show you some love! I’m @theloopholefoxcrochet. You can also share pictures on my recent posts on Facebook or within my Facebook group!
And don’t forget to pin this to your Pinterest boards, so you can remember it for later!
Don’t forget to join my Facebook Group so we can chat all about your creations! We are a group for crocheters of all experiences, all interests and love to hang out together. Come join the fun!

Shannon | Designer & Editor
Shannon helps crocheters find their next project and build their skills with in depth tutorials and crochet patterns on her blog, theloopholefox.com.
With more than a decade of crochet experience, Shannon knows that understanding why we do something matters just as much as how we do it. She teaches new techniques and crochet stitches in depth so you can crochet with confidence.
Looking for more Christmas crochet patterns? You’ll love these!

2 Comments
Comments are closed.