
In Bloom Ruana CAL – Seaming the Squares into a Ruana
The final part of the In Bloom Ruana CAL is here! All that’s left to do is to seam the 3 squares together before you can wear your gorgeous piece and show off your work.
If you’re ready to seam your squares into a ruana and you’d like to use the Invisible Whip Stitch seaming method, you’re in the right place!
Let’s jump right in!

How to Seam the Squares into the In Bloom Ruana – Layout
Before we start to seam the squares together, we need to know the layout.
Throughout this CAL, you will have made 3 total squares. You will have made 1 square of one of the patterns and 2 squares of the other pattern.
(Did you miss the square patterns? No problem! You can find them linked in the main In Bloom Ruana CAL post.)
For the sake of simplicity, we will call the square you made only one of Square A. The square you made 2 of we will call Square B.
Square A will be your middle square. This is the square that will be at the back of the Ruana.
Your two Square B’s will be on either side of Square A. These squares will be the parts of the Ruana that drape over your shoulders.
Lay your 3 squares down with their right sides facing up and Row 1 of the squares all facing toward the center as shown in the graphic below.

Square A should be your corner square. Circles in the corners of the squares in the graphic above indicate the Magic Circle that started each square/Row 1. Make sure each Magic Circle/Row 1 all point toward each other.
We will seam the 3 squares together as shown in the graphic, following the orange dotted arrows.
Seam together Square A and one of your Square B’s along the sides that “touch” starting from the outside (Row 48) and working your way toward the inside (Magic Circle/Row 1).
When you reach the “end” of these squares, do not cut your yarn. Continue to seam your second Square B to the other side of your Square A.

I used the Invisible Whip Stitch seam and Agat used Slip Stitch in Back Loops Only. These seaming methods are very similar. The major difference is that the Whip Stitch uses a tapestry needle and separate length of yarn and Slip Stitch uses a hook and the yarn already attached.
You’re welcome to use either seaming method you prefer or use a totally different seaming method. Any seaming method you choose is great!
How to Seam the Squares – Invisible Whip Stitch
MATERIALS
To seam your squares together using the Invisible Whip Stitch, you will need the same yarn you used to crochet your squares. Cut a length of yarn approximately 5 times as long as one side of a square. This will be more than enough yarn to seam your squares and weave in the seaming ends.
Yarn Used
I used Stylecraft Naturals Bamboo & Cotton DK in colorway Lavender. This yarn is 60% Bamboo and 40% Cotton.
TOOLS
Tapestry needle
Scissors
NOTE
Your squares OR your finished ruana will need to be blocked. If you prefer to block them as squares and haven’t already, block them before seaming. If you prefer to block the finished ruana, continue:
Step 1
Align the first 2 squares that will be seamed together. Right Side should be facing up and the sides that will be seamed should be horizontal to you.
- The corner chain 2 spaces created in the Magic Circle while creating the borders should be together and the corner chain 2 spaces created on the edge of Row 48 should be together.
- Begin in the corner chain space on the edge of Row 48.
Step 2
Insert the tapestry needle from Right Side to Wrong Side into the chain 2 space of the square closest to you. Then insert the needle from Wrong Side to Right Side into the chain 2 space of the other square (Pics 1 & 2, below). Pull yarn through and secure.
You can weave in the tail of yarn now or you can leave it until later. Either way, make sure it’s secure before you continue.

Step 3
Bring the yarn up and over the stitches. Insert needle into the Back Loop Only of the next 2 stitches (Pics 3 & 4 – Back Loops are highlighted pink and yellow in Pic 3, below). Your needle will insert into the Back Loop of the stitch on the bottom square from Right Side to Wrong Side. Then, your needle will insert into the Back Loop of the square on top from Wrong Side to Right Side.
Make sure to ignore the slip stitch that closed the border. It is not a stitch and if you work into it for seaming, you’ll have an extra stitch.

Step 4
Continue seaming the squares, making sure to insert your needle into the Back Loops Only (Pic 5, below). It can be easier to insert the needle into the Back Loops if you pinch the sides of the squares together so that they lift up (Pic 6, below).

Step 5
When you reach the corner chain 2 spaces in the Magic Circles, seam these together the same as the first 2 at the start of this seam (Pics 7 & 8, below).
- This part of the seam ends at the chain 2 space created in the Magic Circle during the border. Make sure to seam the corresponding stitches together. There are 97 stitches on this side plus the ch-2 spaces for a total of 99 stitches.

Step 6
Rotate the 2 seamed pieces so that the rectangle is horizontal. Align the final square to the unseamed side of the center square (Square A) with the Right Side facing up.
- The two sides that will be seamed will be horizontal to you.
- The corner chain 2 spaces created in the Magic Circle while creating the borders should be together and the corner chain 2 spaces created on the edge of Row 48 should be together. Begin in the corner chain 2 space created in the Magic Circle. (Pic 9, below)

Step 7
Insert the tapestry needle from Right Side to Wrong Side into the chain 2 space of the square closest to you (the square that has not been seamed yet). Then, insert your tapestry needle from Wrong Side to Right Side into the chain 2 space of the square furthest from you (Square A – Center Square). Pull yarn through. (Pic 10, above, shows this completed).

Step 8
Seam these two squares together using the same method as previously described (Pic 10, above) following the graphic above. At the end, make sure you seam the corner chain 2 spaces together. Then, cut yarn and weave ends.
You’re done!

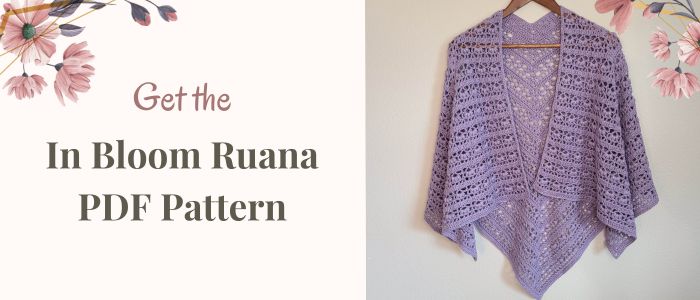
The In Bloom Ruana PDF Pattern
Did you miss the CAL? Maybe you haven’t even started the In Bloom Ruana yet? That’s okay!
You can still crochet your In Bloom Ruana at your own pace, of course! You can use the free versions of the pattern on our blogs by reviewing the main In Bloom Ruana CAL post. Or, you can purchase the PDF pattern (which has been raved about by crocheters!).
The purchase of the In Bloom Ruana PDF pattern will give you access not only to these seaming instructions but to all the technical information, the entire pattern (including both squares), two options for seaming and photo tutorials for both squares as well as both seaming options all on one document.
We also have put together a “Printer Friendly” version of the PDF pattern for those who like to print patterns but may want to save ink. This included secondary PDF removes all of the photo tutorial pictures but leaves important graphics (that are mostly black and white) and the main design photo.
During the event, from June 27, 2023 through July 23, 2023, the PDF will be available for a discounted price of $5.60 (USD) for CAL participants. After the event, the price will be increased to $8.
Now that you’ve seamed your 3 squares together, your In Bloom Ruana is complete! Yay!
All that’s left to do is wear it with pride – you deserve it!
Show us your completed In Bloom Ruana using any of the methods below. We are so excited to see your finished project!
- Show off your In Bloom Ruana in our Facebook communities! We invite you to join both of our groups, the Fox Den Crochet Community and the Made by Gootie FB Community, where we both like to hang out, participate in events like this one and support you.
- If you’re an Instagrammer, you can use the hashtag #InBloomRuanaCAL and tag me @theloopholefoxcrochet and Agat @madebygootie to share your work with us.

Don’t forget to join my Facebook Group so we can chat all about your creations! We are a group for crocheters of all experiences, all interests and love to hang out together. Come join the fun!

Shannon | Designer & Editor
Shannon helps crocheters find their next project and build their skills with in depth tutorials and crochet patterns on her blog, theloopholefox.com.
With more than a decade of crochet experience, Shannon knows that understanding why we do something matters just as much as how we do it. She teaches new techniques and crochet stitches in depth so you can crochet with confidence.