Plumeria Petals Wall Hanging
We may still be bundled up for winter, but spring is around the corner. What better way to brighten up your room and welcome spring and warmth than with a beautiful, brightly colored crochet wall hanging pattern? While most people know crochet for warm items like scarves, beanies and blankets, crochet isn’t just for winter! You can brighten up any living space with crochet decor that is fun and beautiful.
Plumeria Petals Wall Hanging Inspiration
DISCLAIMER: This post includes affiliate links. This means, should you decide to purchase a product via one of these links, I will receive a small commission at no extra cost to you. I only recommend products I use and love (Or products I know others love, have heavily researched, know have good ratings and plan to purchase myself). These small commissions help to support this blog and continue keeping most of my patterns free. You can read more on my Privacy Policy, if you prefer.
I love how many different ways you can use crochet to bring joy to yourself or others. Whether that is to brave the weather or to brighten up a living space, I think it’s amazing all the different things we can do with crochet.
I wanted this crochet wall hanging pattern to yell “SPRING!” from the rooftops. The thing that screams spring at me more than anything else is flowers. I googled “flowers” and looked through all the images that came up to grab some bright, fun inspiration. The flower that stood out to me the most is the delicate and lovely Plumeria.
When I was just a kiddo, my parents had a Plumeria bush on our deck. When it bloomed it provided such a strong, lovely scent in the air and had the brightest, most gorgeous flowers of white, yellow and pink. This flower took me back to the simplicity of being a child, of playing in the spring and summer warm evenings on that deck and feeling peaceful.
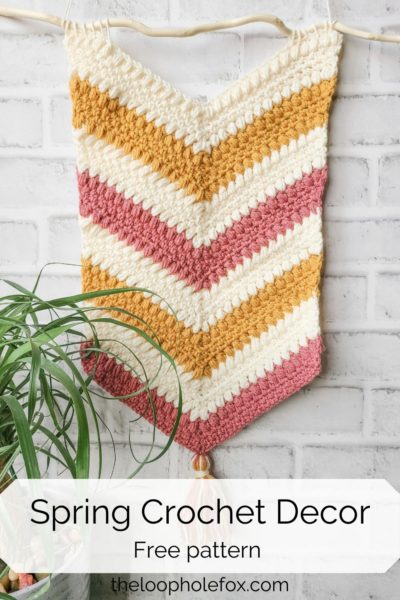
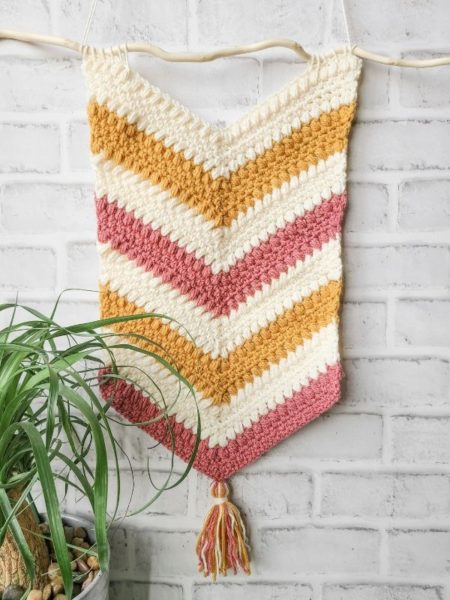
I think we could all use a little trip to playing in the warm evenings and feeling joy, so I set out to capture the Plumeria in a crochet wall hanging pattern. I used the colors I felt represented the Plumeria at least somewhat accurately, and used puff stitches to represent the petals. I’ve also hung mine on a Kulu Stick, which while it isn’t completely accurate to the trunk and branches of the Plumeria bush, it’s at least a nod to it.
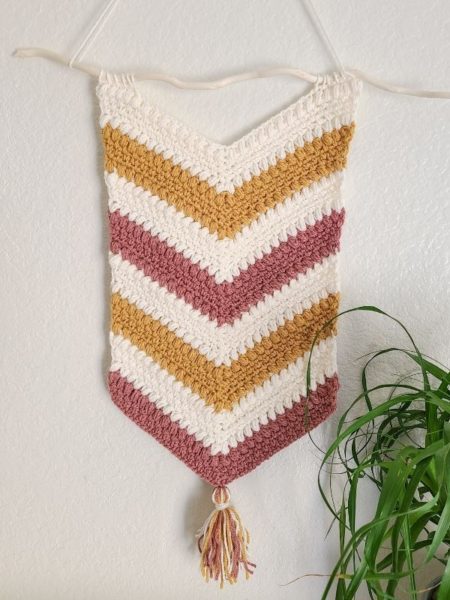
The only thing it’s lacking is the Plumeria scent, but you could spritz it with some if you really wanted to. 😉
SKILL LEVEL
Intermediate – Pattern uses chains, single crochet, double crochet and puff stitches, as well as increasing and shaping. I do believe an adventurous beginner could work their way through the project. One of my testers for this crochet wall hanging pattern has only been crocheting for a few months!
There is a photo tutorial in the PDF with the rows written out in full explanation as opposed to short hand abbreviations, if you are the adventurous beginner.
MATERIALS & TOOLS
YARN
You will need 3 colors of medium (4) yarn. Sizing and approximate usage is referring to this weight. You can use a lighter or heavier weight if you prefer, but it will change the dimensions of the wall hanging and yarn usage.
Yards/Oz:
CA: Approx 75 yards or 1.5 oz
CB: Approx 120 yards or 2.5 oz
CC: Approx 75 yards or 1.5 oz
I used: Yarn Bee Soft & Sleek in Mauve (CA) and Ivory (CB), I Love This Yarn in Sungold (CC)
TOOLS AND NOTIONS
5 mm (H) hook – I used my favorite Furls Crochet Hook.
Tapestry needle
Scissors
Stitch Markers
You will need a wooden dowel or something to hang the wall hanging from. I used a Kulu Stick I bought in a bundle at Michaels because I like the organic, boho look to it, but you can use whatever you like!
GAUGE
Gauge isn’t necessary as this is a crochet wall hanging pattern and doesn’t necessarily need to “fit”, but here’s mine: 15 sc x 16 rows = 4 inches x 4 inches
FINISHED SIZE
Width: Approx 11 inches.
Length: Approximately 17 inches from dowel to bottom point.
Sizing is without fringe or tassels.
ABBREVIATIONS
- Ch – chain
- Sl st – slip stitch
- Sc – single crochet
- Dc – double crochet
- St – Stitch
- Sk – Skip
- Puff St – Puff stitch *See special stitch instructions below
NOTES
- Chains at the beginning of the row both count as adding height AND a chain 1 space.
- You will never place your first stitch of the row in the same stitch you chained out of.
- All stitches worked in this pattern beyond Row 1 are worked into chain 1 spaces.
- You will see, in several rows, “Sk stitch”. This is referencing to skip the actual stitch in the row below, not counting the chain as a “stitch”. In some rows, this may be skipping a single crochet. In others, it may be referencing to skip a puff stitch. No matter the row, this is always referencing to skip the actual stitch, never skip a chain 1 space.
- The pattern is written this way for ease of reading and easier row repeats.
- Colors are abbreviated to Color A (CA), Color B (CB) and Color C (CC)
- Stitch counts will always reference chain spaces, not actual stitches. Chain spaces are what we are paying the most attention to.
SPECIAL STITCH – Puff Stitch
This pattern uses a puff stitch. There are many variations of the puff stitch, so I want to make sure we are all using the same puff stitch variation when working this crochet wall hanging pattern.
To create a puff stitch, you will: [Yarn over and insert your hook into the indicated stitch. Yarn over and pull up a loop.] Repeat inside of the brackets two more times in the same stitch. You should now have 7 loops on your hook. Yarn over and pull through all 7 loops.
How to Make this Crochet Wall Hanging
With CA, Ch 60.
Row 1 – sc in 3rd chain from hook. [ch 1, sk 1, sc next]. Repeat inside brackets 13x. Sk 2 chs, sc next. [ch 1, sk 1, sc next]. Repeat inside brackets 14x to the end of the row. Your last st should be a sc. (57 sts total, including ch 1 spcs – 14 sc, 14 ch 1 spcs on first side of V, 15 sc and 14 ch 1 spcs on 2nd side)
Row 2 – ch 2, turn. Sc in first ch 1 space. [ch 1, sk st below, sc in next ch 1 space]. Repeat inside brackets 13x. Sk 2 sc, sc in next ch 1 space. [ch 1, sk st below, sc in next ch 1 space]. Repeat inside brackets 13x. You should be in the last ch 1 space. Ch 1, sc in same space. (57 sts total, including ch 1 spcs – 14 sc, 14 ch 1 spcs on first side of V, 15 sc and 14 ch 1 spcs on 2nd side)
Row 3 – Repeat R2.
Row 4 – ch 3, turn. Puff st in first ch 1 space. [ch 1, sk sc, puff st in next ch 1 space]. Repeat inside brackets 13x. Sk 2 sc, puff st in next ch 1 space. [ch 1, sk sc, puff st in next ch 1 space]. Repeat inside brackets 13x. You should be in the last ch 1 space. Ch 1, dc in same space. (57 sts total, including ch 1 spcs – 14 Puff sts, 14 ch 1 spcs on first side of V, 15 Puff sts and 14 ch 1 spcs on 2nd side)
Finish last st of Row 4 with CB.
Row 5 – Repeat R4
Rows 6 through 8 – Repeat R2.
Row 9 – Repeat R4. Finish last st of R9 with CC.
From here, we will repeat rows 5 through 9 in sequence, changing our colors for each set.
Rows 10 through 14 – Repeat Rows 5 through 9 with CC. Finish last st of R14 with CB.
Rows 15 through 19 – Repeat Rows 5 through 9 with CB. Finish last st of R19 with CA.

Rows 20 through 24 – Repeat Rows 5 through 9 with CA. Finish last st of R24 with CB.
Rows 25 through 29 – Repeat Rows 5 through 9 with CB. Finish last st of R25 with CC.
Rows 30 through 34 – Repeat Rows 5 through 9 with CC. Finish last st of R34 with CB.
Rows 35 through 39 – Repeat Rows 5 through 9 with CB.
Finish off, weave ends. Here you can add tassels or fringe as you see fit.
Hang the project onto your chosen dowel with a length of yarn and your tapestry needle.
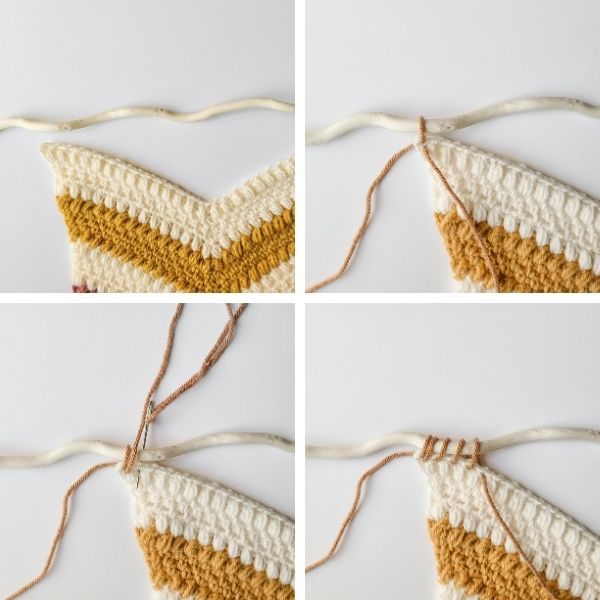
Starting in one corner of the work, thread the yarn in from the back side of the work into a chain 1 space, then up and over your dowel. Continue looping the yarn over your dowel and into a chain one space as far across (or completely across) the work as you like.
I would recommend keeping these loops somewhat loose so that the pointed nature of the wall hanging doesn’t become skewed. Below I’ve included a few pictures so you can see my process.
Finally, use a separate length of yarn or create a chain to attach to the dowel for the purposes of hanging. Attach to the dowel and hang in your favorite spot.
That’s all there is to it! You could make this crochet decor in any colors and in any color pattern that you like to make it uniquely yours.
One of my greatest joys is seeing your finished crochet projects from my patterns or tutorials, so when you post to Instagram, don’t forget to tag me so I can show you some love! I’m @theloopholefoxcrochet. You can also share pictures on my recent posts on Facebook or within my Facebook group!
And don’t forget to pin this to your Pinterest boards, so you can remember it for later!
Don’t forget to join my Facebook Group so we can chat all about your creations! We are a group for crocheters of all experiences, all interests and love to hang out together. Come join the fun!

Shannon | Designer & Editor
Shannon helps crocheters find their next project and build their skills with in depth tutorials and crochet patterns on her blog, theloopholefox.com.
With more than a decade of crochet experience, Shannon knows that understanding why we do something matters just as much as how we do it. She teaches new techniques and crochet stitches in depth so you can crochet with confidence.
Find More Free Crochet Patterns:
The Fledgling Baby Blanket
Something New Baby Blanket
The Aspen Blanket
Long Stemmed Roses