
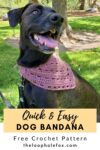
Lumina Crochet Dog Bandana Pattern
There’s something absolutely adorable about a dog wearing a bandana. I’m not normally a dog-wearing-clothes person, but even I have to admit that they look so stinking cute with a bandana. I designed the Lumina Bandana, this crochet dog bandana pattern, for my rescue pup and it comes in 6 sizes so you can make one for yours or make a bunch to donate to dog shelters, too!
Animals have always been a big part of my life and I have been known to rescue all sorts of animals ever since I was a kid. Currently I have my dog, Onyx, who is a rescue from a shelter and I also have two cats (a Maine Coon and a little black domestic cat) who were both rescued. My husband and I have also rescued a pair of chameleons and at one point I rescued a King snake I had found that I nursed back to health after it had been attacked by another animal.
There’s even a story floating around of kiddo me bringing a duck covered in oil from the train tracks home to save. “Mom, get the Dawn dish soap!” Left to my own devices, I would probably have a farm full of rescued animals, haha!
Anyway, I absolutely had to participate in Debbie’s event since it spoke so deeply to my animal loving heart. Especially since our most recent rescue was our bundle of love and crazy energy, Onyx.
Why a Crochet Dog Bandana?
Onyx was just a few months old when I came across her shelter picture. A little black puppy sitting on a blanket, scared to death but wearing a bright colored bandana with flowers on it. The listing said she was an “urgent case” which we all know doesn’t mean anything good.
Now, you know me well enough by now to know that I saw “puppy needs help” and was sold but I can’t deny how much that bright, pretty bandana stood out. I still remember it today and we rescued Onyx almost 3 years ago now.
I immediately showed my husband a picture of the puppy and just like that, we were on the way to the shelter to rescue this dog that had been labeled “URGENT”. We met her when she was all legs and energy and fell in love immediately. After the waiting period of a couple days, we drove the 4 hour round trip again to bring our little lady home.
Would my heart still have stopped and would I still have gotten in my car almost immediately to go get this dog without her wearing a bandana? Absolutely because that’s who I am as a person, haha.
But there is no denying how important little things like a crochet dog bandana can be when it comes to dogs (or cats!) shelter photos and whether or not someone will be interested enough to go meet and adopt them.
Little things like a bandana or a blanket can make these dogs stand out, can show the human looking at just a picture how much personality they have and bring some comfort through hugs and smiles to these pups when they’re scared and alone.
If you prefer a premium, ad-free PDF version of this pattern, you can grab one on my Etsy shop by clicking the button below!
Crochet Dog Bandana Pattern Details
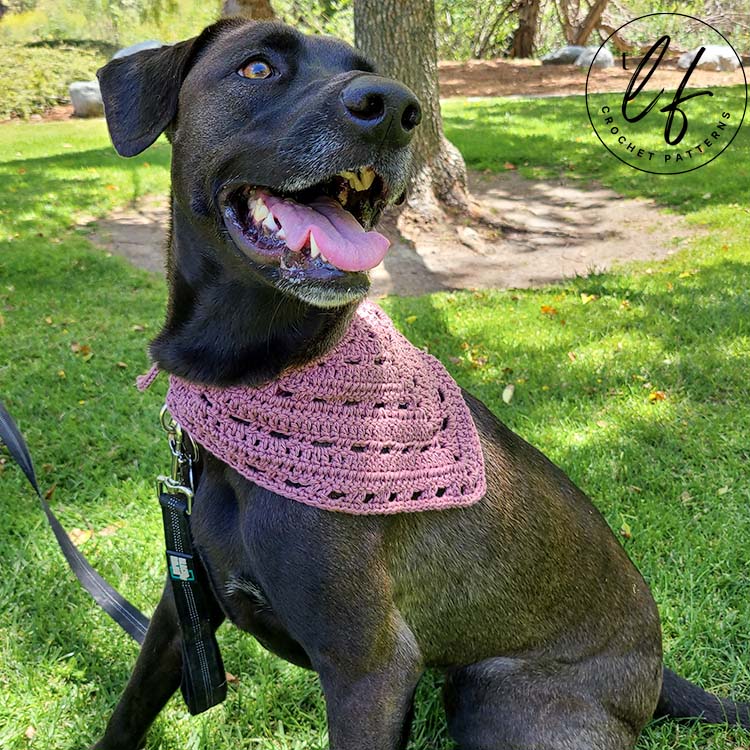
This crochet dog bandana pattern is quick and simple to crochet. It’s simple enough that it can be great for either male or female dogs and you can choose bright, fun or variegated colored yarn to bring a little extra personality to it, if you’d like! I chose a soft purple for my pup’s bandana because almost all of her gear (like her harness and collar) are purple or purpled themed (can you tell I like purple?).
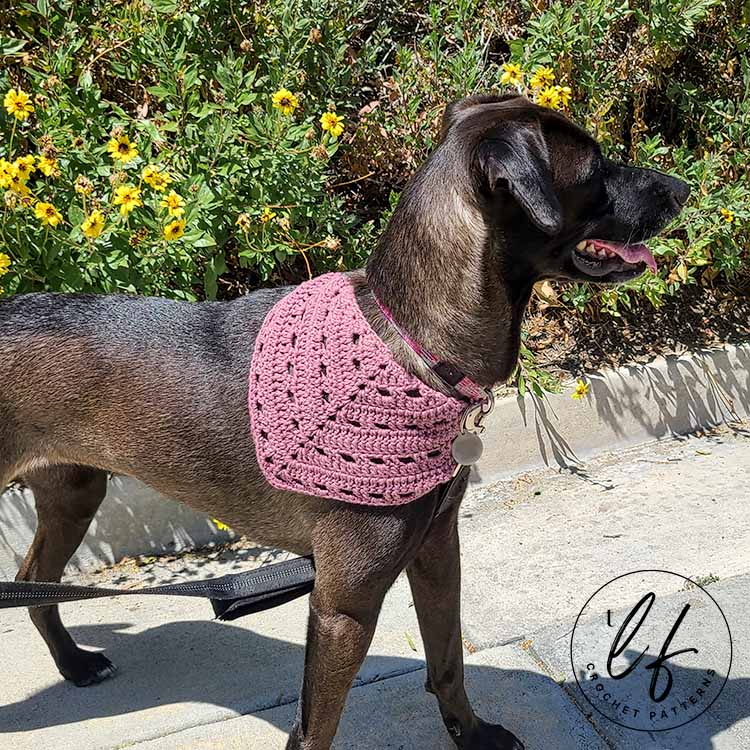
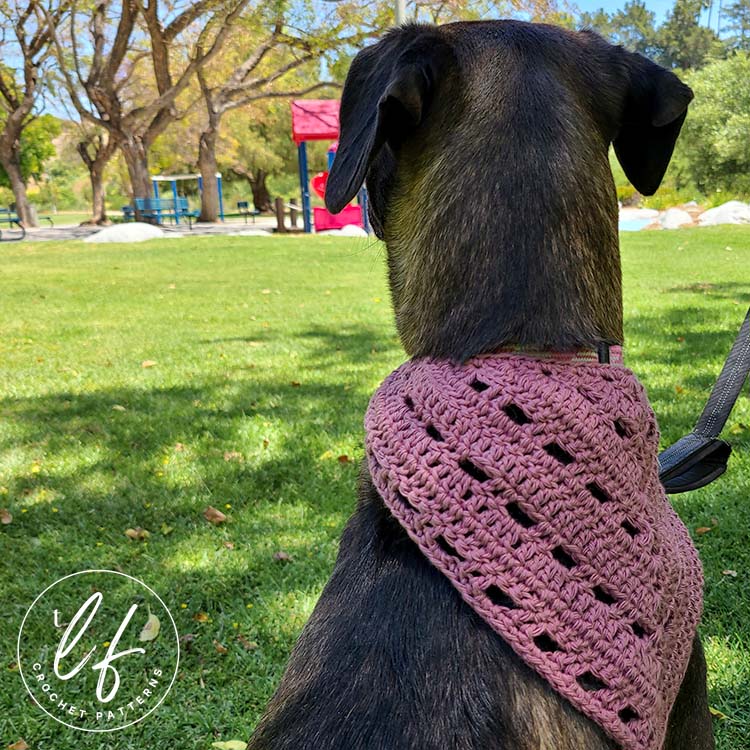
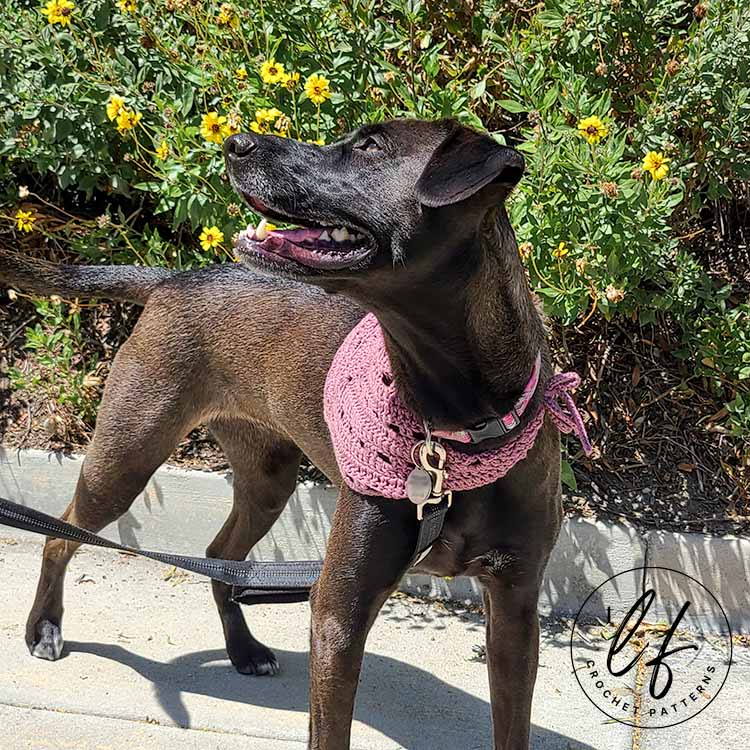
The bandana is worked as a triangle and then we create ties so the bandana can be tied on with a bow when we create the border.
If you’re looking to donate bandanas to a shelter, this pattern is quick and easy so you can make a bunch in different sizes in no time.
Or, of course, you can make one for your own pup because they’re so stinking cute on! Plus, if you like the idea of matching with your pup, this Lumina crochet dog bandana matches my Lumina shawl! How fun is that? A shawl for you and a bandana for your pup.
This crochet dog bandana comes with 6 different sizes that should match the neck size of almost any dog. The PDF pattern comes with details on how to customize the size(s) if you’d like to plus a full step by step picture tutorial!
Where to Get this Pattern
This crochet dog bandana pattern is free in this blog post. Scroll down to view the free version.
However, if you’d like a more robust pattern with a photo tutorial, the steps for the photo tutorial written out in full sentences, information on how to change the size and a printer friendly version of the PDF, I recommend you purchase the PDF pattern.
With the PDF pattern, you will receive a detailed photo tutorial for the first few starting rows which will set you up to create this pattern with confidence and a photo tutorial for the border and ties. The photos include highlighted stitches and details with arrows or dots, when necessary. You can purchase this pattern on Etsy!
DISCLAIMER: This post includes affiliate links. This means, should you decide to purchase a product via one of these links, I will receive a small commission at no extra cost to you. I only recommend products I use and love (Or products I know others love, have heavily researched, know have good ratings and plan to purchase myself). These small commissions help to support this blog and continue keeping most of my patterns free. You can read more on my Privacy Policy, if you prefer.
SKILL LEVEL
Advanced Beginner- This crochet dog bandana uses stitches and techniques that should be familiar to advanced beginners, especially if you’ve crocheted a triangle shawl before.
You will need to know how to: chain, slip stitch, single crochet, double crochet, work in rows, create chain spaces and work into the chain spaces.
You’ll also need to be familiar with working a border on a raw edge.
FINISHED SIZE(S)
Below you will find the list of sizes available. Each size available fits the indicated neck size range in inches (in) or centimeters (cm).
For reference, the dog shown in the pattern picture is wearing the Medium size. She is approximately 55 pounds and has a neck size of approximately 16 inches where her collar sits comfortably.
To choose the best size for your dog, you will measure around their neck where their collar sits comfortably. Don’t measure super tight, but you don’t need to measure super loose either. Pick the size that fits within the range of your dogs neck size in either inches or centimeters.
Extra Small: 8 to 12 in (20.5 to 30.5 cm)
Small: 12 to 15 in (30.5 to 38 cm)
Medium: 15 to 17 in (38 to 43 cm)
Medium/Large: 17 to 20 in (43 cm to 51 cm)
Large: 20 to 23 in (51 cm to 58.5 cm)
Extra Large: 23 to 25 in (58.5 cm to 63.5 cm)
MATERIALS
Medium (4) weight cotton yarn. You will need approximately (amounts rounded up):
Extra Small: 20 grams/38 yards
Small: 30 grams/56 yards
Medium: 40 grams/75 yards
Medium/Large: 65 grams/121 yards
Large: 90 grams/168 yards
Extra Large: 115 grams/213 yards
Yarn Used
Lion Brand Pima Cotton in colorway Rose Taupe
TOOLS
5 mm (H-8) hook
Tapestry needle
Scissors
Stitch markers, if you prefer them.
GAUGE
Gauge isn’t massively important as the bandana rows can be worked until the bandana reaches the required size.
For reference, my work measured approximately 5 inches across after Row 5.
I’m a tight crocheter which means my tension is typically tighter than others. This bandana can be worked to a specific size and still be wearable, so there’s no need to worry if your gauge is slightly off. If it’s massively off, you may want to change hook sizes.
ABBREVIATIONS
- Ch – Chain
- Sc – Single Crochet
- Dc – Double Crochet
- Sl st – Slip stitch
- Sk – Skip
- Spc – Space
- Sts – Stitch(es)
- […] – Repeats are listed inside brackets
- (…) – Indicates to work all stitches in the same space.
- (…) – Stitch counts are listed at end of row in ( ) and bold italics.
NOTES
- This dog bandana is worked from the center of the neck outward, growing larger with each row.
- Pattern is written to specific sizes however, if you desire a larger or smaller bandana, you can add or remove rows.
- Chain 2 at the beginning of rows never counts as a stitch.
- This bandana is written to use Medium (4) cotton yarn which is fantastic for heavy use items. However, you can use any weight of cotton yarn you prefer.
- Yarn requirements are listed for Medium (4) weight. If you use a different yarn weight, your usage will be different.
- You might want to mark your center chain 2 space with a stitch marker and move the stitch marker up each row if you haven’t worked a bandana in this way before. Some rows have many chain 2 spaces, so it will be important to know where the center chain 2 space is.
Special Stitch – Magic Circle
This pattern is written to use a magic circle. You can use the magic circle or you can chain 3 and slip stitch to the first chain made to create a circle to work into. Your choice!
If you don’t know how to work a magic circle but would like to learn, I do have a photo and video tutorial!
Crochet Dog Bandana Free Pattern
All Sizes Begin Here:
Row 1 – In Magic Circle, chain 2 (doesn’t count here or throughout). Place 3 dc, chain 2, 3 dc. Pull tail tight. (6 dc, 1 ch 2 spc)
Row 2 – Ch 2, turn. Place 3 dc in same st. 1 dc next 2 sts, (2 dc, ch 2, 2 dc) in ch 2 spc. 1 dc next 2 sts, 3 dc last st. (14 dc, 1 ch 2 spc)
Row 3 – Ch 2, turn. 3 dc in same st. Ch 2, sk 2, 1 dc next 2 sts. Ch 2, sk 2, (2 dc, ch 2, 2 dc) in ch 2 spc. Ch 2, sk 2, 1 dc 2 sts. Ch 2, sk 2, 3 dc last st. (14 dc, 5 ch 2 spcs)
Row 4 – Ch 2, turn. 3 dc in same st. 1 dc in each st and 2 dc in each ch 2 spc to center ch 2 spc (point of triangle). (2 dc, ch 2, 2 dc) in center ch 2 spc. Place 1 dc in each st and 2 dc in each ch 2 spc until 1 st remains. 3 dc in last st. (30 dc, 1 ch 2)
Row 5 – Ch 2, turn. 3 dc in same st. 1 dc in each st to ch 2 spc. (2 dc, ch 2, 2 dc) in ch 2 spc. 1 dc in each st until 1 st remains. 3 dc in last st. (38 dc, 1 ch 2 spc)
Row 6 – Ch 2, turn. 3 dc in same st. Ch 2, sk 2, [1 dc next 2 sts, ch 2, sk 2] Repeat inside brackets to ch 2 spc. (2 dc, ch 2, 2 dc) in ch 2 spc. Ch 2, sk 2, [1 dc next 2 sts, ch 2 sk 2] Repeat inside brackets until 1 st remains. 3 dc in last st. (26 dc, 11 ch 2 sps)
From here, find the size you’re creating below and follow the instructions listed.
Once you have completed the instructions for the size you’re working, continue to finishing instructions.
Extra Small
Row 7 – Repeat Row 4. Or, repeat Rows 4, 5 and 6 in sequence until work measures approximately 9 inches (23 cm) across the long, raw edge.
Small
Rows 7 through 9 – Repeat Rows 4, 5 and 6 in sequence through Row 9 or until work measures approximately 13 inches (33 cm) across the long, raw edge.
Medium
Rows 7 through 12 – Repeat Rows 4, 5 and 6 in sequence through Row 12 or until work measures approximately 16 inches (40.5 cm) across the long, raw edge.
Medium/Large
Rows 7 through 14 – Repeat Rows 4, 5 and 6 in sequence through Row 14 or until work measures approximately 18 inches (46 cm) across the long, raw edge.
Large
Rows 7 through 17 – Repeat Rows 4, 5 and 6 in sequence through Row 14 or until work measures approximately 21 inches (53.5 cm) across the long, raw edge.
Extra Large
Rows 7 through 19 – Repeat Rows 4, 5 and 6 in sequence through Row 19 or until work measures approximately 24 inches (61 cm) across the long, raw edge.
Finishing Instructions
Now the bandana is to size, we will work 1 round around the triangle to both clean up the edges and create the ties that you will use to secure the bandana to your pup.
Regardless of what row repeat you ended on, you will:
Ch 41. Place 1 sl st in the 2nd ch from hook and in each of the next 39 chs. You will now have a long tie and 40 sts. Continue working along the long raw edge. Place 2 sc in side of each dc across to the end.
(Your stitch count should be approximately 4x the number of rows you worked. If you worked 7 rows, you should have 28 stitches. Your stitch count doesn’t have to be perfect here. As long as the edge lays flat and doesn’t wrinkle, it’s good to go!)
Ch 41 again. Place 1 sl st in the 2nd ch from hook and in each of the next 39 chs. You should now have a 2nd tie and 40 sts.
Rotate your work to work along the tops of the stitches from your final row.
If you ended on a Row 6 Repeat (with many ch 2 spcs): Crochet along the final row completed and place 1 sc in each st and 2 sc in each ch 2 spc to the ch 2 point. In the point, place 3 sc. Continue working along the final side, placing 1 sc in each st and 2 sc in each ch 2 spc. At the end, sl st to the first sl st on the tie to close.
If you ended on a Row 4 or 5 Repeat (with no chain spaces other than the 1 in the center): Crochet along the final row completed and place 1 sc in each st to the ch 2 space. In the ch 2 space, place 3 sc. Continue working along the final side, placing 1 sc in each st. At the end, sl st to the first sl st on the tie to close.
You’re done! Cut your yarn, weave in your ends and block if desired.
A little bit about our rescue dog, Onyx.
Our rescue dog, Onyx, is the lovely model for this crochet dog bandana. She received lots of love and treats for being such a good sport (translation: getting these pictures was very difficult, haha).
As you read above, I came across Onyx’s shelter picture when she was just a puppy. My husband and I had already talked previously about rescuing a dog, so there wasn’t a lot of talking to do when I saw her. We went, we met her, we signed paperwork and came back two days later to pick her up. She slept calmly the whole way home on my husbands lap.
When you rescue a dog, regardless of their age, you’re accepting that they will come with some trauma. Despite Onyx being about 3 months old when we got her, she very clearly came to us with some serious trauma. She was terrified of the strangest things and needed a lot of love and a lot of support as she grew her confidence.
She is and was the biggest ball of energy and she never fails to bring a smile to my face. Whether she’s laying on her back holding a toy above her head with her paws, doing “face-rubbies” after eating her dinner, investigating something new with curiosity or finally settling next to me on the couch after a long day, she truly is one of the biggest lights of my life.
It has been such a joy to be the humans that showed her compassion, that gave her boundaries, that helped her build confidence and learn that she is safe. To watch her grow from being terrified of creeks or things shaped like circles to being a fearless little lady that dives into water head first or ignoring the circular shaped object (hello pizza pan!) has been a fantastic experience.
While there have been challenges, of course, I absolutely could not imagine my life without this pup or without her taking up way too much space on our little couch.
I am truly lucky to be her dog-momma and that I had the opportunity to design a crochet dog bandana special for her so that she and I can spread our love to your dogs and to the dogs in shelters who need love and homes.

Did you love this crochet dog bandana pattern? Make sure to share the love and Pin it to Pinterest!
One of my greatest joys is seeing your finished crochet projects from my patterns or tutorials, so when you post to Instagram, don’t forget to tag me so I can show you some love! I’m @theloopholefoxcrochet. You can also share pictures on my recent posts on Facebook or within my Facebook group!
And don’t forget to pin this to your Pinterest boards, so you can remember it for later!
Don’t forget to join my Facebook Group so we can chat all about your creations! We are a group for crocheters of all experiences, all interests and love to hang out together. Come join the fun!

Shannon | Designer & Editor
Shannon helps crocheters find their next project and build their skills with in depth tutorials and crochet patterns on her blog, theloopholefox.com.
With more than a decade of crochet experience, Shannon knows that understanding why we do something matters just as much as how we do it. She teaches new techniques and crochet stitches in depth so you can crochet with confidence.
Loved this pattern and want to see more?
Check out all of my patterns in the order they were released or you can check out my other crochet accessory patterns!
Thanks so much for the lovely bandana‼️‼️
Greetings, Arina
🇳🇱
Oh my gosh, of course! Thank you so much for taking the time to leave such a lovely comment. I hope you enjoy!