Cactus Crochet Can Cozy Pattern
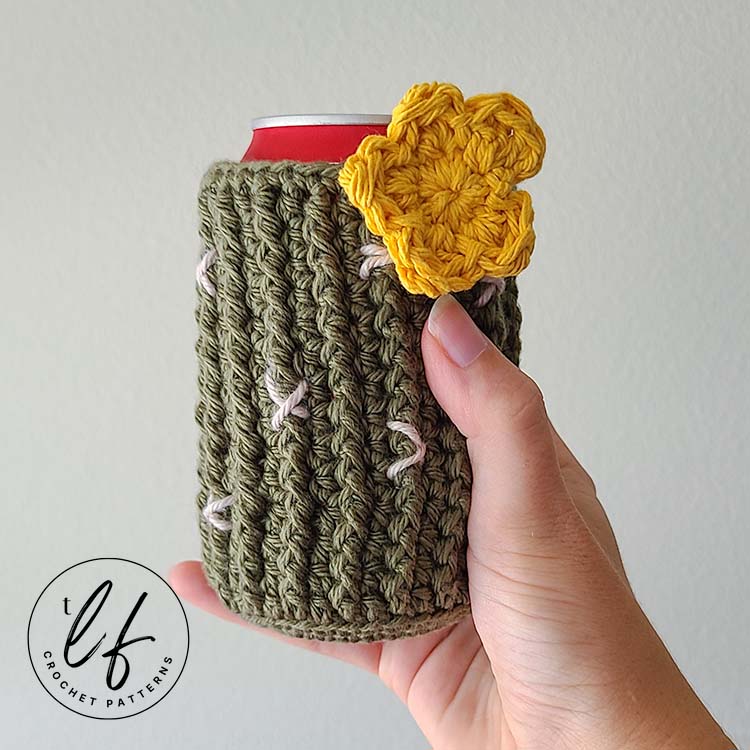
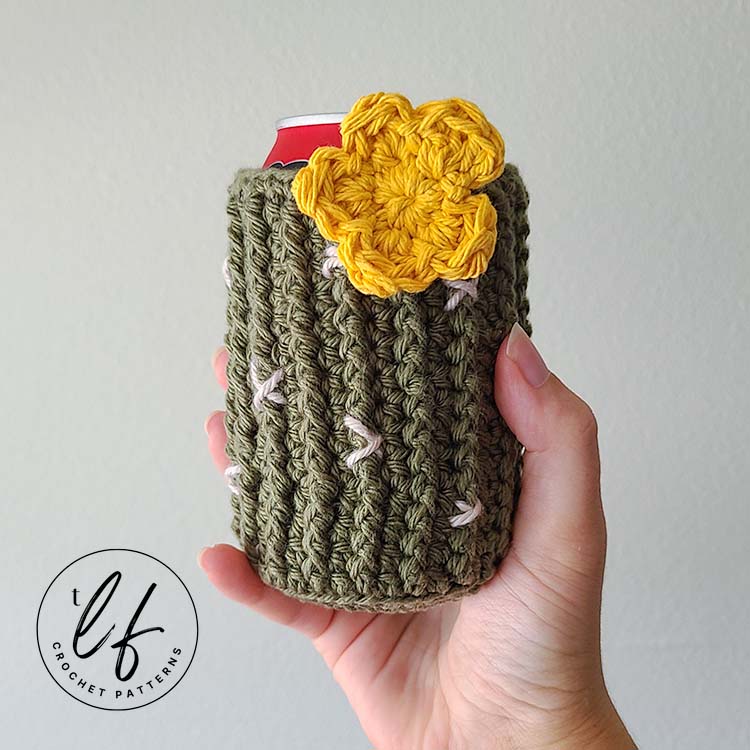
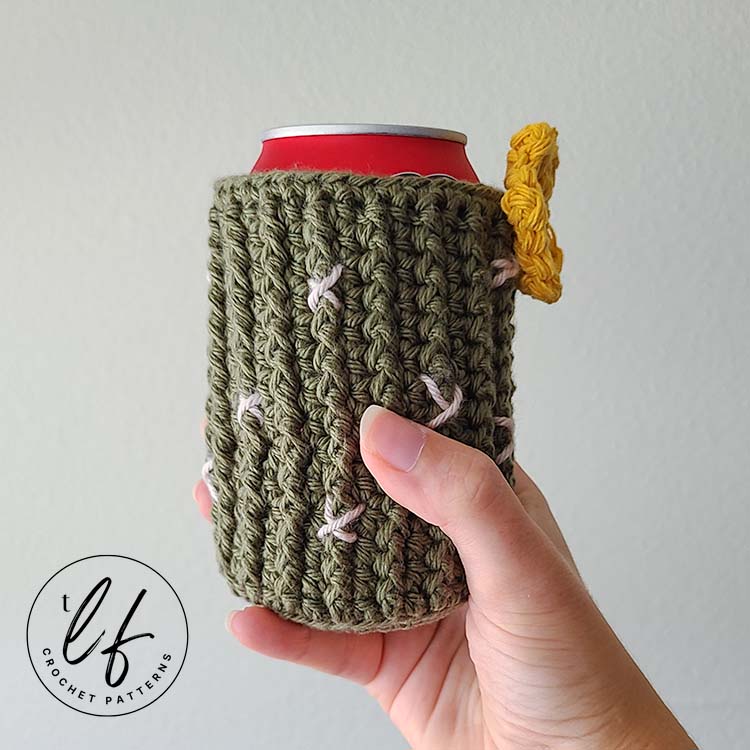
One thing I’m super good at: Drinking Coke Zero. One thing I hate about drinking Coke Zero: The condensation on the can. It makes my hands wet and we all know that’s not a fun thing when you’re trying to crochet. Enter: The Cactus Crochet Can Cozy to not only look absolutely adorable but to also keep our hands dry (and not frozen!) this summer. Using half double crochet (both standard and front post) creates the adorable cactus ribbing.
This pattern was updated August 2022. There is only one major change. Please see below for information.
Crochet Can Cozy | Cactus Style
I remember when I was a kid, my parents ALWAYS had can cozy’s for their drinks. They had a shelf full of all different types – from sports team memorabilia to random sayings. If my parents had a can in their hand, it had a cozy on it. But… They never had a crochet can cozy.
DISCLAIMER: This post includes affiliate links. This means, should you decide to purchase a product via one of these links, I will receive a small commission at no extra cost to you. I only recommend products I use and love (Or products I know others love, have heavily researched, know have good ratings and plan to purchase myself). These small commissions help to support this blog and continue keeping most of my patterns free. You can read more on my Privacy Policy, if you prefer.
When I was in my early 20’s, it was my mission to gift one of my best friends a can cozy for every possible holiday or event I could as a joke. He ended up amassing a huge can cozy collection and most of them were as ridiculous as they were useful. To his credit, he ended up using all of them! I even bought a knitted can cozy for him once and never even thought of crocheting a can cozy… that is, until now!
What I love about this crochet can cozy is that once you get started, it only takes approximately an hour to make. The half double crochet ribbing creates height quickly but also keeps a dense texture. You could nearly make a new can koozie for every new drink you have! Just kidding. 🙂
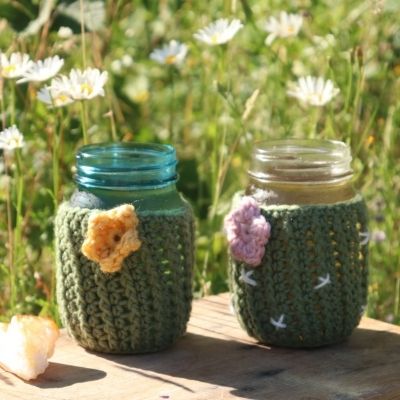
These cactus can cozy’s are so customizable, which is also one of my favorite things. You can make them in any color, with any color flower and choose to add spines or not. Make it your own!
If you prefer a premium, ad-free PDF version of this pattern, you can grab one on either my Ravelry or my Etsy shop by clicking the buttons below.
What changed with this can cozy pattern update? Anything important?
It’s August 2022 and I’ve been designing for some time now. One of the things I like to do is go back to my older patterns and update them. Sometimes this means just updating the PDF template they’re on and sometimes it’s more than that.
Luckily for me (and you!), this cactus crochet can cozy is cute as a button as it is, so a huge amount hasn’t changed and surely not enough to make the old pattern inaccessible.
Here’s what changed between the “old” can cozy crochet pattern and this current version:
- Updated the style of pattern writing – Very minor changes, nothing substantial. Capitalizing letters, making the stitch counts bold and italic, etc.
- Changed the fiber from acrylic to cotton – This is the most major change. Originally this pattern was designed with acrylic yarn and that is totally fine. However, as I’ve grown as a designer, I’ve discovered that I prefer cotton yarn more for can cozies. Thus, the yarn fiber has changed.
- The ONLY thing this changed is we have to work 1 additional round in the first portion of the pattern, which is the flat circle. We now work with 36 stitches instead of 30. Nothing major. 🙂
SKILL LEVEL
Advanced Beginner
Yarn Requirements
Medium (4) weight cotton yarn of your choice. You will need approximately:
Color A (Green for Cozy): 35 g / 60 yards
You will also need scraps of white yarn for the “spines” (the little X’s that we sew in and your desired color for the flower. A few grams each.
Yarn Used
I Love This Cotton in colorway Sage (green) and Parchment (white). I also used Peaches and Cream cotton in Golden (for the flower).
TOOLS
4 mm (G-6) hook
Tapestry needle
Scissors
Stitch Markers, if you prefer them
GAUGE
After Round 6, your flat circle should measure approximately 2.5 inches in diameter. This ensures that your cozy will fit a standard 12 ounce can properly.
Approximately 2.5 inches will suffice. If you are significantly under, go up a hook size. If you are significantly over, go down a hook size.Note: I am a tight crocheter, so my tension is usually tighter than others. Learn more about gauge and what this means here.
FINISHED SIZE
This can cozy is created to fit a standard 12 oz soda can or a smaller mason jar.
ABBREVIATIONS
This pattern is written in US terms.
- Ch – Chain
- Sl St – Slip Stitch
- Sc – Single crochet
- Hdc – Half Double Crochet
- Dc – Double Crochet
- Tr – Treble Crochet
- BLO – Back Loop Only
- FPhdc – Front Post Half Double Crochet
- St(s) – Stitch(es)
- Spc(s) – Space(s)
NOTES
- This pattern is worked in closed rounds. You will always slip stitch to the first stitch of the round to close.
- Chain 1 to start a new round does not count as a stitch. Always place your first stitch of the round in the first stitch or space.
- This pattern calls for usage of a magic circle. Please see my magic circle tutorial, if you’d like to learn the technique.
- Stitch counts are referenced at the end of each round in parentheses and bold italics (#).
- Repeats are listed in brackets [ ].
- Instructions inside parenthesis indicate to work all stitches in the same stitch.
How to make this crochet can cozy
Beginning with your cactus color (Color A), create a Magic Circle or chain 3, slip stitch to first chain made to form a circle.
Round 1 (RS) – In Magic Circle, ch 1 and place 6 sc. Pull tail tight, sl st to first st to close. (6)
Round 2 (RS) – Ch 1, place 2 sc in each st around. Sl st to first st to close. (12)
Round 3 (RS) – Ch 1, [1 sc 1 st, 2 sc next st]. Repeat inside brackets 6x. Sl st to first st to close. (18)
Round 4 (RS) – Ch 1, [1 sc 2 sts, 2 sc next st]. Repeat inside brackets 6x. Sl st to first st to close. (24)
Round 5 (RS) – Ch 1, [1 sc 3 sts, 2 sc next st]. Repeat inside brackets 6x. Sl st to first st to close. (30)
Round 6 (RS) – Ch 1, [1 sc 4 sts, 2 sc next st]. Repeat inside brackets 6x. Sl st to first st to close. (36)
Your circle should measure approximately 2.5 inches in diameter while laying flat.
Round 7 (RS) – Ch 1, 1 hdc BLO in each st around. (36)
Round 8 (WS) – Ch 1, [1 hdc 1 st, 1 FPhdc next st]. Repeat inside brackets 15x to end of round. Sl st to first st to close. (36)
Rounds 9 through 20 OR until work reaches approximately 4 inches in height – Repeat Round 8.
Round 21 – Ch 1, 1 sc in each st around. (36)
Finish off, weave ends.
Flower Pattern
Beginning with your chosen flower color, create a Magic Circle or chain 3, slip stitch to first chain made to form a circle.
Round 1 – In Magic Circle, ch 1 and place 10 sc. Pull tail tight, sl st to first st to close. (10)
Round 2 – Ch 2 (doesn’t count as a stitch). [ (1 dc, 1 tr, 1 dc) in 1st st, sl st next st]. Repeat inside brackets 5x. Sl st to the base of the ch 2 to close the round. (20)
Finish off, weave ends.
Finishing the Cozy
You now will want to add the “spines”. Do this by sewing little x’s around the ribbing created by the FPhdc’s. There are 18 ribs total. Add as many or as few spines as you like. I sewed 2 x’s on one rib, skipped a rib, 1 x on the next rib and skipped a rib. You can do it like this, add them sporadically, or not at all. Your choice! Sew the flower (or flowers, if you made a few!) onto the top of the cozy. You’re done!
I hope you’ve enjoyed this free crochet can cozy pattern! Aren’t they cute?
One of my greatest joys is seeing your finished crochet projects from my patterns or tutorials, so when you post to Instagram, don’t forget to tag me so I can show you some love! I’m @theloopholefoxcrochet. You can also share pictures on my recent posts on Facebook or within my Facebook group!
And don’t forget to pin this to your Pinterest boards, so you can remember it for later!
Don’t forget to join my Facebook Group so we can chat all about your creations! We are a group for crocheters of all experiences, all interests and love to hang out together. Come join the fun!

Shannon | Designer & Editor
Shannon helps crocheters find their next project and build their skills with in depth tutorials and crochet patterns on her blog, theloopholefox.com.
With more than a decade of crochet experience, Shannon knows that understanding why we do something matters just as much as how we do it. She teaches new techniques and crochet stitches in depth so you can crochet with confidence.