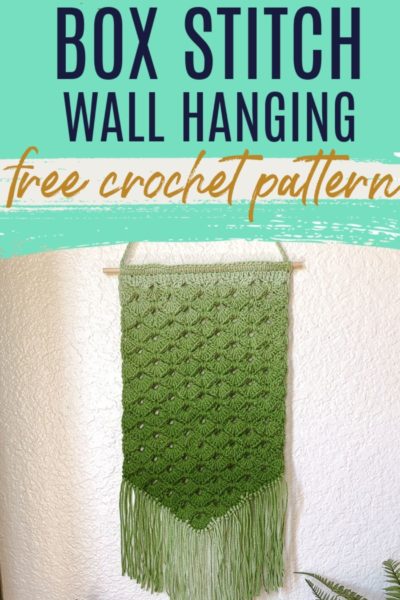
Box Stitch Crochet Wall Hanging Pattern
When it comes to pretty crochet stitches, I think the box stitch is one of the prettiest. I quickly fell in love with this stitch and decided I needed to have a box stitch crochet wall hanging in my home. Thus, this free crochet wall hanging pattern was born.
Box Stitch Crochet Wall Hanging Pattern
DISCLAIMER: This post includes affiliate links. This means, should you decide to purchase a product via one of these links, I will receive a small commission at no extra cost to you. I only recommend products I use and love (Or products I know others love, have heavily researched, know have good ratings and plan to purchase myself). These small commissions help to support this blog and continue keeping most of my patterns free. You can read more on my Privacy Policy, if you prefer.
These crochet wall hangings are absolutely gorgeous in person. Pictures truly don’t do them justice. These are great crochet wall decor ideas because you can create them as long and wide and in any color you want.
You can also finish it off with a tassel for a classic look, or fringe for a more boho crochet look. The choice is yours!
I truly love working the box stitch so much that I have created three different crochet wall hangings in three different types of yarn to really get a feel for how each yarn works up, how it drapes, and what structure it gives to the crochet wall hanging.
So, before we get into the free crochet wall hanging pattern, I’ll be reviewing the different yarn I used for each tapestry so that you can make the decision on what yarn will be best for yours.
If you prefer a premium, ad-free PDF version of this pattern, you can grab one on either my Ravelry or my Etsy shop by clicking the buttons below.
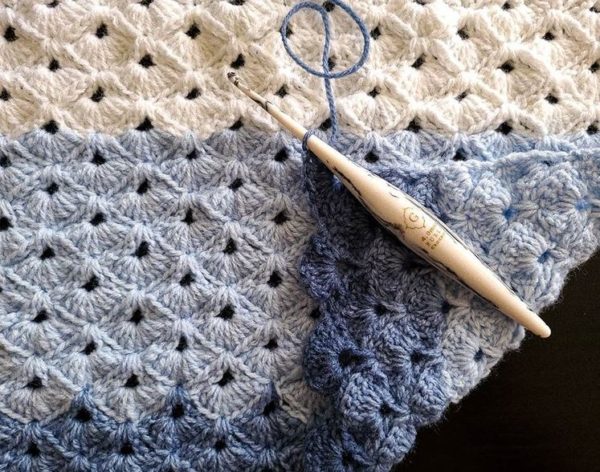
If you haven’t worked the box stitch before or if you’re a beginner to crochet, this free crochet wall hanging pattern might look a little intimidating. Don’t worry! I’ve created a tutorial specifically for the box stitch using contrasting colors so you can really see where the stitches go and how this pattern works up.
I would definitely recommend checking out the crochet box stitch tutorial before you get started, if you haven’t worked this stitch before.
So… which yarn is best?
Any! Truly, any yarn you prefer is “best” in terms of this tapestry. Of course, we will have to consider sizing and things like that, but let’s talk about the feel and look of the yarn first.
Let’s talk about Lion Brand Mandala first.
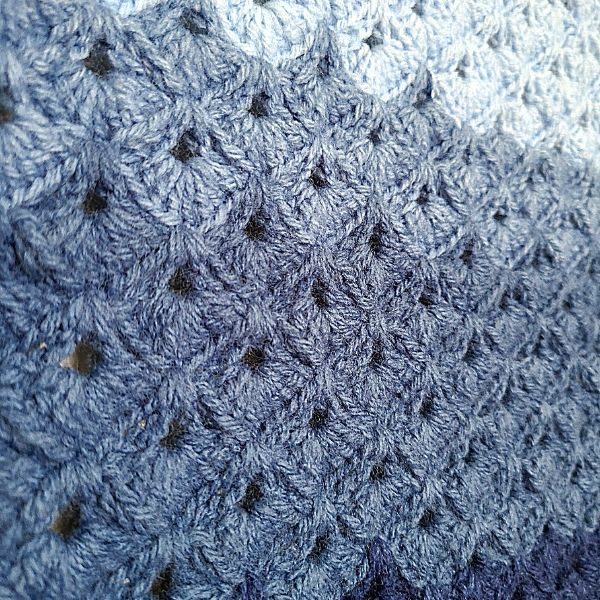
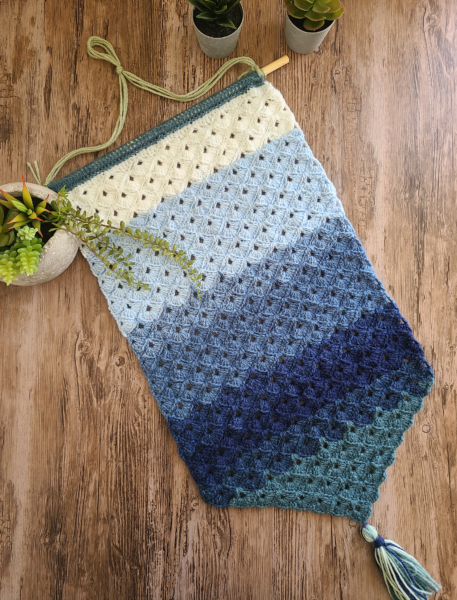
For the first tapestry I created while designing, I choose Lion Brand Mandala Baby in Echo Caves and used a 4 mm hook.
Honestly, I had this yarn in my stash and thought the change of colors would look absolutely gorgeous. Spoiler: It did!
This is a light (3) weight yarn and has a beautiful drape. The stitches were easy to work into and over all, it flows nicely. I used less than one skein.
This lightweight crochet wall hanging shifts slightly in the breeze and over all has the best drape of all the yarn I used.
I found this yarn to be the easiest to work with in terms of the box stitch. It flowed nicely through my fingers, sat well in the stitches and overall worked up absolutely gorgeous.
Con: The stitches aren’t quite as defined as the others but still have a lovely, soft and unassuming look and feel.
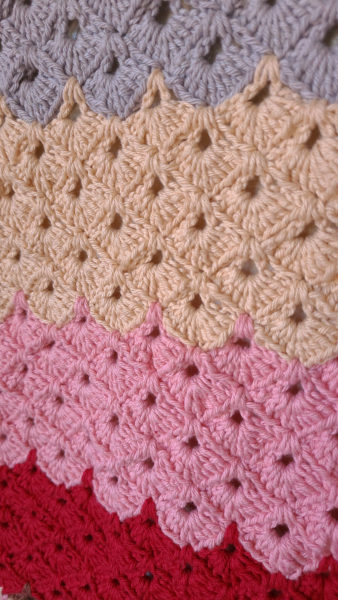
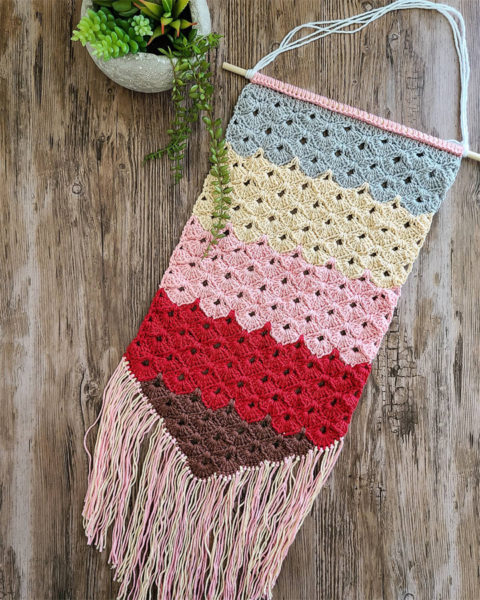
For my second crochet wall hanging, I wanted a bit more of a “boho” look. I also wanted to play with purposefully changing color and see how the cotton turned out.
I shopped my own stash and used left over Paintbox DK (lightweight – 3) Cotton I’ve had sitting around for a while and I used a 4mm hook.The colors in this tapestry are: Stormy Grey, Light Caramel, Blush Pink, Pillar Red and Coffee Bean.
I used approximately 1/3 of a skein for each color.
While I loved how this tapestry worked up, I found the cotton to be harder to work with. The stitches are defined and have a lovely look, but I had to push stitches around more to create the fans.
This crochet wall hanging also turned out to be a bit more firm. It definitely needed a little blocking and has a more solid form.
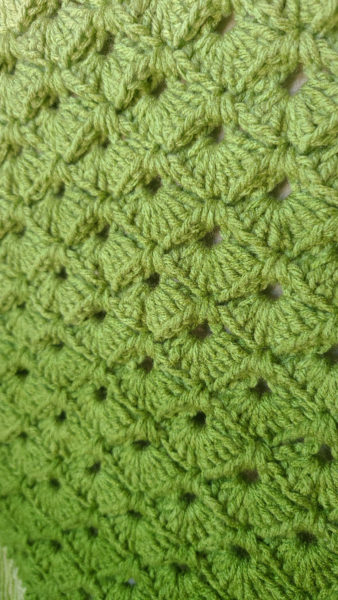
The last tapestry I created was unplanned, but a dear friend of mine requested one for her baby’s nursery. I don’t normally take commissions anymore, but for this friend? Of course!
It also gave me a reason to play with Red Heart Ombre in Green Apple, which is a medium (4) weight yarn. For this yarn, I used a 5 mm hook. I used approximately 1/2 of a skein.
I have to say, I love the fade of the ombre in this yarn. I was impressed that it actually faded to the next color whereas in other yarns the color just suddenly changes. So that’s a big plus for this yarn!
This yarn also had the best fan definition, which helps the tapestry look bolder.
However, this yarn was the hardest for me to work with in this stitch. The bulkier yarn definitely had me fiddling with chain 2 spaces to get the fan into place (9 dc in chain 2 space) and seemed a bit more stiff to work with.
That’s not to say that it was inherently HARD to work with. It just was the hardest out of all three. Would I use it for another box stitch crochet tapestry in the future? Yes.
So, what kind of yarn is used for this wall hanging? What yarn is best?
In terms of this free crochet wall hanging pattern, it’s up to you! Take a few minutes to decide what kind of definition and drape you would prefer your wall hanging to have and make a choice from there.
You’re definitely not limited to the three yarns I used, either!
A quick note: If you decide to use different yarn colors in this pattern, always change your yarn directly after a fan row and before a chain row.
How big will my finished item be if I follow this free crochet wall hanging pattern exactly?
If you follow this pattern exactly and you use Lion Brand Mandala Baby, your tapestry will be approximately 12 inches wide by 22 inches long (not counting the dowel to hang it on, the yarn to hang the dowel from or your fringe or tassel).
However, this tapestry is very customizable. You can make this tapestry as wide or as long as you prefer. For the purposes of this free crochet wall hanging pattern, I have written it as I have designed it. You can, though, make this crochet wall hanging more or less wide by adding or removing starting chains, and make it longer or shorter by repeating the rows more or less. It’s really up to you.
In addition, you can also choose to leave your box stitch crochet wall hanging as is, hang it on a dowel, add fringe, a tassel, both or none. Make this yours!
I want mine a different size, how can I figure out how to change the size?
Pretty easy!
The crochet box stitch has a starting chain of multiples of 8+2. So, in “English”, the actual stitch repeat itself requires 8 chains to start, plus two chains to turn. In this pattern, I chain 66 (8 chains x 8 repeats = 64+2 = 66) with light (3) weight yarn and a 4 mm hook.
Keep in mind: Heavier weight yarn will create a bigger project even if you’re following my pattern exactly.
If you’d like to create a test swatch to see how wide your crochet wall hanging will be with the yarn you’ve chosen, a good sample swatch is: chain 26 (8 chains x 3 repeats = 24+2 = 26). Once you’ve worked a few rows at this length, you’ll be able to measure and see how wide it is. Then, you can divide your ideal size by that measurement to decide how many repeats you’ll need.
Similarly, you can do the same with the length to figure out how many rows or pattern repeats you’ll need. Or you can just keep going until it’s the length you like, which is what I did for my two additional crochet wall hangings.
Alright, let’s get to the good stuff…
SKILL LEVEL
Intermediate
MATERIALS & TOOLS
For the purposes of this exact pattern, I am using Lion Brand Mandala Baby in Echo Caves light (3) weight and a 4 mm hook.
You will need:
Yarn of your choice
Hook that corresponds with that yarn
Scissors
A wooden dowel (if you prefer to hang it. If you don’t, that’s fine too!)
GAUGE
Gauge is not important
FINISHED SIZE
Approximately 12 inches wide by 22 inches long (without tassels or fringe).
ABBREVIATIONS
This pattern is written in US terms.
- sc – single crochet
- hdc – half double crochet
- dc – double crochet
- tr – treble crochet
- sl st – slip stitch
- ch – chain
SPECIAL STITCHES
This entire crochet wall hanging is created using the box stitch. I have a photo tutorial on how to work the Crochet Box Stitch which I recommend reviewing before you get started.
How to Crochet this Box Stitch Wall Hanging
As I mentioned above, I have written this pattern specifically to meet the size of 12″ x 22″. This means this pattern will refer to repeating instructions a certain amount of times. If you decide on a different size, your repeating instructions may require more or less repeats.
Chain 66.
R1 – Sc 2nd ch from hook. [hdc, 1 dc 2 stitches, 1 tr, 1 dc 2 stitches, hdc, sc] Repeat inside brackets 7 more times.
R2 – Ch 4, turn. Place dc in same stitch. [Ch 6, skip 7 stitches to the sc of previous row, dc in sc, ch 2, dc in same sc] Repeat inside brackets 6 more times. Ch 6 and, in last stitch, place 1dc, ch 1, 1 dc.
R3 – Ch 3, turn. Place 4 dc in ch 1 space. Skip 3, sc in top of tr around chains. [9 dc in next ch 2 space, sc in top of tr around chains] Repeat inside brackets 6 more times. 4 dc in last ch 1 space, 1 dc in the 3rd chain of ch 4
R4 – Ch 1, turn. sl st in the very first dc. Ch 3, dc in tr from the first row (around the sc). Ch 2, dc in same stitch. [Ch 6, dc in tr (around sc), ch 2, dc in tr] Repeat 6 more times. Ch 3, sl st in top of ch 3.
R5 – Ch 1, turn. sc around the sl st (in the same stitch as the sl st) [9 dc in ch 2 space, sc in 5th dc of fan, around ch 6] Repeat 7 more times. Sc around sl st.
So far, we have set up our work and now we will more on to the pattern repeat. This pattern repeat is very similar to the work we have already done, but the stitch names are different. If you followed the box stitch crochet tutorial, you know what I mean.
The pattern repeat is four rows, as follows:
R6: Ch 4, turn and dc same stitch. [ch 6, skip 9 stitches of fan to sc, dc around sc (work into the dc), ch 2, dc around same sc]. Repeat 7x. Ch 6, 1 dc, ch 1, 1 dc last st.
R7 – Ch 3, turn. Place 4 dc in ch 1 space. Skip 3, sc in 5th dc of fan (capturing chains). [9 dc in next ch 2 space, sc in 5th dc of fan] Repeat inside brackets 6 more times. 4 dc in last ch 1 space, 1 dc in the 3rd chain of ch 4
R8 – Ch 1, turn. sl st in the very first dc. Ch 3, dc around sc from previous row (work stitch into the dc). Ch 2, dc in same stitch. [Ch 6, dc around sc, ch 2, dc around sc] Repeat 6 more times. Ch 3, sl st in top of ch 3.
R9 – Ch 1, turn. Sc around the sl st (in the same stitch as the sl st) [9 dc in ch 2 space, sc in 5th dc of fan below (capturing chain 6)] Repeat 7 more times. Sc around sl st.
For rows 10 through 61, repeat rows 6 through 9 (13 repeats of the 4 rows).
If you prefer your tapestry to be rectangle, you can stop following the free crochet box stitch wall hanging pattern here. If you prefer for it to have a tapered end, continue:
R62 – Sl st in each of the first 5 dc of fan from row 61. Ch 3, dc around sc from previous row, ch 2, dc around sc from previous row. [Ch 6, dc around sc from previous row, ch 2, dc around sc from previous row] Repeat inside brackets 5 more times. Ch 3, sl st to 5th dc of last fan.
R63 – DO NOT CHAIN! Go straight into working [9 dc in ch 2 spc, sc in 5th dc of previous fan (capturing chains)]. Repeat inside brackets 6 more times. (7 fans total)
R64 – Sl st in each of the first 5 dc of fan from previous row. Ch 3, dc around sc from previous row, ch 2, dc around sc from previous row. [Ch 6, dc around sc from previous row, ch 2, dc around sc from previous row] Repeat inside brackets 4 more times. Ch 3, sl st to 5th dc of last fan.
R65 – DO NOT CHAIN! Go straight into working [9 dc in ch 2 spc, sc in 5th dc of previous fan (capturing chains)]. Repeat inside brackets 5 more times. (6 fans)
R66 – Sl st in each of the first 5 dc of fan from previous. Ch 3, dc around sc from previous row, ch 2, dc around sc from previous row. [Ch 6, dc around sc from previous row, ch 2, dc around sc from previous row] Repeat inside brackets 3 more times. Ch 3, sl st to 5th dc of last fan.
R67 – DO NOT CHAIN! Go straight into working [9 dc in ch 2 spc, sc in 5th dc of previous fan (capturing chains)]. Repeat inside brackets 4 more times. (5 fans)
R68 – Sl st in each of the first 5 dc of fan from row 61. Ch 3, dc around sc from previous row, ch 2, dc around sc from previous row. [Ch 6, dc around sc from previous row, ch 2, dc around sc from previous row] Repeat inside brackets 2 more times. Ch 3, sl st to 5th dc of last fan.
R69 – DO NOT CHAIN! Go straight into working [9 dc in ch 2 spc, sc in 5th dc of previous fan (capturing chains)]. Repeat inside brackets 3 more times. (4 fans)
R70 – Sl st in each of the first 5 dc of fan from row 61. Ch 3, dc around sc from previous row, ch 2, dc around sc from previous row. [Ch 6, dc around sc from previous row, ch 2, dc around sc from previous row] Repeat inside brackets 1 more time. Ch 3, sl st to 5th dc of last fan.
R71 – DO NOT CHAIN! Go straight into working [9 dc in ch 2 spc, sc in 5th dc of previous fan (capturing chains)]. Repeat inside brackets 2 more times. (3 fans)
R72 – Sl st in each of the first 5 dc of fan from row 61. Ch 3, dc around sc from previous row, ch 2, dc around sc from previous row. Ch 6, dc around sc from previous row, ch 2, dc around sc from previous row. Ch 3, sl st to 5th dc of last fan.
R73 – DO NOT CHAIN! Go straight into working [9 dc in ch 2 spc, sc in 5th dc of previous fan (capturing chains)]. Repeat inside brackets 1 more time. (2 fans)
R74 – Sl st in each of the first 5 dc of fan from previous row. Ch 3, dc around sc from previous row, ch 2, dc around sc from previous row. Ch 3, sl st to 5th dc of last fan.
R75 – DO NOT CHAIN! Go straight into working [9 dc in ch 2 spc, sc in 5th dc of previous fan (capturing chains)]. (1 fan)
Cut yarn, weave ends.
Your box stitch crochet wall hanging is almost complete!
Or maybe it’s complete already! That’s up to you!
If you wish to hang your crochet wall hanging on a dowel, my friend over at Noor’s Knits has a great Youtube Video on how to do that.
If you’d like to add a tassel (or several), here is a video on how to make tassels.
You can also create a fringe effect by looping strands of yarn through your stitches. Take a strand of yarn, fold it in half, use your hook to pull the loop through your stitch. Now use your hook to pull the two ends through the loop and tighten. Repeat as many times as you wish.
We did it! Now you can spruce up any room with a gorgeous box stitch crochet wall hanging.
I need to know, though, will you go more classic or boho?
One of my greatest joys is seeing your finished crochet projects from my patterns or tutorials, so when you post to Instagram, don’t forget to tag me so I can show you some love! I’m @theloopholefoxcrochet. You can also share pictures on my recent posts on Facebook or within my Facebook group!
And don’t forget to pin this to your Pinterest boards, so you can remember it for later!
Don’t forget to join my Facebook Group so we can chat all about your creations! We are a group for crocheters of all experiences, all interests and love to hang out together. Come join the fun!

Shannon | Designer & Editor
Shannon helps crocheters find their next project and build their skills with in depth tutorials and crochet patterns on her blog, theloopholefox.com.
With more than a decade of crochet experience, Shannon knows that understanding why we do something matters just as much as how we do it. She teaches new techniques and crochet stitches in depth so you can crochet with confidence.
RELATED CROCHET PROJECTS:
Crochet Box Stitch Tutorial: US & UK Terms
How to Gingham Crochet for Absolute Beginners
Easy Crochet Market Bag Pattern