Seedling Baby Blanket
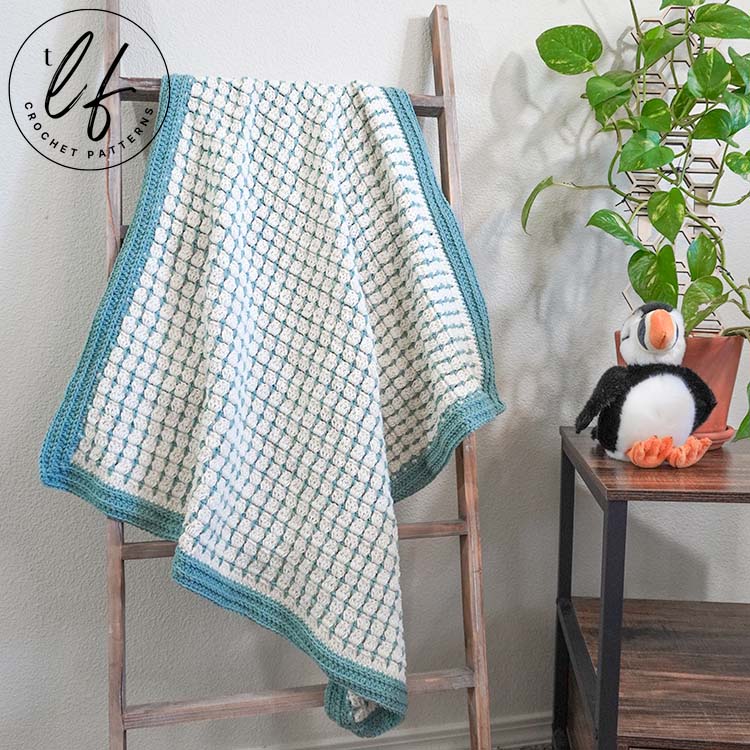
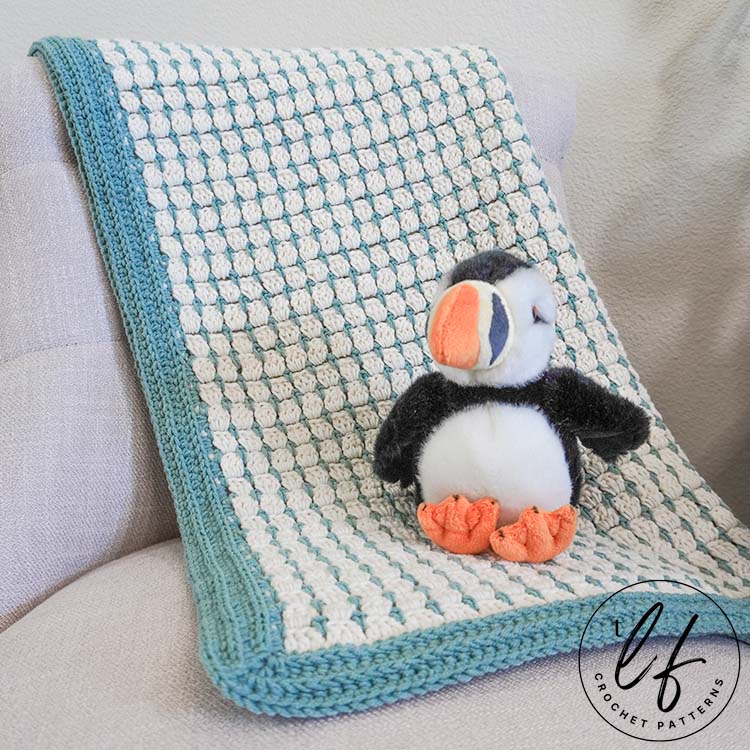
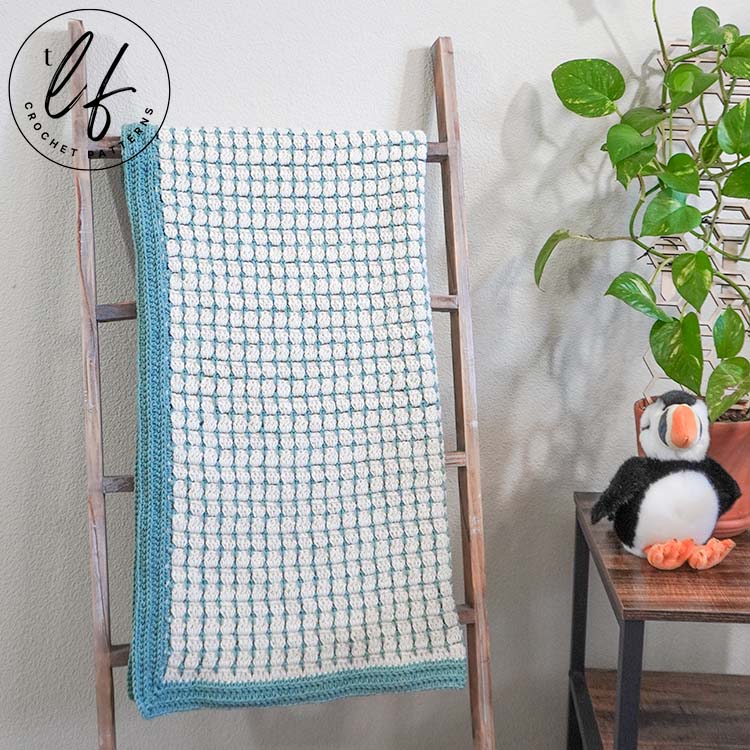
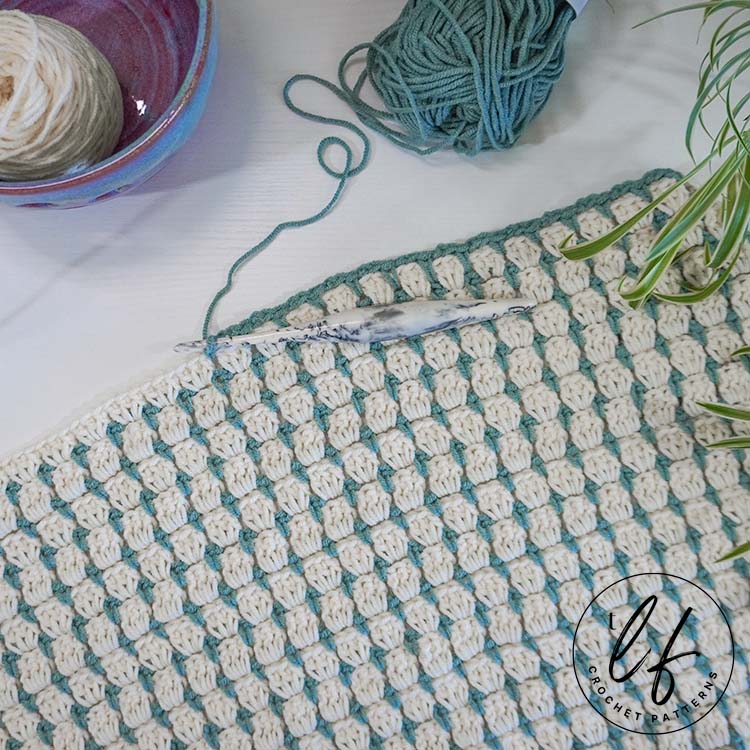
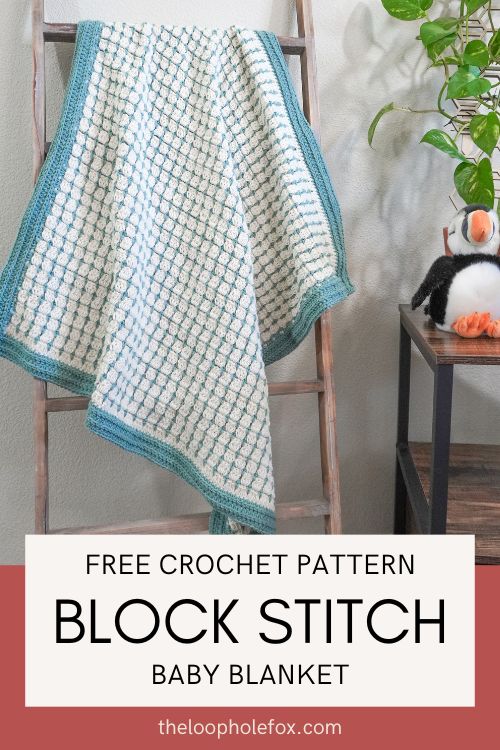
If you’re looking for a crochet baby blanket that is fairly mindless and uses 2 different colors to create a ton of personality, you will love the Seedling Crochet Block Stitch Baby Blanket.
This crochet block stitch baby blanket pattern is easy to work once you get into it, is mindless to crochet while watching your favorite TV show in the evening and can easily be made to match 2 colors of the expecting parents nursery decorations.
The previous version of the blanket (using 3 colors and a different border) is no longer available. If you were in the middle of crocheting this blanket and it has suddenly changed, please reach out to me and I’ll supply you with the original pattern so that you can finish your project.
You may have come here from an old Pinterest Pin (showing a white and pink baby blanket). This is the updated version of the pattern. There is no way for me to remove all pins that have been shared by crocheters on Pinterest. Thank you for your understanding.
Crochet baby blankets are one of my favorite projects and this Block Stitch Baby Blanket is no exception.
Baby blankets are fast and interesting projects that almost always have a good home: With a new addition to the family!
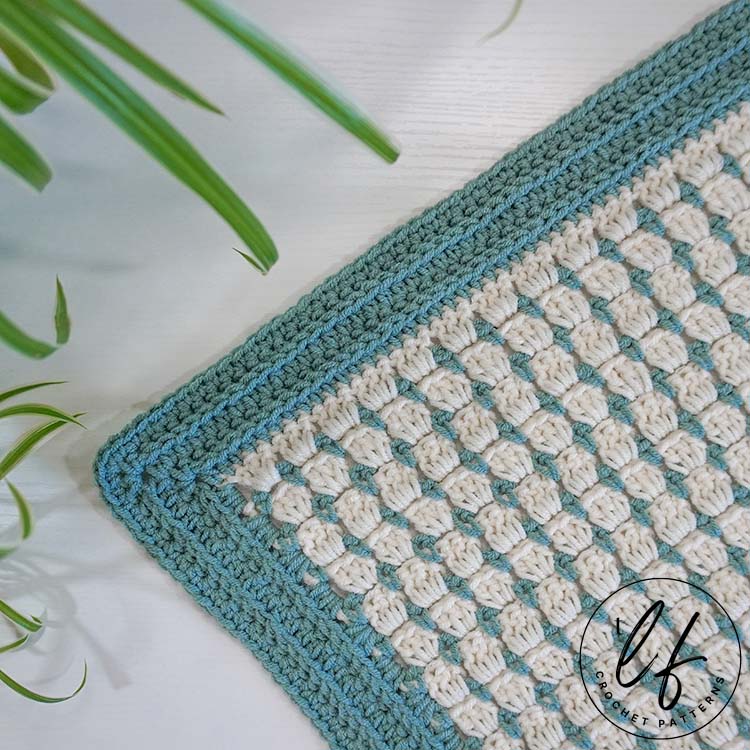
The crochet block stitch is such a soothing and easy stitch that works incredibly well for blankets.
It’s fast once you get into it, is just interesting enough to not get bored but easy enough to crochet while watching your favorite TV show.
If you’re looking for an easy way to bring some personality to your double crochet baby blanket projects, this block stitch baby blanket is a great way to do it.
This Block Stitch Baby Blanket Technique
The best thing about using the crochet block stitch for baby blankets is the ability to use two colors of yarn. This not only shows off the personality of the stitch incredibly well but it’s a fantastic way to match the nursery colors chosen by the new parents.
Using 2 colors in the block stitch typically leaves us with a ton of ends to weave in, though. I can’t stand having to weave in a huge amount of ends and I imagine you can’t either.
When updating this pattern, I knew I had to come up with a way to avoid as many ends as possible for my sanity and for yours. I am beyond thrilled to tell you: I did it!
Instead of cutting the yarn after every row of this crochet block stitch baby blanket, we’ll instead carry the yarn up the sides with chains. This does require a little bit of manipulation, including working 2 rows on the Right Side and then 2 rows on the Wrong Side but it’s really not difficult to do.
Make sure to carefully read over the technique information before starting this pattern so you understand what the pattern is asking you to do.
You can also review my crochet block stitch in 2 colors photo tutorial and create some practice swatches before going full steam ahead in a baby blanket.
If you prefer a premium, ad-free PDF version of this pattern, you can grab one in my Etsy shop by clicking the button below. The PDF pattern includes a PDF with a picture tutorial and a PDF that is “printer friendly without pictures.
DISCLAIMER: This post includes affiliate links. This means, should you decide to purchase a product via one of these links, I will receive a small commission at no extra cost to you. I only recommend products I use and love (Or products I know others love, have heavily researched, know have good ratings and plan to purchase myself). These small commissions help to support this blog and continue keeping most of my patterns free. You can read more on my Privacy Policy, if you prefer.
A Note About Yarn for this Baby Blanket
While this block stitch baby blanket pattern is written to use a specific yarn, you absolutely can use any yarn whether a different weight or different fiber.
The blanket is easy to customize in width and even easier to customize in length by repeating the indicated rows as necessary for the length.
This means you could really use any weight or fiber you like. Keep in mind, though, that the yarn usage is listed ONLY for the yarn used in the pattern and you may need more or less yarn depending on how you customize the blanket.
I used Lion Brand Color Theory in colorways Ivory (white) and Tourmaline (blue). This yarn is incredibly soft for being 100% acrylic and is machine washable and dryable, so it’s an easy choice for this pattern.
Working with the yarn is nice and smooth. It’s soft on the hands and creates a beautiful drape.
However, this yarn does not have good stitch definition. I ended up using it in my Avery Baby Blanket Pattern after realizing that it was just not going to work for the original design I had in mind.
This is to say that while I do recommend the yarn for this pattern, I don’t necessarily recommend it for any other patterns that have intricate stitches or where stitch definition is going to be important.
Where to get the Seedling Baby Blanket Pattern
The Seedling Baby Blanket is a free crochet block stitch baby blanket pattern in this blog post. Scroll down to view the free version.
However, if you’d like a more robust pattern with photo tutorials, the steps for the photo tutorial written out in full sentences, links to the video tutorial and a printer friendly version of the PDF, I recommend you purchase the PDF pattern.
With the PDF pattern, you will receive photo tutorials for the special stitches and techniques as well as a detailed photo tutorials for Rows 1 through 6, Rows 74 and 75 and the border which will set you up to work this crochet baby blanket pattern with confidence. The photos include details with arrows and dots to help identify all the stitches and their placement.
Seedling Crochet Baby Blanket Pattern
SKILL LEVEL
Intermediate. Crocheters looking to follow this pattern should know:
- How to work the basic stitches: Chain, Slip Stitch, Single Crochet, Half Double Crochet and Double Crochet
- How to work in the 3rd Loop Only (3LO) of half double crochet stitches, which is used only in the border
- What the posts of stitches are and how to work between them (as opposed to into the top of a stitch)
- How to (or are willing to learn) how to work 2 rows with the same side facing BEFORE turning the work (this is easier than it sounds but is noted).
- How to create chain spaces by chaining 2 and skipping stitches.
- How to work into a chain space.
While the crochet block stitch could technically be considered “beginner friendly”, the technique used in this crochet block stitch baby blanket isn’t. An Advanced Beginner could follow through this pattern, especially if they purchase the PDF pattern that includes a ton of photos and details (or with the 2 Color Block Stitch Tutorial, which is a simpler form of the tutorial and not made specifically for this pattern).
If you are new to crochet and you’re just learning your basic stitches, this crochet baby blanket pattern will be out of your skill level. If you’ve worked patterns that include making chain spaces, working into them and carrying yarn, you’ll likely have no issues.
MATERIALS
Medium (4) worsted weight acrylic yarn in 2 colors.
Color A: 9.25 oz/ 260 g/ 640 yards
Color B: 6 oz/ 170 g/ 418 yards (Border uses 80g)
Yarn Used: Lion Brand Color Theory in Ivory (White – Color A) and Tourmaline (Blue – Color B).
TOOLS
5 mm (H-8) hook – Check out my favorite hooks!
Tapestry needle
Scissors
At least 2 stitch markers
GAUGE
14 double crochet x 7 rows = 4 inches x 4 inches.
Gauge doesn’t have to be perfect for this pattern. Baby blankets are wonderful at any size, so don’t worry too much about gauge.
Note: I’m a tight crocheter, so my tension is usually tighter than others. Learn more about gauge and what this means here.
FINISHED SIZE
Approximately 30 inches x 30 inches
ABBREVIATIONS
This pattern is written using US terms.
- Ch – Chain
- Sc – Single Crochet
- Hdc – Half Double Crochet
- Dc – Double Crochet
- Dc “Cluster” – 3 dc all in same ch 2 spc.
- 3LO – Third Loop Only (of hdc)
- St(s) – Stitch(es)
- Sl st – Slip Stitch
- Spc – Space
- RS – Right Side
- WS – Wrong Side
- […] – Repeats are listed inside brackets
- (…) – Indicates to work all sts in the same st.
- (…) – Stitch count at end of row in bold italics.
PATTERN NOTES
- Chain 3 at the beginning of Color A rows always count as a double crochet.
- Chain 2 at the beginning of Color B rows do not count as a stitch. These simply build height and carry the Color B yarn up the side. These will be hidden in the border.
- Chain 1 does not count as a stitch.
- To minimize the amount of ends to weave in, this pattern uses a special technique to carry the yarn up the sides. Please see “IMPORTANT PATTERN INFORMATION” for details.
- Please see “TIPS FOR PROFESSIONAL FINISH” for tips on how to keep your carried colors from showing and how to secure them, if desired.
- This stitch pattern requires a multiple of 3 stitches + 2 stitches. To change the width of the blanket, chain a multiple of 3 chains + 1 chain at the end and then follow the pattern to achieve the proper stitch multiple.
- To change the length of the blanket, repeat the indicated rows as many times as necessary to the length you’d like.
- DO NOT cut the yarn at the end of each row. The pattern will instruct when to cut the yarn.
- Review my 2 Color Block Stitch Technique Photo Tutorial prior to starting this pattern. It will help a lot!
IMPORTANT PATTERN INFORMATION
Typically, the Crochet Block Stitch when worked in 2 colors has a ton of ends. This is because patterns usually instruct to cut the yarn at the end of each row. To minimize the amount of ends to weave in for this crochet block stitch baby blanket, I’ve created a technique to carry both colors up the side. This means we will have minimal ends to weave in as opposed to hundreds.
This technique requires us to work 2 rows on the Right Side (in the same direction) without turning the work. After these 2 rows are completed, we will turn our work and work 2 rows on the Wrong Side.
For example, Row 1 would be worked on the Right Side. Then, we go back to the start of Row 1, join our 2nd color of yarn (Color B) and work Row 2 with the Right Side still facing. Once complete, Color A and Color B working yarn will be on the same side.
Then, we will turn our work. Rows 3 and 4 will be worked on the “Wrong Side”. After these rows are complete, we will turn our work and work Rows 5 and 6 on the “Right Side”.
This technique is a lot easier than it sounds in explanation. There are notes on when to turn, what row is on what side, etc.
“Previous Color A Row”
In this pattern, you will see “Previous Color A Row” in Color A row instructions. This means the last row you worked that ALSO used Color A. For example, in Row 3 this will be Row 1. In Row 5, this will be Row 3. In Row 7, this will be Row 5, etc.
3LO (3rd Loop Only)
In the border of this pattern, we use the 3LO (third loop only) of half double crochet stitches to create a pretty, chain-like texture in the border. It is important to understand where the third loops of the stitches are to ensure the placement is correct.
When we turn our work after working a round (or row) of half double crochet stitches, we will see the back of the half double crochet. Unlike other stitches, half double crochets have a 3rd loop.
The 3rd loop is directly below the front loop of the stitch and sits diagonally. When instructed to place a stitch into the “3LO”, use only this loop.
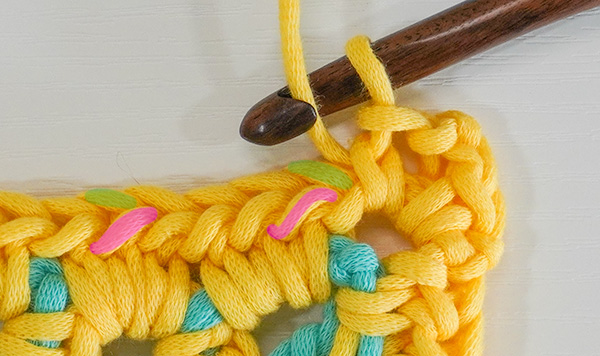
In this image, I’ve highlighted the 3rd loop of the hdc in pink. This loop will always be the closest loop to you and sits directly below the front loop of the stitch (highlighted green) somewhat diagonally.
When instructed to work in “3LO”, work only in this loop (highlighted pink).
TIP: Keep Color B Working Yarn to Wrong Side of Work
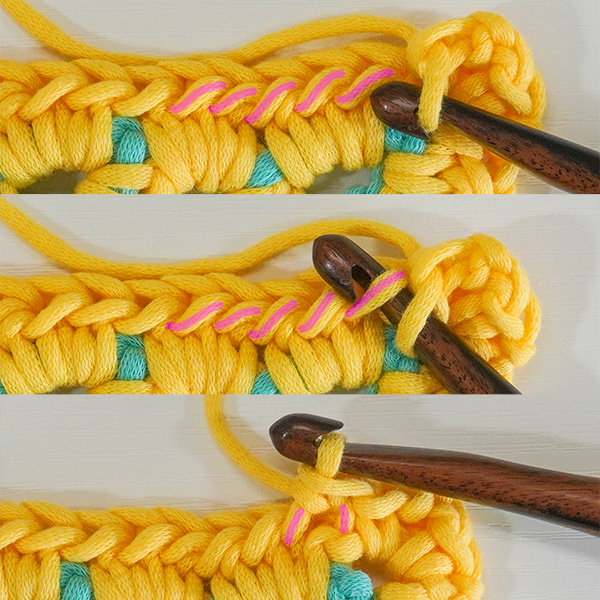
To carry the yarn up the sides of the work instead of cutting the yarn after each row, we’ll build height by creating a chain 2 at the start of each Color B row. This brings our working yarn up high enough so that we can work this row with the same side facing without the work squishing downward.
These chain 2’s will show but we can minimize the amount they show and they will be covered in the border. To minimize the amount these show, we will keep them all on the Wrong Side of the blanket.
When we’re beginning a Right Side Color A row, we will push the Color B working yarn to the back of the work:

When we return to the start of the Right Side row to begin using Color B for the next Right Side row, we will pick up the Color B yarn that is behind the work and chain 2:

When we’re beginning a Wrong Side Color A row, we will pull the Color B working yarn to the front of the work.

When we return to the start of the Wrong Side row to begin using Color B for the next Wrong Side Row, we will pick up the Color B yarn that is in front of the work and chain 2:

This will keep all of your Color B chain 2’s hidden on the wrong side of the work.
The picture on the left below shows the Wrong Side of the work with the Color B chain 2’s showing. The picture on the right shows the Right Side of the work with the Color B chain 2’s hidden to the back of the project.


How to Crochet this Block Stitch Baby Blanket
With Color A, Ch 115.
Row 1 (RS, Color A) – 1 dc in 4th ch from hook and 1 dc in each ch across. Pull up working loop and place stitch marker. (113 – 3 sk ch at start of row counts as 1 dc)
Go back to start of Row 1 and join Color B yarn between posts of 1st dc (sk’d ch 3) and next dc with a chain 1.
Row 2 (RS, Color B) – 1 sc in same space between posts as join. [Ch 2, sk 3 sts, 1 sc between posts of dc’s]. Repeat inside brackets until only 1 dc remains. Pull up working loop and place st marker in loop. Ignore the 1 remaining st. (112 sts (38 sc + 37 ch 2’s))
The following Rows, including instructions before the row, are repeated through the pattern:
Turn work. Insert hook into Color A working yarn from previous Color A row.
Row 3 (WS, Color A) – Ch 3 (counts as dc here and throughout). [Sk sc, 3 dc in ch 2 spc]. Repeat inside brackets until 1 sc from previous row remains. Sk the sc and place 1 dc in the 3rd ch of the ch 3 from Previous Color A row. Pull up working loop and place st marker. (113 sts)
Go back to start of row and insert hook into Color B working yarn from previous Color B row.
Row 4 (WS, Color B) – Ch 2 (does not count as a stitch here or throughout). 1 sc between 1st dc (ch 3 from previous row) and cluster of 3 dc. [Ch 2, sk 3 dc, place 1 sc between dc “clusters”]. Repeat inside brackets until only 1 dc remains. Pull up working loop and place st marker. Ignore the 1 remaining st. (112 sts (38 sc + 37 ch 2’s))
Turn work. Insert hook into Color A working yarn from previous Color A row.
Row 5 (RS, Color A) – Ch 3. [Sk sc, 3 dc in ch 2 spc]. Repeat inside brackets until 1 sc from previous Row remains. Sk the sc and place 1 dc in the 3rd ch of the ch 3 from Previous Color A row. Pull up working loop and place st marker. (113 sts)
Go back to start of row and insert hook into Color B working yarn from previous Color B row.
Row 6 (RS, Color B) – Ch 2. 1 sc between 1st dc (ch 3 from previous row) and cluster of 3 dc. [Ch 2, sk 3 dc, place 1 sc between dc “clusters”]. Repeat inside brackets until only 1 dc remains. Pull up working loop and place st marker. Ignore the 1 remaining st. (112 sts (38 sc + 37 ch 2’s))
Rows 7 through 74 – Repeat Rows 3, 4, 5 and 6 in order, including all instructions before the row. Row 74 will be a repeat of Row 6 (RS, Color B). See Row Repeat Table.
At end of Row 74 (Repeat of Row 6), sl st into the last remaining dc. Make sure the sl st is fairly tight and not loose. This sl st does not count as a stitch. Cut Color B yarn, tie off.
Insert hook into Color A working yarn from previous Color A Row.
Row 75 (WS , Color A) – Ch 3. Sk over sl st, [Sk sc, 3 dc in ch 2 spc]. Repeat inside brackets until 1 sc from previous Row remains. Sk the sc and place 1 dc in the 3rd ch of the ch 3 from Previous Color A row. (113 sts)
Cut Color A yarn, tie off. Weave in any ends you may have and then move on to crocheting the border.
Row Repeat Table
| Row # | Row to Repeat | Row # | Row to Repeat | Row # | Row to Repeat |
| Row 7 | Row 3 (WS, Color A) | Row 30 | Row 6 (RS, Color B) | Row 53 | Row 5 (RS, Color A) |
| Row 8 | Row 4 (WS, Color B) | Row 31 | Row 3 (WS, Color A) | Row 54 | Row 6 (RS, Color B) |
| Row 9 | Row 5 (RS, Color A) | Row 32 | Row 4 (WS, Color B) | Row 55 | Row 3 (WS, Color A) |
| Row 10 | Row 6 (RS, Color B) | Row 33 | Row 5 (RS, Color A) | Row 56 | Row 4 (WS, Color B) |
| Row 11 | Row 3 (WS, Color A) | Row 34 | Row 6 (RS, Color B) | Row 57 | Row 5 (RS, Color A) |
| Row 12 | Row 4 (WS, Color B) | Row 35 | Row 3 (WS, Color A) | Row 58 | Row 6 (RS, Color B) |
| Row 13 | Row 5 (RS, Color A) | Row 36 | Row 4 (WS, Color B) | Row 59 | Row 3 (WS, Color A) |
| Row 14 | Row 6 (RS, Color B) | Row 37 | Row 5 (RS, Color A) | Row 60 | Row 4 (WS, Color B) |
| Row 15 | Row 3 (WS, Color A) | Row 38 | Row 6 (RS, Color B) | Row 61 | Row 5 (RS, Color A) |
| Row 16 | Row 4 (WS, Color B) | Row 39 | Row 3 (WS, Color A) | Row 62 | Row 6 (RS, Color B) |
| Row 17 | Row 5 (RS, Color A) | Row 40 | Row 4 (WS, Color B) | Row 63 | Row 3 (WS, Color A) |
| Row 18 | Row 6 (RS, Color B) | Row 41 | Row 5 (RS, Color A) | Row 64 | Row 4 (WS, Color B) |
| Row 19 | Row 3 (WS, Color A) | Row 42 | Row 6 (RS, Color B) | Row 65 | Row 5 (RS, Color A) |
| Row 20 | Row 4 (WS, Color B) | Row 43 | Row 3 (WS, Color A) | Row 66 | Row 6 (RS, Color B) |
| Row 21 | Row 5 (RS, Color A) | Row 44 | Row 4 (WS, Color B) | Row 67 | Row 3 (WS, Color A) |
| Row 22 | Row 6 (RS, Color B) | Row 45 | Row 5 (RS, Color A) | Row 68 | Row 4 (WS, Color B) |
| Row 23 | Row 3 (WS, Color A) | Row 46 | Row 6 (RS, Color B) | Row 69 | Row 5 (RS, Color A) |
| Row 24 | Row 4 (WS, Color B) | Row 47 | Row 3 (WS, Color A) | Row 70 | Row 6 (RS, Color B) |
| Row 25 | Row 5 (RS, Color A) | Row 48 | Row 4 (WS, Color B) | Row 71 | Row 3 (WS, Color A) |
| Row 26 | Row 6 (RS, Color B) | Row 49 | Row 5 (RS, Color A) | Row 72 | Row 4 (WS, Color B) |
| Row 27 | Row 3 (WS, Color A) | Row 50 | Row 6 (RS, Color B) | Row 73 | Row 5 (RS, Color A) |
| Row 28 | Row 4 (WS, Color B) | Row 51 | Row 3 (WS, Color A) | Row 74 | Row 6 (RS, Color B) |
| Row 29 | Row 5 (RS, Color A) | Row 52 | Row 4 (WS, Color B) |
BORDER
With right side of blanket facing, join Color B yarn with chain 1 in first stitch of last row.
Border Round 1 (RS) – 1 hdc in same stitch as join and in each stitch across to end of row. At the end of this side, chain 2 and rotate to work down the side of the blanket.
Down the side of the blanket, place 3 hdc around the side of the first dc (* See note below). [Sk Color B sc, place 3 hdc around Color A dc (and Color B chain 2, when one is behind the dc)]. Repeat inside brackets until end of side. Then, chain 2 and rotate to work along the bottom of the blanket.
*Note: “Around the side of the dc” means to insert your hook under the double crochet. Treat this as if it were a ch 2 spc. See end of block stitch photo tutorial for visuals.
Place 1 hdc in the bottom of each st (Don’t forget the ch 3 at start of Row 1). At the end of this side, chain 2 and rotate to work up the side of the blanket.
Up the side, place 3 hdc around the side of the first dc. [Sk Color B sc, place 3 hdc around Color A dc (and Color B chain 2, when one is behind the dc)]. Repeat inside brackets until end of side. Then, chain 2 and sl st to first hdc made in border to close. (454 sts , 4 ch 2 spcs)
Border Round 2 (WS) – Ch 1 (does not count as a stitch here or throughout), turn. [(1 sc, ch 2, 1 sc) in ch 2 spc. 1 sc in 3LO each st to next ch 2 spc]. Repeat inside brackets 4x. Sl st to first sc made to close. (462 sts, 4 ch 2 spcs)
Border Round 3 (RS) – Ch 1, turn. [1 hdc each st across to ch 2 spc, (1 hdc, ch 2, 1 hdc) in ch 2 spc]. Repeat inside brackets 4x. 1 hdc in last st. Sl st to first hdc made to close. (470 sts, 4 ch 2 spcs)
Border Round 4 (WS) – Ch 1, turn. 1 sc in 3LO each of the first 2 sts. (1 sc, ch 2, 1 sc) in ch 2 spc. [1 sc in 3LO each st to next ch 2 spc, (1 sc, ch 2, 1 sc) in ch 2 spc]. Repeat inside brackets 3x. 1 sc in 3LO of each remaining st to end. Sl st to first sc made to close. (478 sts, 4 ch 2 spcs)
Border Round 5 (RS) – Ch 1, turn. [1 sc in each st to next ch 2 spc, 3 sc in ch 2 spc]. Repeat inside brackets 4x. Sl st to first sc made to close. (490 sts)
Cut yarn, weave ends. You’re done!
I hope you love this block stitch baby blanket as much as I do!
I love how this stitch pattern brings some personality to standard double crochet baby blankets. It is always so much fun to mix things up.
One of my greatest joys is seeing your finished crochet projects from my patterns or tutorials, so when you post to Instagram, don’t forget to tag me so I can show you some love! I’m @theloopholefoxcrochet. You can also share pictures on my recent posts on Facebook or within my Facebook group!
And don’t forget to pin this to your Pinterest boards, so you can remember it for later!
Don’t forget to join my Facebook Group so we can chat all about your creations! We are a group for crocheters of all experiences, all interests and love to hang out together. Come join the fun!
Shannon | Designer & Editor
Shannon helps crocheters find their next project and build their skills with in depth tutorials and crochet patterns on her blog, theloopholefox.com.
With more than a decade of crochet experience, Shannon knows that understanding why we do something matters just as much as how we do it. She teaches new techniques and crochet stitches in depth so you can crochet with confidence.
Find More Free Crochet Baby Blanket Patterns:
Avery Baby Blanket
Piper Baby Blanket
Fledgling Baby Afghan
Something New Baby Blanket
Rising Star Baby Blanket
Sage Baby Blanket


