Avoid Pain with Simple Stretches and Routines
When it comes to crochet, we love to think about future projects, purchasing more yarn and the excited feeling of finishing a piece (or starting one!). We don’t want to think about pain while crocheting. So, let’s take care of our most important tool first: Ourselves.
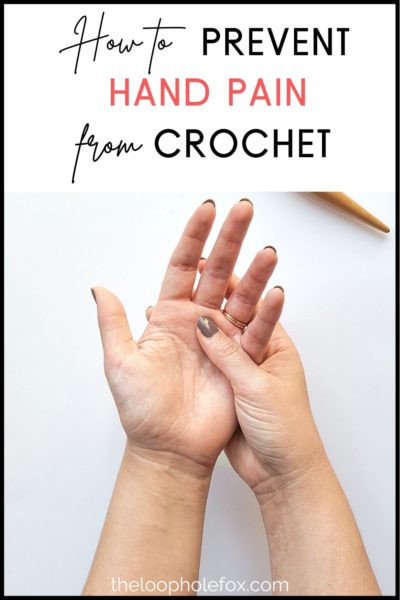
The most common area of pain for crocheters is in the hands and wrists, but we also struggle from pain and tension in our forearms, shoulders and necks, too. I’ve found stretching to be the best pain reliever for myself and many other artists (not just crocheters!) swear by it, too.
In this article, I’ll cover the stretches I do on a regular basis, my two main culprits of hand pain and other things that help me avoid pain while crocheting like massages and other tools I use.
DISCLAIMER: I am not a medical doctor. None of the information I provide in this post should override anything your doctor has told you. I am writing this as someone who has little-to-no physical concerns and therefore can do the items listed. You should always talk to your doctor if you are feeling a legitimate pain that lasts beyond the act of crocheting and it’s cool down time. You should speak to your doctor if you have any concerns about what stretches you personally should do. All stretches included in this article are stretches I use myself. When possible, I’ve included a source (so you know I’m not telling you to do something crazy!) for the information so that you can do further research, if you like. I’ve done my best to source information from proper medical sources or articles that are reviewed by doctors or hosted by a medical institute. When I can’t find a source, I will acknowledge that.
Crochet has a lot of benefits like improving memory, improving mood, helping with anxiety, building community, possibly postponing the onset of dementia, relaxation and a ton of other benefits (source). However, it also has repetitive motion and can cause repetitive use strain and pain. To make sure we are taking care of our most important tool first, we should practice some crochet self care. Balance is key, after all!
So, How Do You Stop Pain While Crocheting?
There are a few things you can do to help limit pain while crocheting in the hands, wrist or neck/shoulders. In my experience, nothing completely takes out all of it. If you spend hours and hours in a day crocheting, your hands, wrists, neck and shoulders are still going to get a little sore. That’s just a fact of life. Here’s what I do to minimize it as much as possible.
There’s a lot of information in this article, so grab yourself a drink and get cozy! I’ve also included this table of contents, so you can skip around the article if you’d like to.
1 | Stretches
Stretching is more than just rolling out of bed, shoving your bedhead hair out of your eyes and reaching your arms for the sky (doesn’t that feel great, though?).
Stretching is important to keep your muscles and joints flexible and healthy. I won’t go too far into the weeds here because, you know, I’m not a medical doctor but I did “learn to run” a couple of years ago and learned first hand that stretching is important or you probably won’t walk properly for a few days. That’s because when you decide to run 2 miles on a treadmill without stretching first, your muscles are cold, inflexible and don’t extend properly. From experience… Ouch.
Stretching helps to lengthen muscles and tendons to keep them healthy and flexible. Repetitive tasks (like crocheting) can shorten the muscles and make them feel tight and painful.
Athletes must stretch to warm up their muscles, keep the muscles and tendons flexible and avoid repetitive use injuries. Aren’t we athletes in our own way? Crochet Athletes!
So let’s take care of our muscles and tendons with some basic stretches (most of which we can do sitting down, yay! No running required).
All stretches should be done GENTLY. This isn’t a gym and we aren’t out here yelling “NO PAIN NO GAIN!” If it hurts, stop. You should feel a stretch but it shouldn’t hurt.
1A | Stretches for Hands
Here are my most used stretches to help keep my hands and fingers free from pain as much as possible. These stretches would be great for more than just crocheters or knitters. They’re also great for people who spend a lot of time typing, using pens (or paintbrushes), etc. My husband works solely on a computer and uses these a lot, too!
Stretch 1: Shake It
Okay, this one doesn’t sound like a stretch but it technically helps. According to my AP Art Teacher in high school and Healthline, shaking your hands keeps the nerves and muscles in your hands from becoming tight and cramped.
Healthline suggests to shake your hands as if you’ve just washed them and don’t have a paper towel to dry them. My AP Art Teacher suggested to “Shake your hands like you just don’t care”. How you prefer to refer to it yourself is up to you, but it does have it’s benefits! I use the shake “stretch” often through out the day. It also helps get the blood flowing when your arm or hand “falls asleep” (that tingling feeling) so that feeling subsides quicker.
Stretch 2: Finger Tip Touch
The finger tip touch is pretty simple. You’ll want to hold your hand out with your wrist straight and your fingers straight against each other (like you’re making a stop sign with your hand). Then bring one finger to the tip of your thumb to create an “O” shape with the finger and thumb. Repeat with your other fingers. You’ll want to make sure to hold each “stretch” for 30-60 seconds. So when you touch your index finger and your thumb to each other, hold it for at least 30 seconds so your muscles can benefit from the range of motion. Doing it quickly won’t give you the benefits of the stretch. You’ll do this on both hands.
According to WebMD, this helps increase your thumbs range of motion. I find this especially beneficial since my thumbs take a lot of the grunt work of crochet – like holding my hook and holding the project. My thumbs are two of the fingers that stay the most stationary while I crochet, so it’s important to give them a little love and move them around a bit.
Stretch 3: The Claw
The claw is another simple stretch you can do to help alleviate crochet hand pain in the long run. To do the claw stretch, you’ll want to hold out your hand with your palm facing you and bend your fingers (thumb included!) in toward the palm until your finger tips touch the bottom of your fingers. This makes your hand look sort of like a “claw”. Hold this for 15-30 seconds.
Colorado Center of Orthopedic Excellence (CCOE) confirms that this helps increase the range of motion in your fingers, which we need as crocheters.
Stretch 4: Thumb Stretch
To do the thumb stretch, keep your hand in a relaxed position with your fingers and thumb straight out (like a stop sign). Then, gently bend your thumb across your palm so that the tip of your thumb touches the bottom of your pinky. If you can’t touch the bottom of your pinky, don’t push it. Just stretch as far as you can for now. The more you do this stretch over time, the further your thumb should be able to stretch. Hold for 15-30 seconds and then release back to the starting position. You’ll want to repeat this several times on both hands.
According to CCOE, the thumb joints are susceptible to repetitive use injury. This stretch helps to alleviate hand pain because it strengthens the four muscles that help control the thumb and the thumb joints.
Stretch 5: Fist to Fan
This one is pretty simple. You’ll want to make a fist (with your thumb wrapping around the outside of your fingers). This fist should not be a clenched fist, but should be gentle and not forced. Hold that fist position for 30-60 seconds. Then, once you’ve held the stretch, let go of the fist and spread your fingers wide like a fan.
This stretch helps me to relieve the tension built up in my hands from holding them in the same position for a length of time. Holding the crochet hook especially gets my hand feeling a little bit like an actual claw, so using this stretch helps me to alleviate that tension.
According to WebMD, this stretch not only relieves pain but it also strengthens your fingers and hands, and helps with range of motion.
Stretch 6: Finger Stretch
I desperately want to call this one the “Spock” stretch and if you’ve ever watched Star Trek, you’ll know why.
Start with your hand in a “stop sign” position, with all of your fingers straight together. You can relax your thumb a bit. Separate your fingers so that your pinky and ring finger are together and your middle and index finger are together. You’re creating a “V” with your four fingers, two fingers on either side. Hold the stretch, release and repeat.
According to Medical News Today, this stretch helps with hand strength and mobility. I can really feel this stretch in my palm, which is one of my biggest points of pain.
1B | Wrists
Wrist stretches are just as important as finger/hand stretches. These stretches will help strengthen your wrists and forearms and relieve pain.
Stretch 1: Wrist Extensor
Before I explain this stretch, I want to reiterate how important it is to make sure you don’t feel pain while stretching. These should be gentle and you should feel a stretch, but you should NOT feel pain.
To use the wrist extensor stretch, you’ll want to hold one hand at chest level with your elbow bent and your fingers facing away from you. (So, don’t worry about locking your elbow or putting your arm straight out). With your other hand, gently hold the thumb side of your hand and bend your wrist downward.
If you want to increase the stretch, you can gently bend your wrist in the direction of your little finger. If you want to increase the stretch even more, you can hold your arm out straight and repeat the steps.
Harvard Medical says this stretch (and the next stretch) are particularly helpful for wrist and forearm pain, which is common when you’re gripping something for long periods of time.
Stretch 2: Wrist Flexor
Similar (but opposite) to the wrist extensor, the wrist flexor stretches the wrist and forearm on the other side. Hold one hand at chest level with your palm facing away and elbow bent. Grasp the fingers of the bend hand with your other hand and gently pull the fingers back toward you. You can increase the stretch by holding your arm out straight and repeating.
Harvard Medical is also the source for this one.
Stretch 3: Prayer Stretch
There are two version of the prayer stretch, so I’ll list them both. Both of these stretches help to strengthen and elongate our muscles, just like all the other stretches.
SITTING: To do the prayer stretch while sitting, sit with a straight back at a table. Place your palms together and your elbows on the table in a “prayer” position. Making sure your palms stay together, slowly lower the side of your hands (pinky side) toward the table until you feel the stretch. Hold the stretch for a few seconds before relaxing and repeating.
STANDING: To do the prayer stretch while standing, start with your hands in prayer position close to your chest and under your chin. Slowly lower your hands toward your waist. Your palms should stay together and your elbows should slowly move outward. Lower your hands until you feel the stretch in your forearms. Hold for a few seconds and then relax and repeat.
Sitting from Medical News Today and standing from My Health Alberta.
Stretch 4: Wrist Roll
When I was a kiddo, I broke my arm and dislocated my shoulder all at once, which severely stunted my wrist and as a kid, I never did the physical therapy. Fun! I still live with that pain decades later. A physical therapist recommended I do wrist rolls to help keep my wrists mobile and release tension.
Make gentle fists (don’t clench!) and roll your fists in a circular motion a few times in both clockwise and counter clockwise directions. This is the stretch I would say I do the most out of any of these. It’s easy to set down your crochet hook and project and roll the wrists a few times. While rolling your wrists, you can feel each muscle in your forearm as it creates the movement. Cool!
A lot of different websites and “sources” have a lot to say on wrist rolls, but none of them felt legitimate enough for me to source them. Whenever possible, I’ve done my best to source websites that have medical reviews or come from health practices. I’m taking my physical therapists word for it. Check with your doctor if you are concerned before doing a wrist roll.
1C | Neck and Shoulders
Yep, our necks and shoulders take a good beating from our crocheting, too! It’s important to stretch out our neck and shoulders to keep away pain and injury. These stretches help to relieve tension and pain in the neck and shoulders.
Stretch 1: Shoulder Rolls
I’ll take you back to high school gym class with these! To do a shoulder roll, stand with your feet hip-width apart and allow your arms to hang comfortably at the sides of your body. Breathe in and lift your shoulders up toward your ears. Then, move your shoulders back and gently squeeze your shoulder blades together. Exhale and let your shoulders drop back to their natural position. Then, move your elbows forward (in front of your body) in a slow swoop motion, which stretches the back of your shoulders.
Do each of these deliberately and slowly. Relax, shake it out if necessary and repeat.
Medical News Today says this helps relieve the tension in the shoulders to help with shoulder pain.
Stretch 2: Cross Body Shoulder Stretch
You’ve probably done this stretch or seen someone else do this stretch before. To do the cross body shoulder stretch, you’ll want to stand with your feed hip-width apart and stretch one arm out straight in front of you. Bring the arm across the body so your hand points toward your other side. Hook your opposite arm at the elbow and bring it up to support the straight arm. Use the hooked arm to pull the straight arm closer across your body and hold for several seconds before repeating on the other side.
According to Medical News Today, this stretch helps to extend the back of the shoulder.
Stretch 3: Overhead Arm Stretch
To further stretch your neck (and your sides!), interlace your fingers at your waist, straighten your arms and then lift your arms up over your head. Keep your elbows straight and your arms close to your body/head. Press your arms toward your back gently and as far as you can. If you’d like to stretch your sides, you can slowly lean one way and then the other.
Canadian Centre for Occupational Health and Safety recommends this one for people who work at desks and computers, but this one can be used for us, too!
Stretch 4: Neck Relaxer
Release tension in your neck with this stretch meant to elongate and relax the muscles. Sitting upright (and straight) and keeping your chin up, slowly drop your head to one side as if you’re trying to touch your ear to your shoulder. Repeat on the other side. Then slowly drop your chin to your chest and turn your head to the left and then to the right.
This one also is sourced from Canadian Centre for Occupational Health and Safety.
2 | Hooks and Tension
DISCLAIMER: This post includes affiliate links. This means, should you decide to purchase a product via one of these links, I will receive a small commission at no extra cost to you. I only recommend products I use and love (Or products I know others love, have heavily researched, know have good ratings and plan to purchase myself). These small commissions help to support this blog and continue keeping most of my patterns free. You can read more on my Privacy Policy, if you prefer.
Two of the top culprits for our pain while crocheting, particularly in the hand, wrist and shoulder/neck are our hooks and tension. Holding something small in a tight grip is just asking for pain in the hands, wrists and forearms. Whether that’s the yarn or the hook, how tight we hold those items can cause the dreaded discomfort.
With your crochet hook being the most used tool you use as a crocheter, it’s important to determine whether or not your hook is hindering you. In my article about my favorite crochet tools, I talked a lot about how my dominant hand pain nearly vanished once I moved from the cheap and basic metal hooks to something more ergonomic.
If you’re looking for a crochet hook that doesn’t break the bank but still has some padding, I would recommend these.

You can purchase these hooks as a set on Amazon. Their rubber grip provides added comfort, as the hook handle is now bigger and you’re not pinching your fingers quite so tight. I have used these hooks myself, purchased them as a gift for my best friend who is learning to crochet and recommended them to many others. The set is affordable and comes with some other goodies, so that’s always a plus, too!
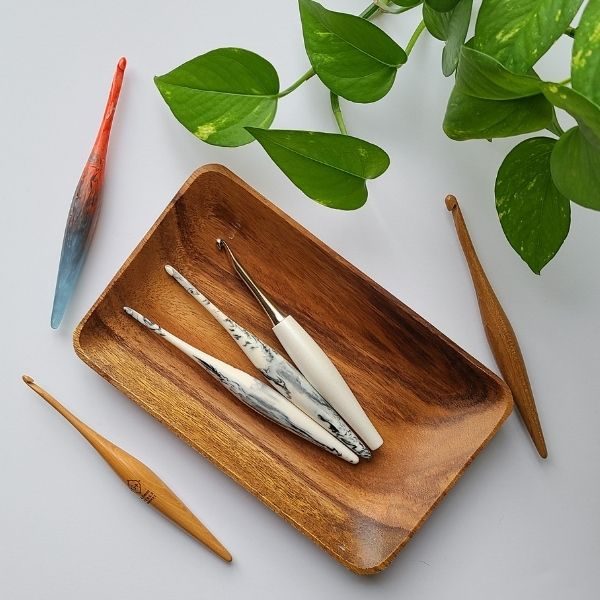
My favorite hooks, though, are the Furls Streamlines. I love love love these hooks. They’re light weight, have an inline hook and are ergonomic. They widen in the middle where you’d grip the hook, so your palm ends up doing most of the work for you. This wider set on the hook allows you to loosen your grip and helps to alleviate the hand pain that comes with using your dominant hand. You can read all about why I absolutely love them in my Furls Streamline review!
With these hooks, I find myself cradling the hook with my middle, ring and pinky finger instead of pinching the neck with my middle finger and thumb. This is especially helpful with smaller hook sizes, as the middle stays nice and wide.
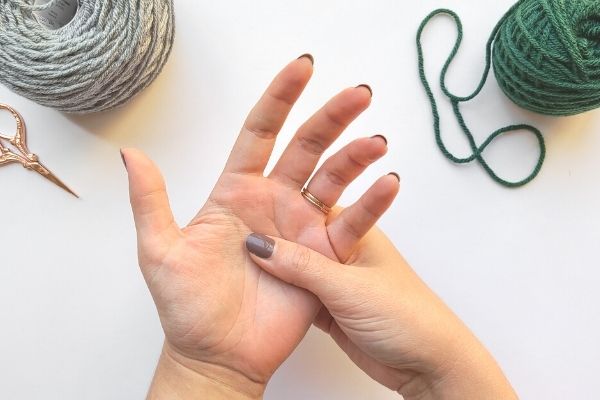
“Tension”
I included tension in this area because my biggest stressor with hand pain is actually the hand I hold my yarn with (left hand). I control my tension with my pinky, so that little finger is curled tight for the entirety of my crochet marathon. The pain I feel the most is in that pinky and in my palm.
I made a conscious effort to stretch my left hand and to try to hold the yarn a little more loose. I’m not perfect, but I’ll get there! If you’re struggling with pain in your non-dominant hand, I would recommend making a conscious effort to pay attention to how tightly you hold the yarn for your tension. Loosening up a bit could help you a lot when done in conjunction with the stretches laid out above.
3 | Massage
Let’s not forget about a self-massage (or even a professional one, if you’re into that!). Massages can help relieve pain while crocheting because they help to relieve tension, increase circulation and, like the stretches, help with flexibility and range of motion.
Firmly but gently massage your palms and fingers using a small circle motion using the thumb of your opposite hand. You can also massage your wrists and forearms in the same method.
I have been massaging my hands, wrists and forearms myself for years. Throughout my life I’ve always been someone who draws, paints, types and, of course, crochets. All of these hobbies take a toll on my hands, so I’ve massaged my hands frequently – probably at least three times a week for most of my life.
One thing I really dislike, though, is a “dry” massage. I prefer to have a nice lotion that helps my fingers glide and make for a better massage. Plus, when working with yarn all day our hands are likely to get dried out, so we have the added benefit of putting some moisture back into our hands.
My favorite lotion is this Aveeno Daily Moisturizing lotion.

The lotion absorbs quickly and doesn’t leave a sticky or greasy residue which is awesome, especially if I’m going to be crocheting soon after. It’s an unscented lotion, which is really really important to me as most perfume smells give me horrible migraines. It’s thick without being too thick, so you’re not having to wipe off on a paper towel or something afterward. It’s great for those of us who have sensitive skin (looking at myself here) that can’t stand most products without some sort of reaction.
I purchased this little three pack of the lotions so I can have a bottle regardless of where I am. There’s one in my purse, one on my side table in the living room and one on my desk, too! I have no excuse to not give myself a little hand massage, now.
4 | Other Things That Can Help
While I think stretching and making sure the main tools we use are comfortable helps the most in avoiding pain while crocheting, there are a few other things we can do or pick up that can help.
4A | Take Breaks
We can take breaks. I know, I know! I’m a marathon crocheter, too. I can sit for hours and crochet and be perfectly happy with that. However, taking somewhat frequent breaks, getting up, stretching and letting our hands relax for a few minutes can really do the body some good. I try to watch how long I’ve been crocheting for and ensure I get up, walk around and shake it out every once in a while.
4B | Strength and Endurance
We can research and complete exercises that help strengthen the muscles around our hands, wrists, arms and shoulders. I’m not saying go out and get a gym membership here. There are small, relatively easy exercises one can do that will help strengthen these muscles, which will go a long way in helping avoid hand pain as well as help our general health. These can be little things like squeezing stress balls or other exercises one can do without having to buy a new pair of running shoes or other gym expenses.

Personally, I squeeze these stress balls regularly. Not because I’m super stressed out but because my physical therapist recommended I do so to strengthen the muscles in the wrist and arm I broke some 20+ years ago (thank you, kiddo me!).
If you’re a new crocheter, you’re likely running into pain while crocheting a lot. This happens as your body gets used to being in new positions for prolonged amounts of time. As you continue learning to crochet, your endurance will grow and you’ll be able to crochet for longer periods of time. That’s not to say that you shouldn’t stretch, do self-massages or take breaks while you’re new. You absolutely should get into a routine of crochet self-care while you’re learning.
4C | Smart Investments in Our Selves and Our Craft
We can make smart investments in items that will help us with pain while crocheting in the long run. Again, I’m not saying to run out and buy a $1,000 La-Z-Boy. Would it be comfy and help? Maybe, probably, I don’t know – I’ve never had one. There are items that are in more attainable price ranges that can go far helping in the long run. I’ve already mentioned hooks, so I won’t bring them up again but I do urge you to look into whether or not your hook is helping or hurting you.
Here are some of the things either I’ve invested in for myself to relieve pain while crocheting, my husband has invested in (yep, he gets hand pain from working on a computer all day!) or that have come highly recommended.

Compression Gloves – Compression gloves are awesome. I’ve purchased these for myself and recommended them to others (not even other crocheters!). Of course, if you have pain relating to arthritis or carpal tunnel, you should verify with your doctor before using these on a regular basis. However, in most cases, I’ve found that wearing the compression gloves helps a lot.
Personally, I can’t crochet with them on but if I’m having a particularly bad hand pain day, I’ll wear them while I’m hanging out watching TV or doing something that doesn’t need my hands.

Heating Pad – I don’t know who I would be without my heating pad and I don’t want to know. Heating pads are great for sore muscles in the back and shoulder, but I use my heating pad for basically everything. A bit chilly at night and can’t get warm? Heating pad. Pain in my shoulders? Heating pad. You get the idea. They’re great to have around for all sorts of reasons and I use mine regularly to help with neck and shoulder pain.

Wrist Wraps or Brace – My husband swears by his wrist wrap. He works on his computer in the 3D industry and uses his keyboard and mouse a lot. He began suffering from wrist pain a few years ago and after speaking with his chiropractor, the chiropractor recommended a wrist wrap. We purchased one and he wears it pretty often. I wouldn’t say he wears it daily, but he’s learned to recognize when he has put too much strain on his wrist and wraps it up.
There are a few different types of wraps or braces you can pick up for your wrist. Personally, I prefer the wrap that doesn’t go over the palm or thumb but you can look into that option. I like that these wraps keep my wrists nice and straight and have been known to wear my husbands (when he’s not wearing them!).
Simple Routines Help Avoid Pain While Crocheting

Whew! I know this was a bit long winded, but it’s packed with a lot of information! Throughout this article, I’ve talked about simple exercises, tools and options you can include in your crocheting routine to help alleviate pain.
These are the things I do the most to help prevent pain while crocheting. Specifically hand pain! It can seem like a lot of steps or exercises to add to your daily crochet marathon but if you add them slowly and over time, you’ll create a habit out of it and be a healthier, happier crocheter!
What are some of the things you do to avoid hand pain while crocheting? I’d love to add to my routine!
I hope this article helps you and that you’ve found something new you can add to your crochet self-care to help you be a more comfortable crocheter. I again want to reiterate that I’m not a medical doctor, I’m a crocheter just like you that has the same pains you do. If you have any concerns about any stretch or tool, you should always ask your doctor. If your pain from crochet becomes more than a general discomfort and a lasting pain, I urge you to take care of yourself and to see your doctor for help.
Take care of yourself, you’re the best tool you have! 🙂
Don’t forget to join my Facebook Group so we can chat all about your creations! We are a group for crocheters of all experiences, all interests and love to hang out together. Come join the fun!

Shannon | Designer & Editor
Shannon helps crocheters find their next project and build their skills with in depth tutorials and crochet patterns on her blog, theloopholefox.com.
With more than a decade of crochet experience, Shannon knows that understanding why we do something matters just as much as how we do it. She teaches new techniques and crochet stitches in depth so you can crochet with confidence.
Other Articles and Resources You Might Like:
Crochet Tools that Changed My Life (and helped me avoid pain while crocheting!)
The Best Gifts for Crocheters
How to Substitute Yarn for Any Crochet Project